Use this task to add, update, or remove Domain Name Systems (DNS) servers.
-
Select .
The DNS window
displays.
-
Select Add DNS Server
and configure the settings.
Table 1. DNS Configuration Settings
| Field |
Description |
| Server Name |
Enter at least three alphanumeric characters. |
| IP Address |
Enter an IP address. |
| Service Connector |
Select a service connector from the drop-down
list. |
-
Select Add.
Next, you will see a
sequence of screen updates while Universal ZTNA works to bring the DNS server
up.
- A connectivity test
runs.
- If the test passes, a
confirmation message displays at the top of the window.
- Your server displays in
the server list.
- The Status
column displays Activating.
- The Status
changes to Up when the server is in service.
-
To update an existing DNS server, select
 and select Update from the drop-down list.
-
To remove an existing DNS server, select
and select Remove from the drop-down list.

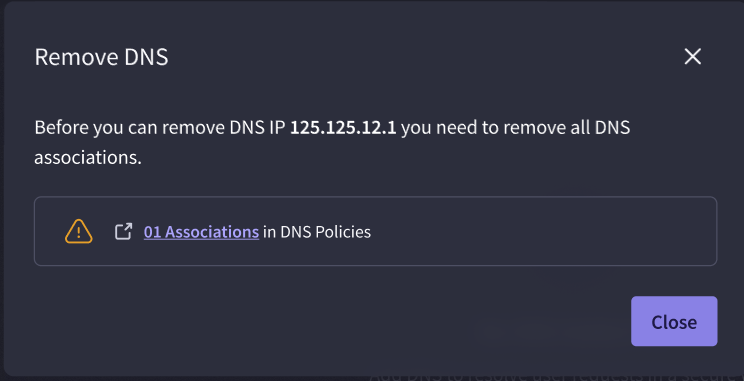
Note
Before removing a DNS server,
you must remove all associations.
Once you have onboarded your resources, go to Applications and Application Groups.