This procedure assumes that you are running a LAN cable through a
wall.
Note
You can also mount this AP to a wall and run a
LAN cable between the AP and bracket without creating a hole in the wall.
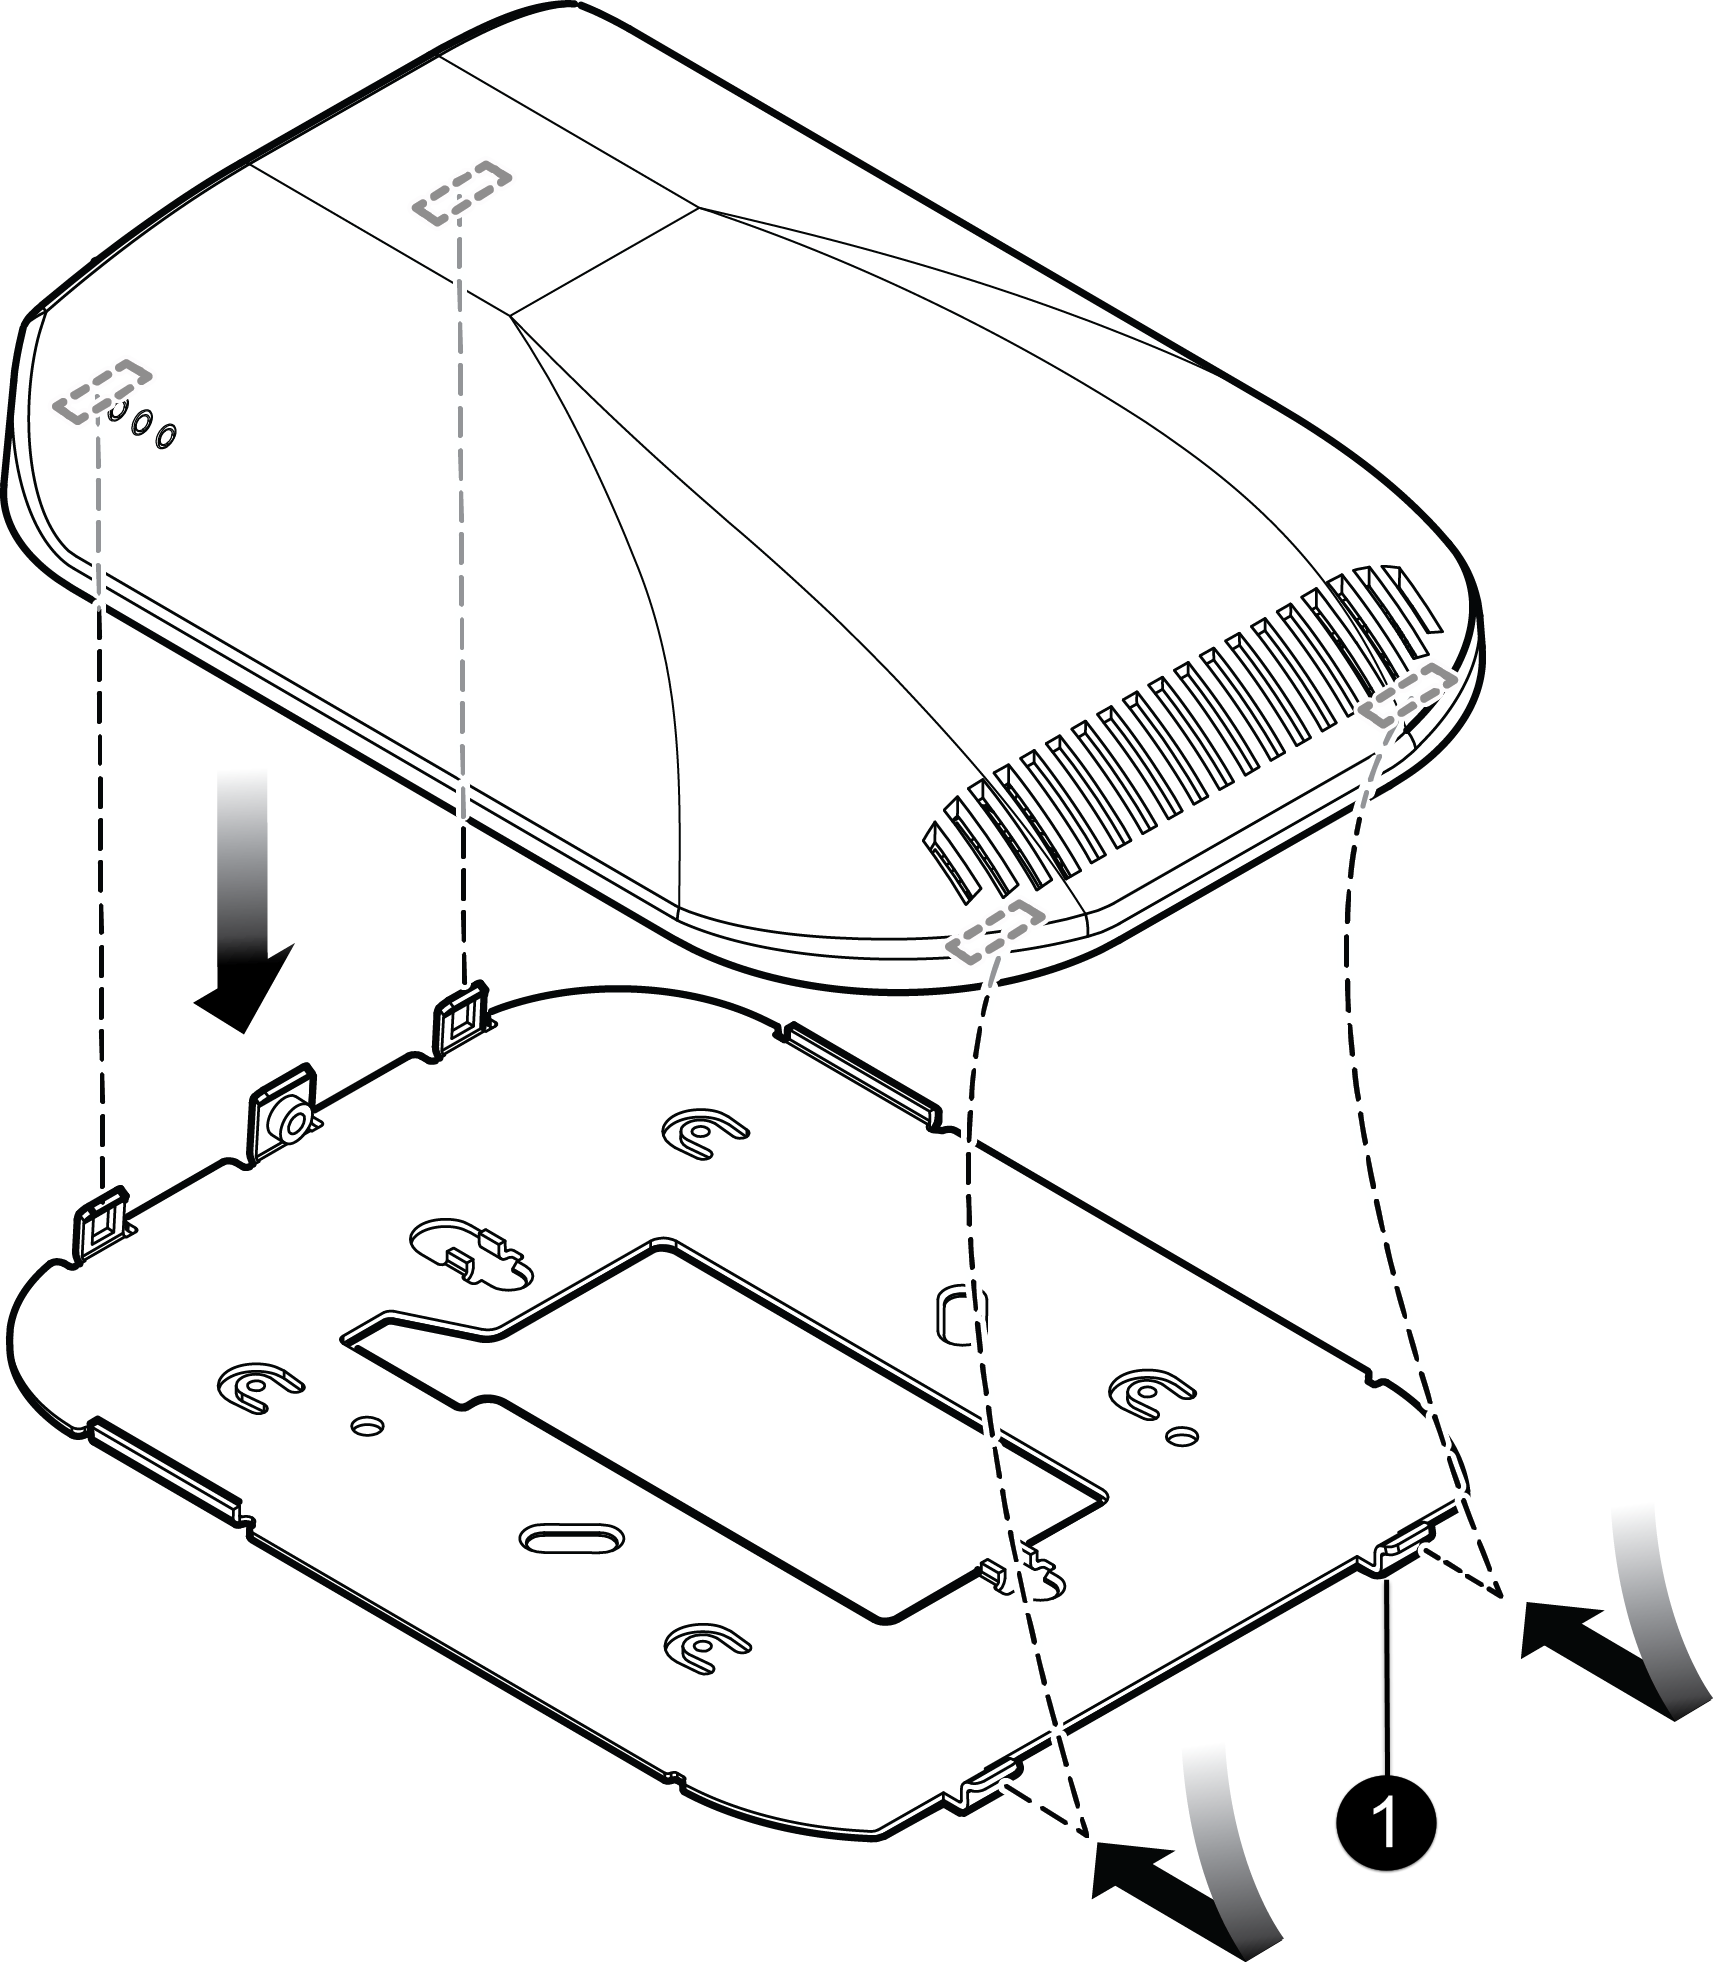
AP-7612 Mounting Bracket
Number
Description
1
AP mounting tabs
To mount the bracket to a wall:
Procedure
Using the mounting bracket as a guide, choose a
location where it is feasible to place the AP‘s center. The location must allow
the LAN cables to come out of the wall within the large rectangular hole. Place
the bracket against the wall. (The captive screw will be used to lock the AP in
place.) Decide which two holes to use to mount the bracket. We recommend using
the two holes at the top and the bottom center of the opening. At a minimum, use
two holes on opposite sides of the large center opening.
Mark the two hole centers.
For drywall/plasterboard walls, drill two holes
using a 1/4” or 6mm diameter drill bit.
For drywall/plasterboard walls, screw the plastic
anchors into the wall first and then insert the screws into the anchors.
Insert the bracket over the screw heads and slide the bracket. Ensure that both
screws get attached to the bracket.
Tighten the screws to secure the bracket in its
place. Torque the screw to 9.0 in-lbs.