Mounting the AP on a Dry Wood Wall or Solid Flat Ceiling; Option
1: Using the Mounting Bracket
Mounting the AP-7632i to a dry/wood wall or a solid flat ceiling
requires mounting bracket, two Philips pan-head screws, and screw-in anchors, which
is included in the box.

Warning
The AP must be
mounted ONLY horizontally when mounting onto a plenum space.
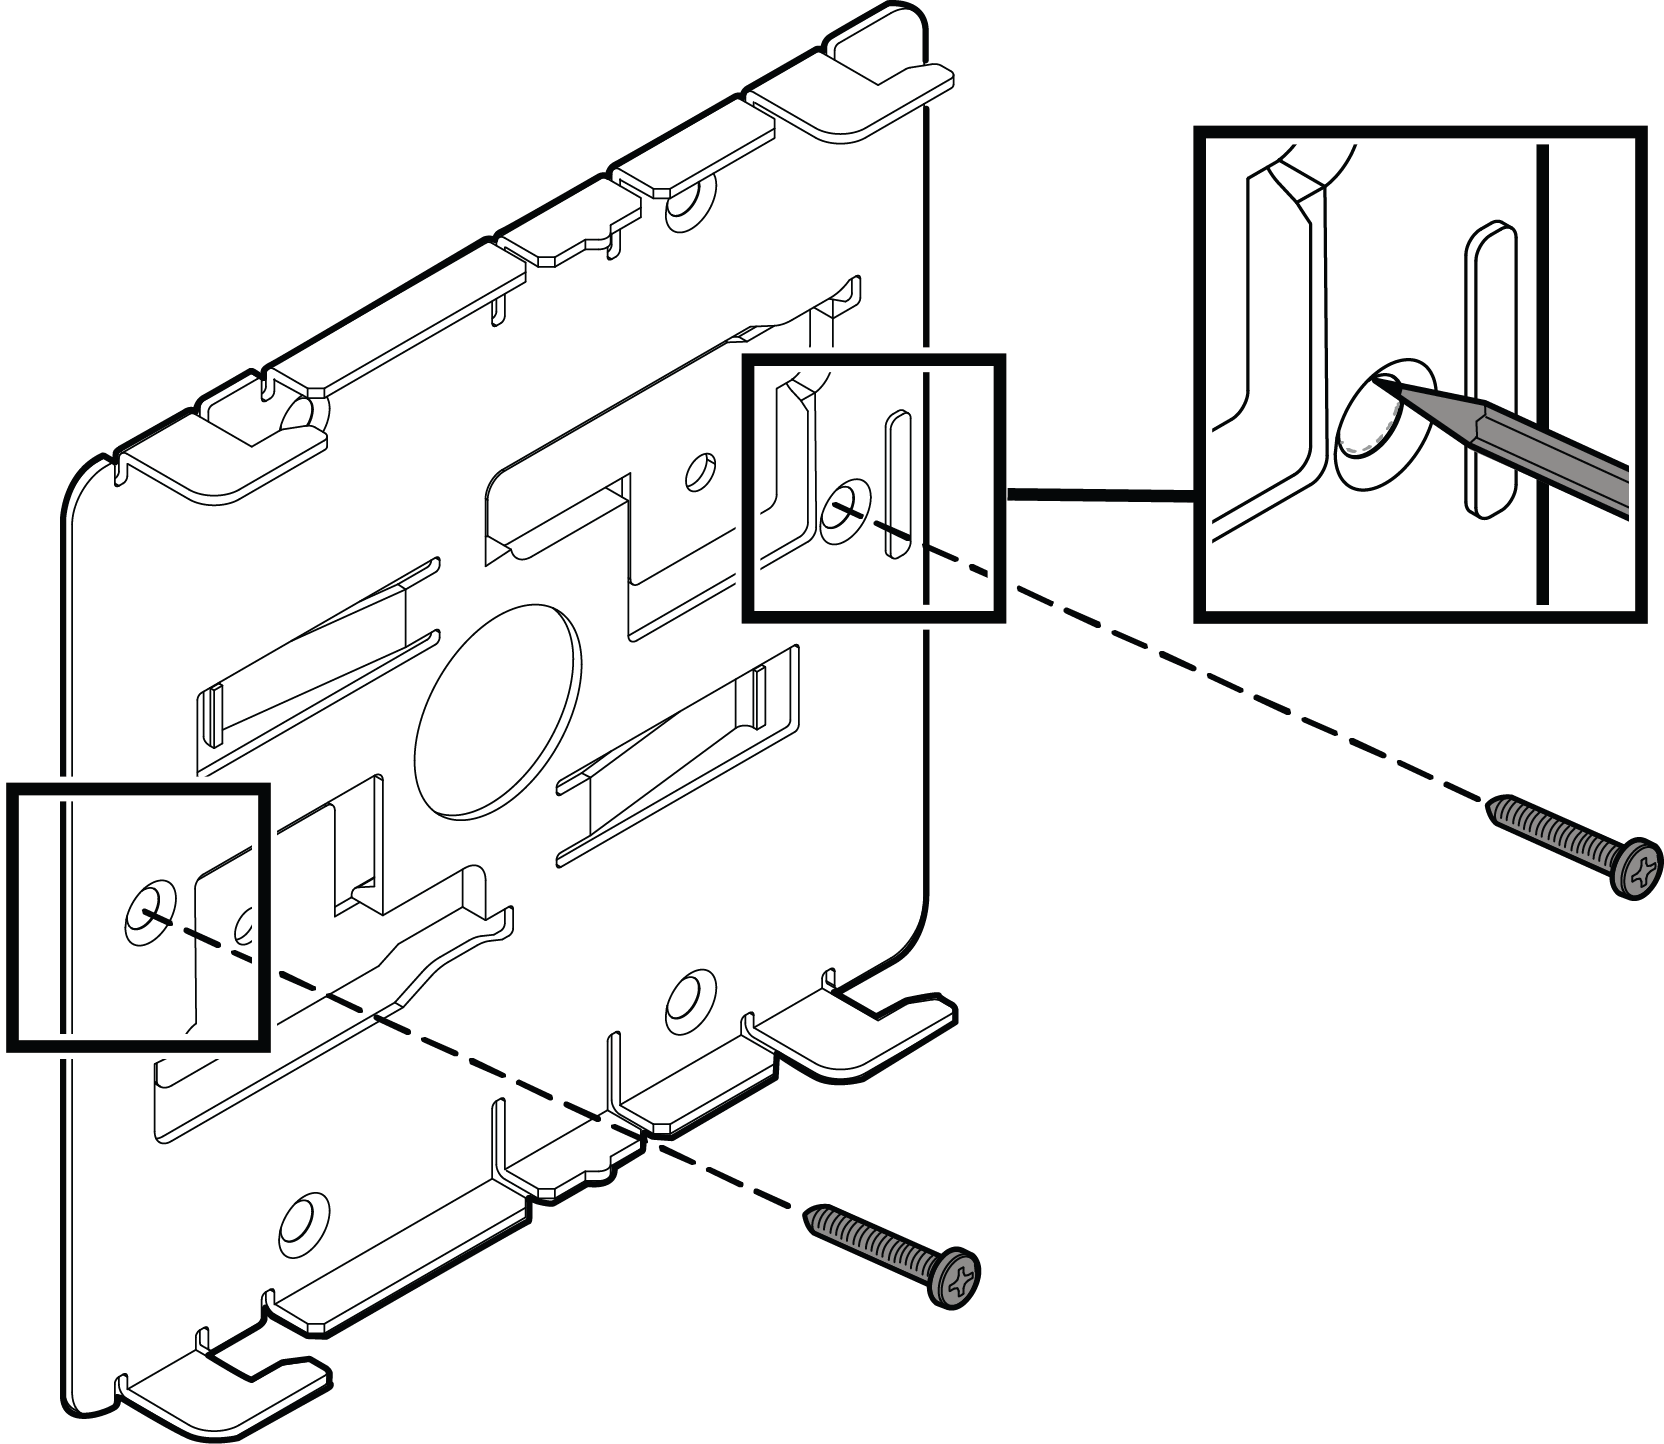
- Remove the mounting bracket attached to the back
of the AP.
- Using the mounting bracket as a template, mark the hole centers on the
wall.

Note
The four feet of the mounting bracket must be horizontal and pointing to
the right and the flat part of the bracket must betouching the surface it is
being attched to.
- Insert the screws into the holes of the mounting bracket. Use the screw-in
anchors if needed.
- Insert the Ethernet cable's RJ45 connector into the LAN1/GE1 port.
- Insert the AP onto the bracket's four feet and slide it to the left to lock it
in place.
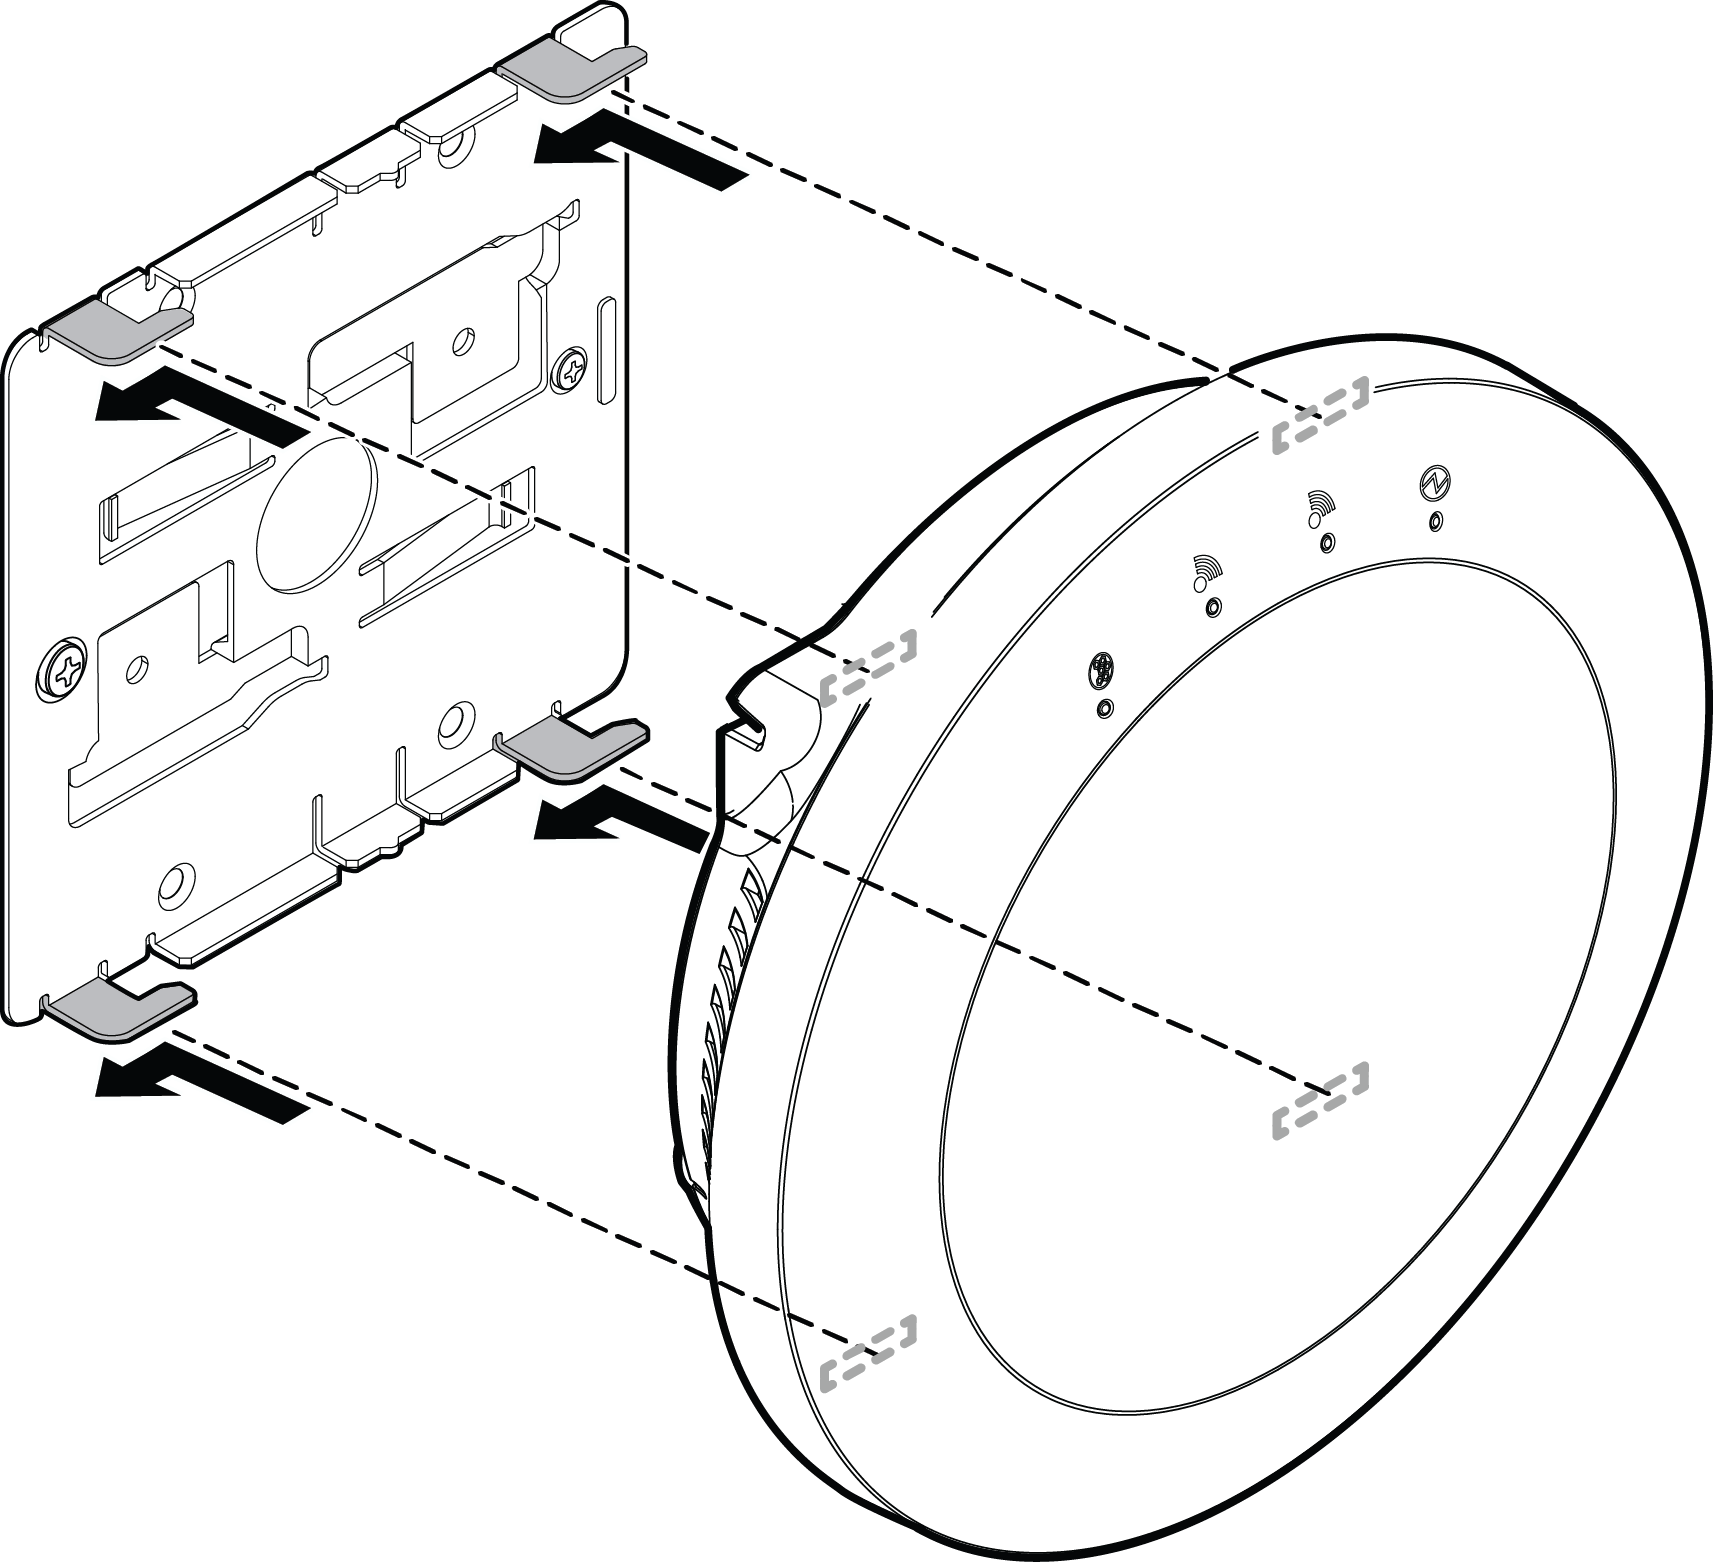
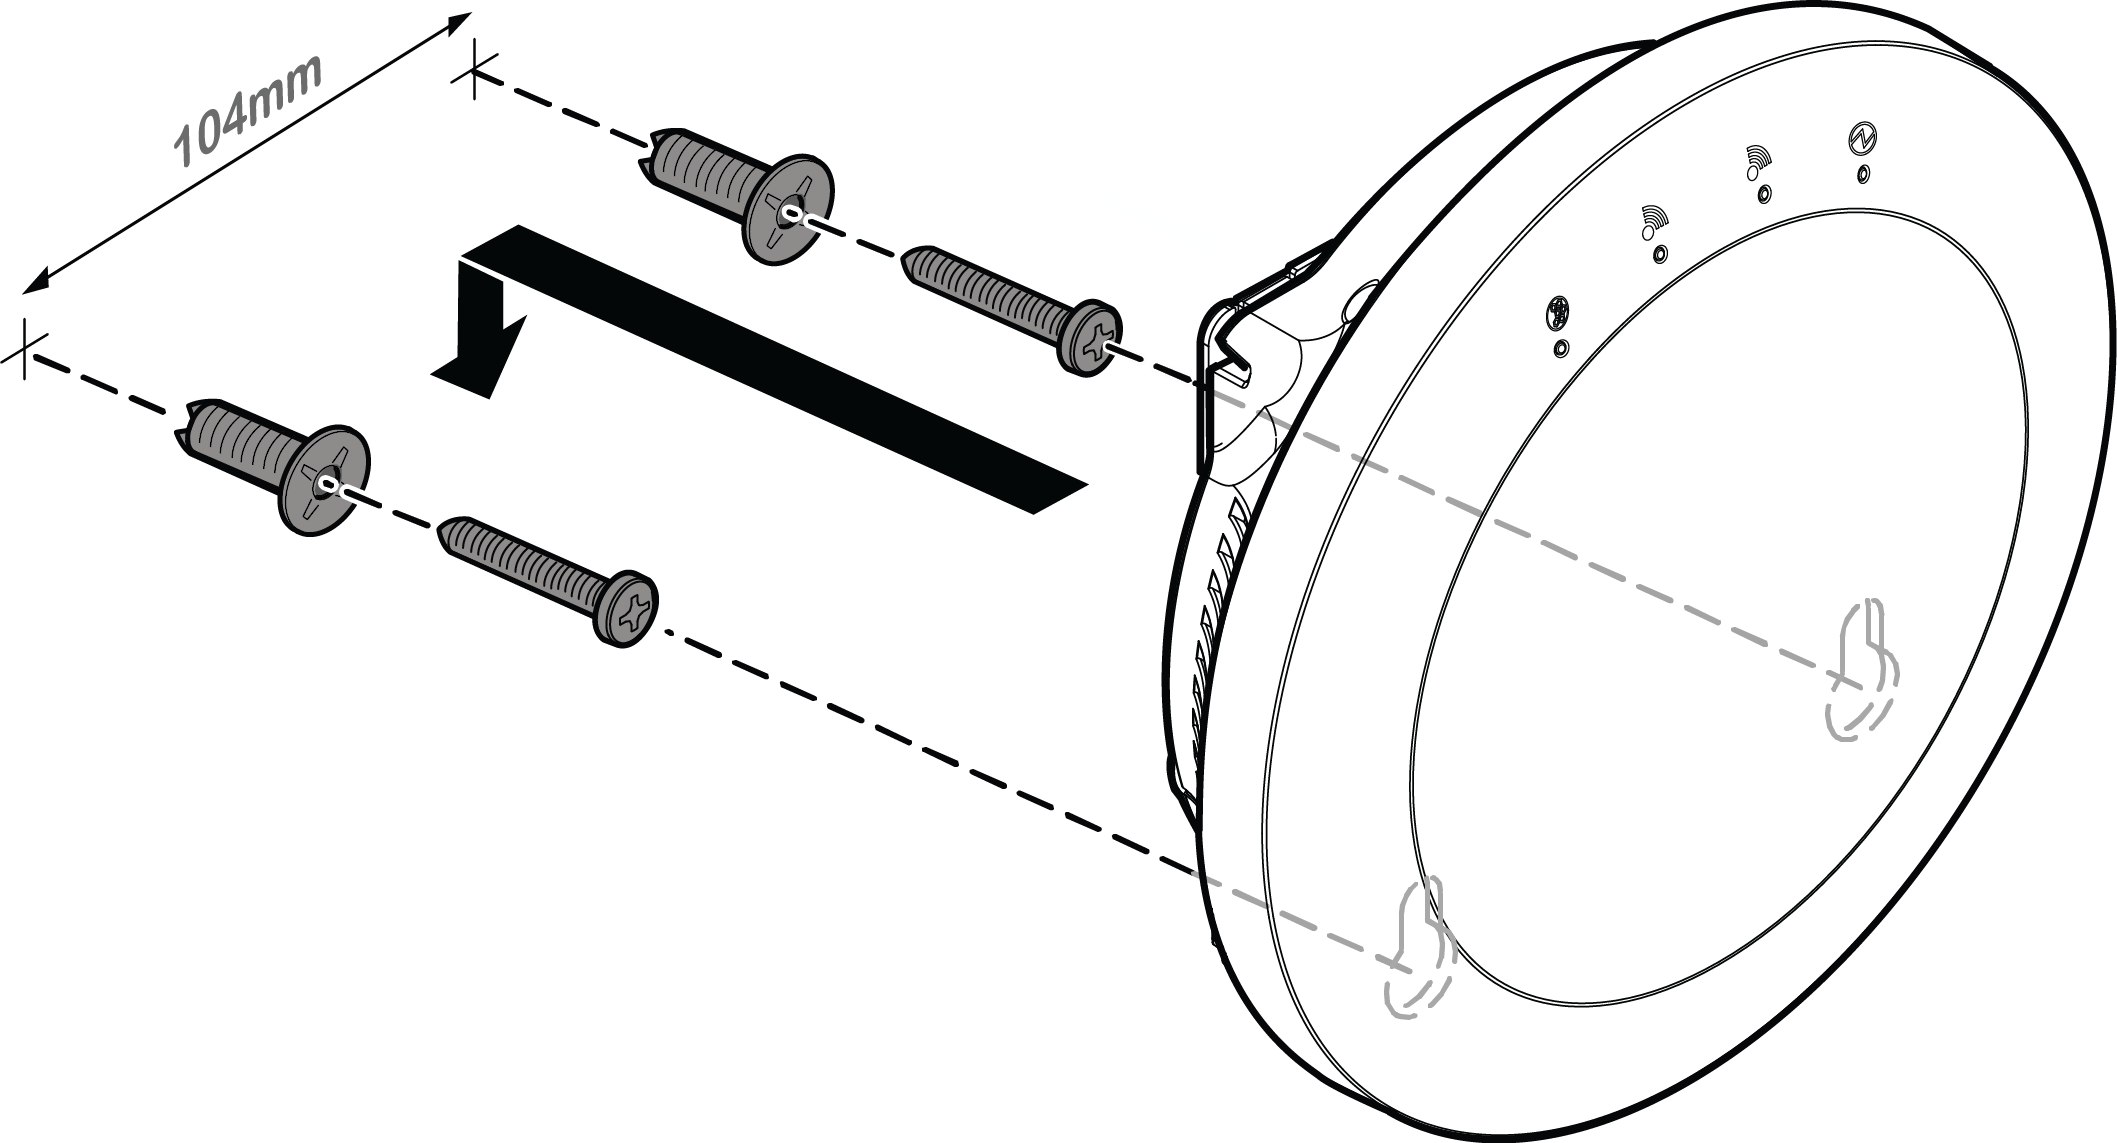
Option 2: Mounting the AP to the Wall using two screws
The AP-7632i can be mounted directly onto the wall without the mouting bracket
by using two screws.
- Remove the mounting bracket attached to the back of the AP.
- Drill two holes 104mm (4.100") apart from each other on the wall.
- Insert the screws into the holes. Use the screw-in anchors if needed.
Note
Leave 1/8" gap between the screw head and the wall.
- Insert the Ethernet cable‘s RJ45 connector into the GE1 port. Attach the
optional DC adaptor if there is no PoE on the Ethernet cable.
- Insert the keyholes of the AP onto the screws and slide it down till it is
firmly held by the screw heads. If the AP is loose, unmount the AP and
decrease the distance between the screw head and the wall. Remount the
AP.
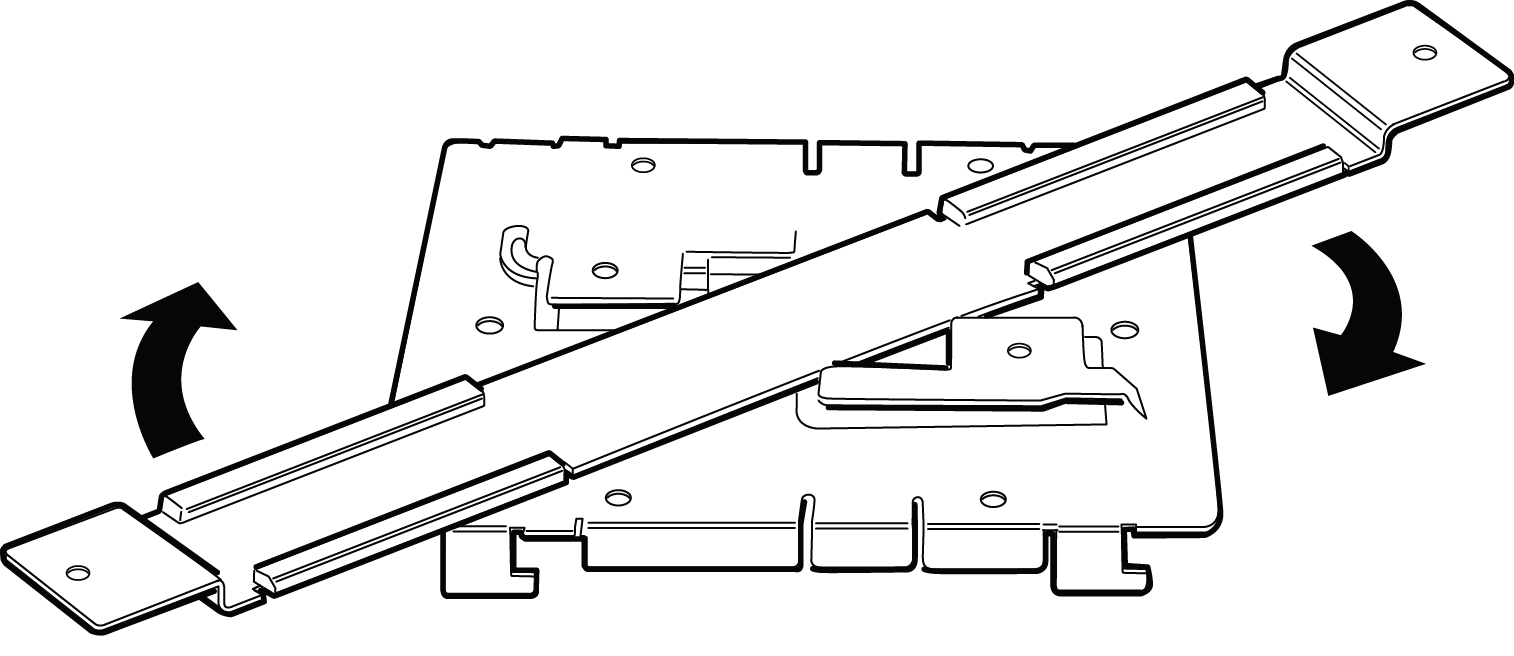
Option 3: Using the Optional Flat Metal Indoor Bracket
The AP-7632i can be installated to the wall or any
solid surface using an optional flat metal indoor bracket (ordering Part Number:
37210) for easy installation.
- Attach the flat metal indoor bracket to the main mounting bracket.
- Hold the AP to the surface to which it needs to be attached and use the
optional bracket‘s end holes as a template to mark the attachment
holes.
- Drill two holes on the wall where you want to mount the AP.
- Connect the LAN/Ethernet cable to the back of the AP.
- Hold the AP, insert and tighten the 2 screws until you lock it into
place.
Option 4: Using an Optional Wall and Box Bracket
The AP-7632i can also be mounted to a flat ceiling or wall using an optional
wall and box bracket. This requires the WS-MBI-WALL04 bracket (ordering part Number
30516) which needs to be purchased separately.
- Remove the mounting bracket from the back of the AP.
- Install the WS-MBI-WALL04 bracket on a
wall/ceiling with the two screws and screw-in anchors.
- Use the WS-MBI-WALL04 as a template and mark the
holes to be used to mount the AP. It is recommended to use the holes
marked "A" or "B".
- Drill the holes and attach the bracket using the
screws and screw-in anchors.
Note
When using the "A" or "B" holes, if the holes
are not near the corners of the bracket, you can break off the corner to
decrease the bracket's visibility once the AP is installed.
- Connect the LAN/Ethernet cable to the
AP.
- Insert the AP onto the keyhole posts and slide
the AP.
- Lock the AP into place at about 1/4
inch.
 Print
this page
Print
this page Email this topic
 Feedback
 View PDF
 Download EPUB