NX-7510/NX-7520/NX-7530 Series Slide Rail Kit Installation
Instructions
Follow this procedure to install the slide rail for an NX-7500
series platform:
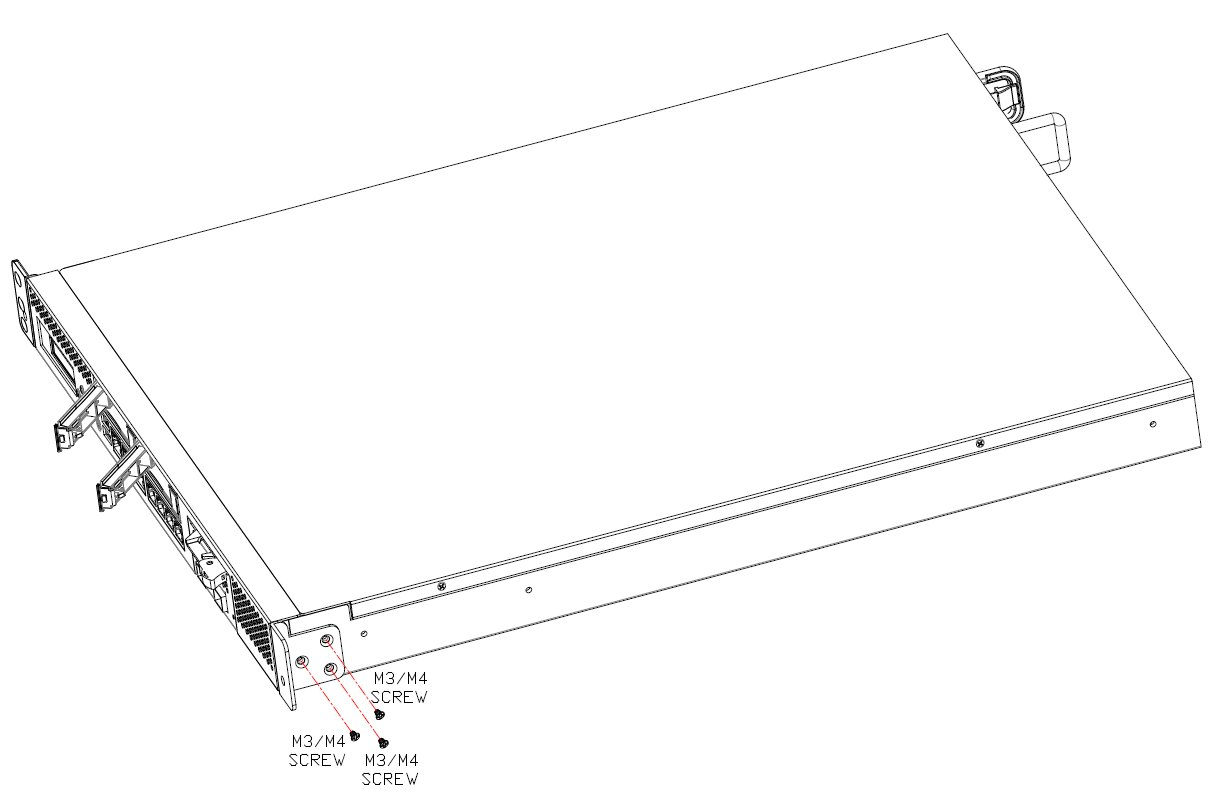
- Using a Phillips head screwdriver, remove the
mounting bracket screws from both sides of unit.

Note
Put the screws aside to be used when attaching the brackets for the slide
rail.
- Position the slide rail brackets so that the single hole at the front of the
bracket is closest to the bottom of the unit. Attach the slide rail brackets
using the mounting bracket screws removed.
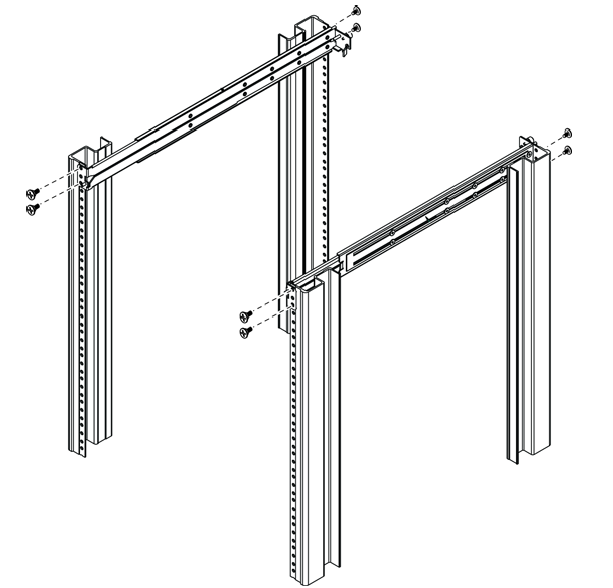
- Refer to the instructions included with the slide rail kit to separate each
slide rail into two pieces and secure the outer slide rails to the rack using
two screws on either end.
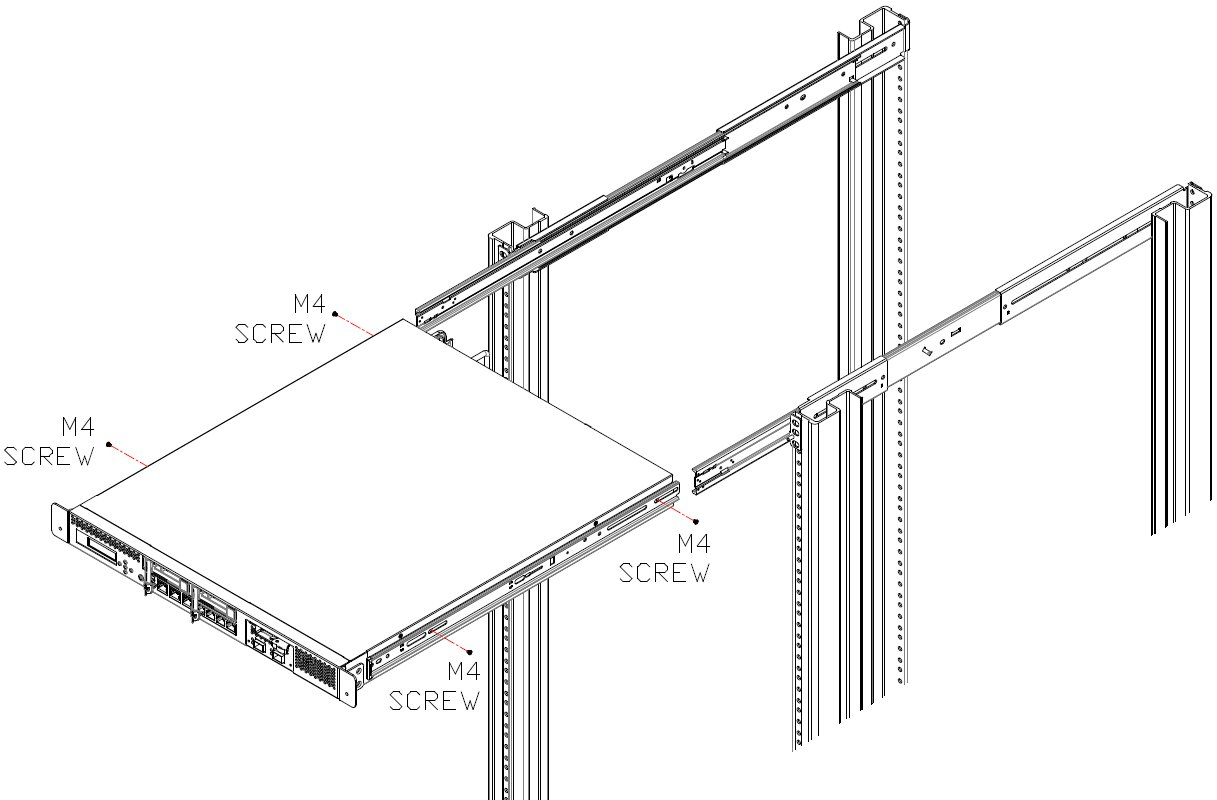
- Using the four M4 screws supplied with the kit, attach the inner slide rails to
the sides of the unit.
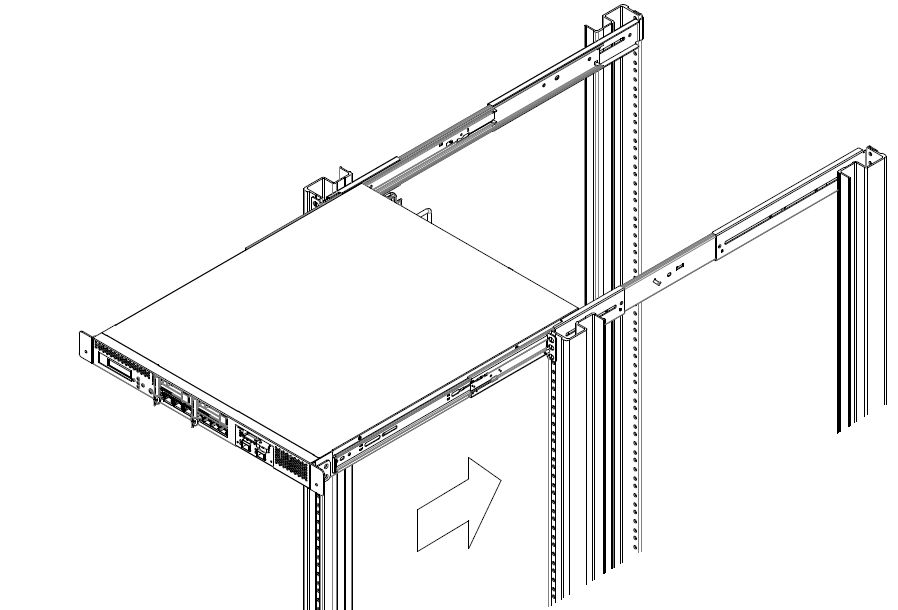
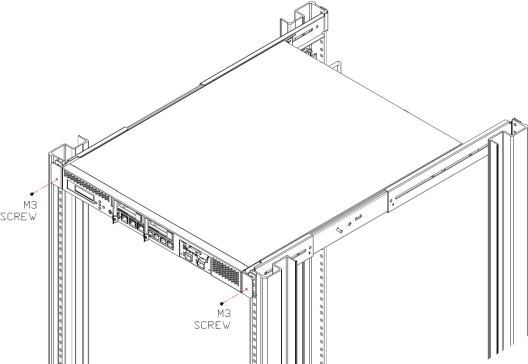
- Align the inner and outer slide rails and carefully insert the unit into the
rack.
- When the front of the unit is flush against the rack, securely attach the unit
using the two M3 screws supplied with the kit.
 Print
this page
Print
this page Email this topic
 Feedback
 View PDF
 Download EPUB