Mounting to a Dry/Wood Wall or Solid Flat Ceiling

Mounting the AP3915i to a dry/wood wall or a solid flat ceiling requires WS-MBI-WALL04 bracket, two Philips pan-head screws, and screw-in anchors, which must be purchased separately.
Warning

Warning

The AP must be mounted ONLY horizontally when mounting onto a plenum space.
Note

Note

The recommended method of installation is using the WS-MBI-WALL04 bracket and the Multi T-bar bracket.
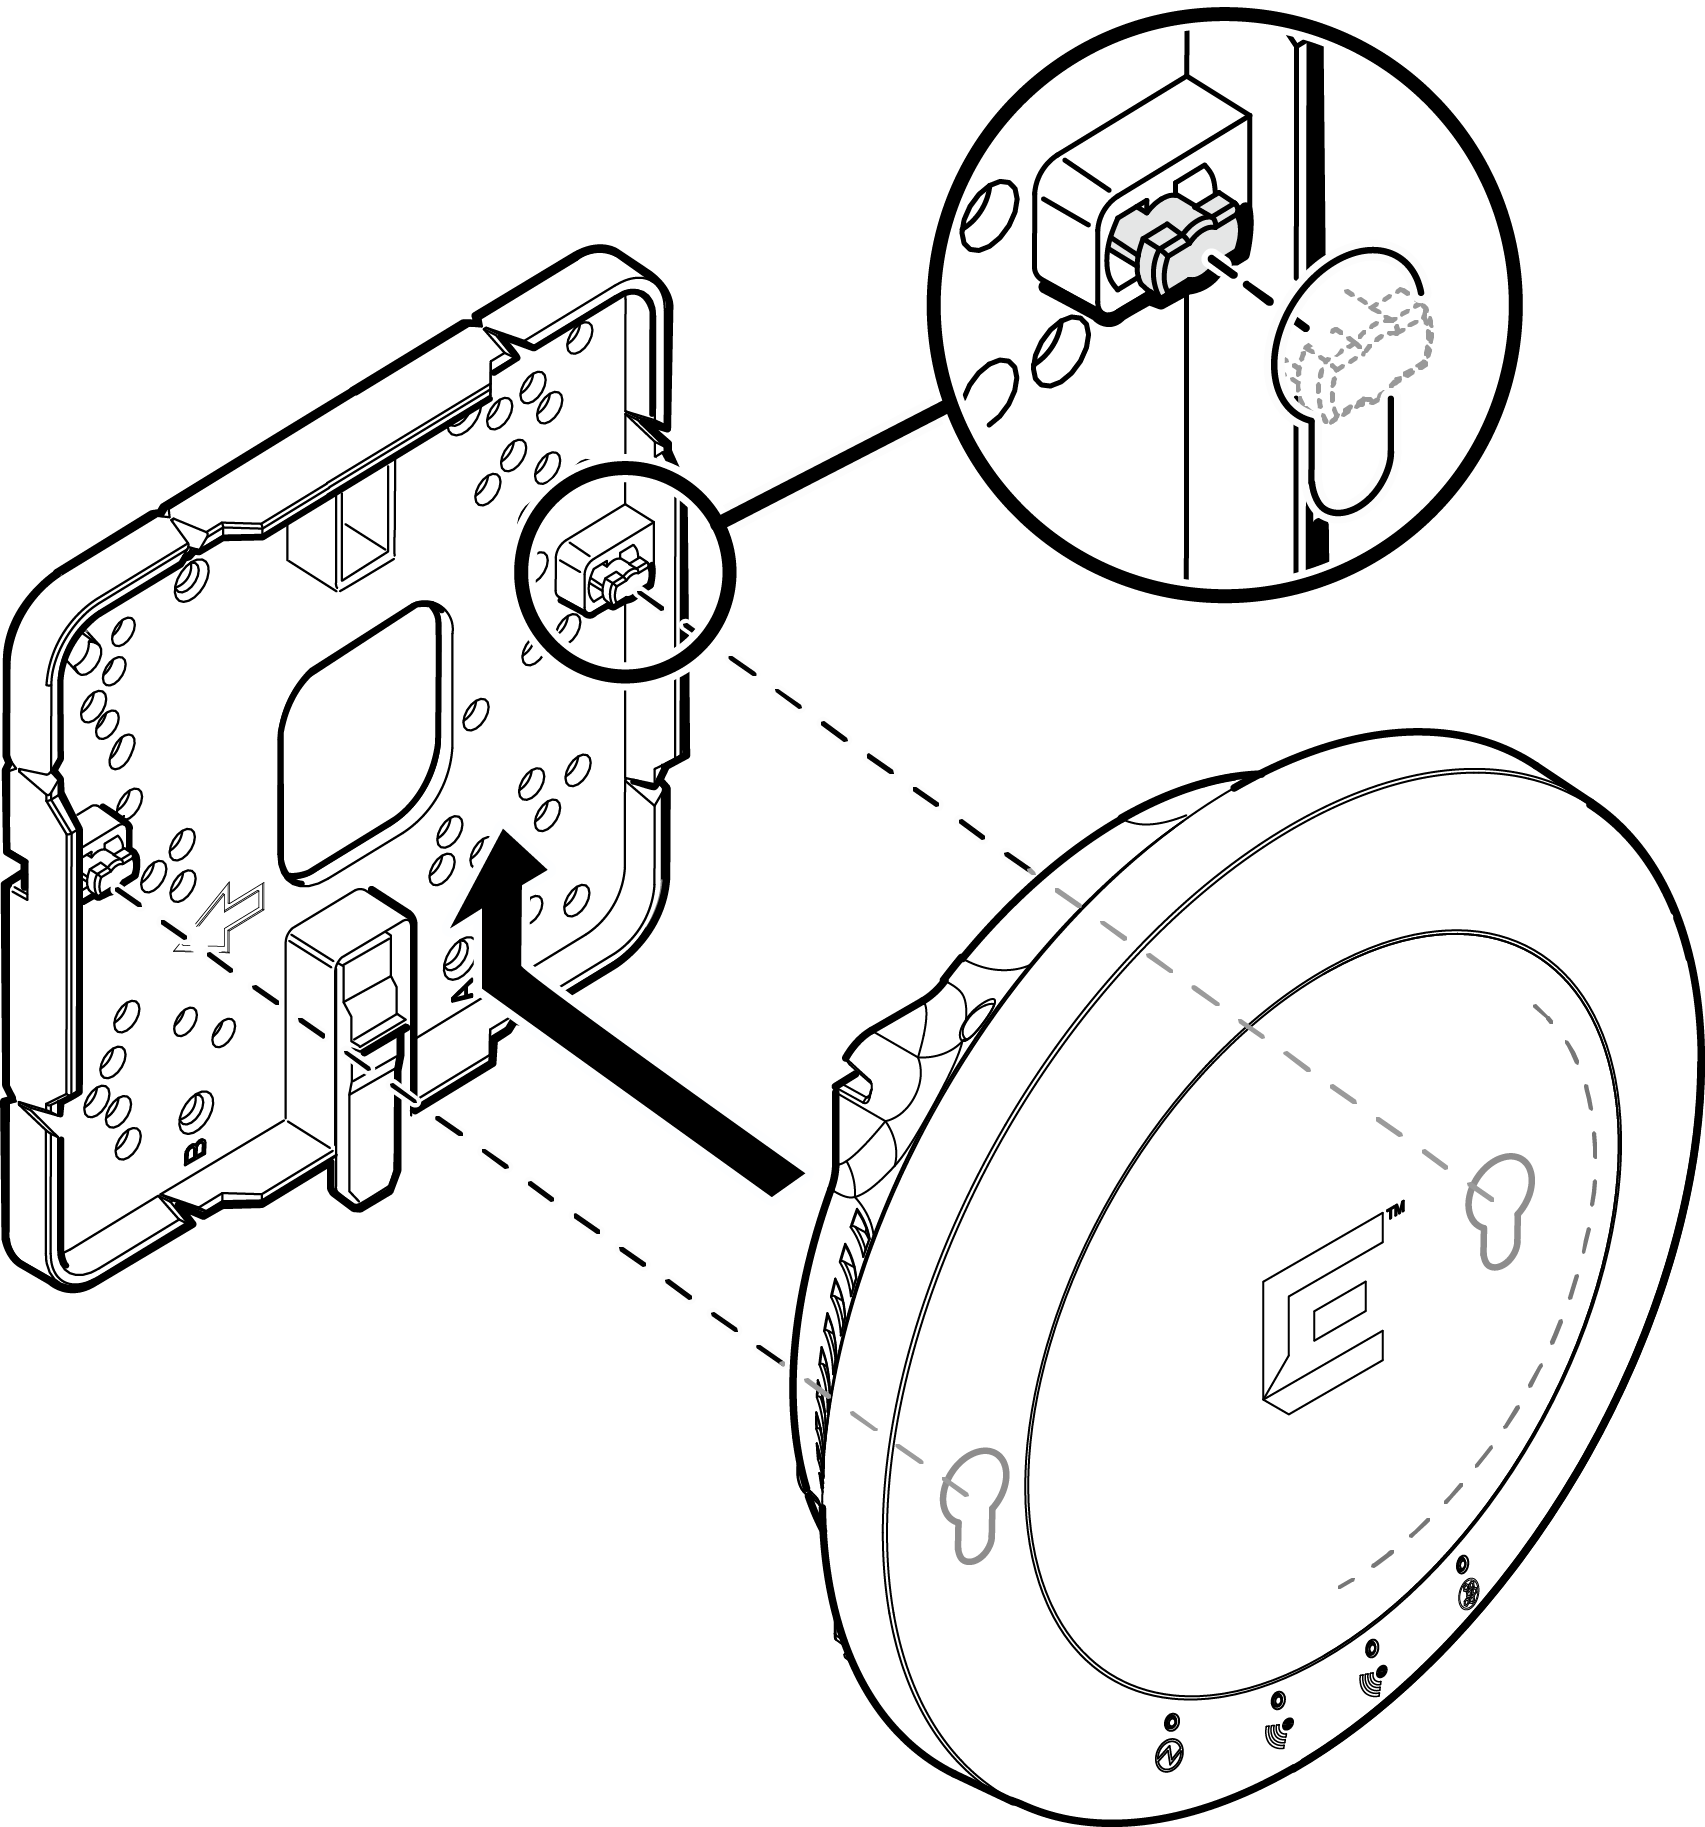
  1. Install the WS-MBI-WALL04 bracket on a wall/ceiling with the two screws and screw-in anchors. Ensure that the locking tab on the WS-MBI-WALL04 bracket is on the bottom side during installation.
    Click to expand in new window
    Mounting the AP using the WS-MBI-WALL04 Bracket
    _Graphics/AP3915i_ins_to_MBI-WALL04.png
    • Use the WS-MBI-WALL04 as a template and mark the holes to be used to mount the AP. It is recommended to use the holes marked "A" or "B".
    • Drill the holes and attach the bracket using the screws and screw-in anchors.
    Note

    Note

    When using the "A" or "B" holes, if the holes are not near the corners of the bracket, you can break off the corner to decrease the bracket's visibility once the AP is installed.
  2. Connect the LAN/Ethernet cable to the AP.
  3. Insert the AP onto the keyhole posts and slide the AP.
  4. Lock the AP into place at about 1/4 inch.

Optional Installation: Mounting to a wall using the Philips Pan-head screws

You can mount the AP3915i access point directly onto a dry/solid wall using the Philips Pan-Head screws. This is an optional installation method and not the preferred mode of installation.
Warning

Warning

Installing the AP using this method will result in the logo, LEDs, and E/N being positioned opposite to the desired installation orientation.
  1. Drill two holes 104 mm (4.100”) apart from each other on the wall where you want to mount the AP.
  2. Insert the screws into the holes and use the screw-in anchors if needed.
    Note

    Note

    Leave 1/8” gap between the screw head and the wall.
    Click to expand in new window
    Mounting the AP directly on a dry/wood wall and solid flat ceiling using the Philips Pan-Head screws
    _Graphics/AP3915i_ins_to_wall.png
  3. Insert the Ethernet cable‘s RJ45 connector into the LAN1/GE1 port.
  4. Align the AP against the screw heads and slide it down. Ensure that the AP is secured in place and tightened. If the AP is loose, unmount the AP and decrease the distance between the screw head and the wall. Remount the AP.
    Note

    Note

    When installing the AP, the LED icons must be on top and the “E” logo should be inverted and pointing down.