Configuring Option 43
-
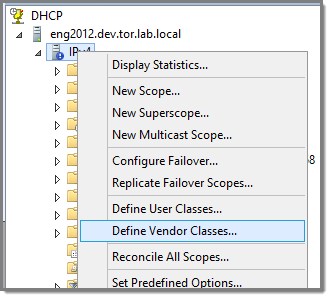
In the DHCP server utility, right-click the DHCP
server icon and choose Define
Vendor Classes.
You will create a new vendor class to
program the DHCP server to recognize the VCI
ExtremeWireless
<AP model name>.
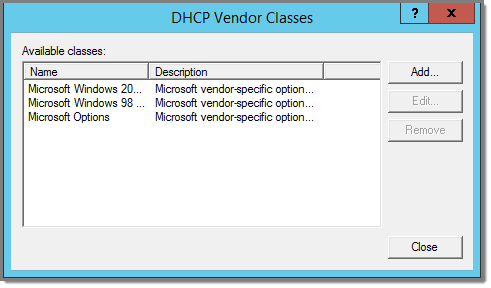
The
DHCP Vendor Classes window
displays.
-
Click Add to create the new
class.
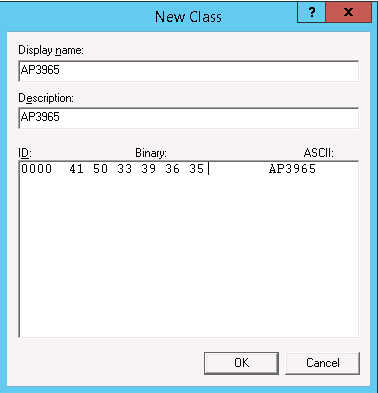
The
New Class window displays.
-
In the Display name field, enter a name. In this
example, AP3965 is used as the display name.
-
In the Description field, enter a short
description of the vendor class: AP3965.
-
Add the Vendor Class Identifier string. Click the
ASCII field, and enter the appropriate value (for example, AP3965).
-
Click OK.
The new class is created.
-
Click Close.
-
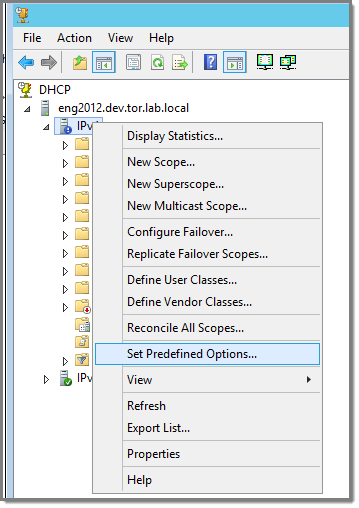
In the DHCP server, IPv4 utility, right-click the
server icon and select Set
Predefined Options to add an entry for the WLAN controller sub-option for the newly created vendor
class.
The sub-option code type and the data
format is used to deliver the vendor specific information to the APs.
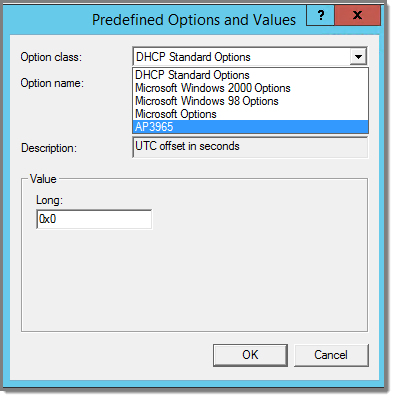
Predefined Options and Values
-
In the Option class field, select the value you
configured for the vendor class and click Add.
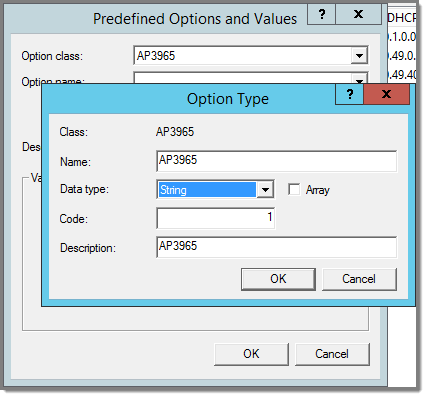
The
Option Type window
displays.
-
Enter a value in the Name field.
-
In the Data type field, select
String.
-
In the Code field, enter the sub-option value
1.
-
Enter a description in the Description field (Optional).
-
Click OK.
The new predefined option is
displayed in the Predefined Options and Values window.
-
Click OK.
You have created the vendor class and
sub-option type needed in order to support controller discovery.

 Print
this page
Print
this page Email this topic
 Feedback
 View PDF
 Download EPUB