Step by Step Procedure
Refer to "Use Case 3" diagram where CloudMesh information is displayed in green.
Activating CloudMesh
|
1
|
Connect Branch Office 1 appliance WAN1 router interface to CloudMesh by checking the option. |
|
2
|
Select the CloudMesh Edge which is closest to the appliance (Frankfurt). Note that Edge information is common to all the WAN interfaces of the appliances on the same Site, for which CloudMesh has been activated. |
Eligible interfaces are WAN Router interfaces on hybrid or full router appliances.
|
4
|
Connect Branch Office 2 appliance WAN2 router interface to CloudMesh by checking the option. |
|
5
|
Select the CloudMesh Edge which is closest to the appliance (London). |
|
7
|
From the SD-WAN Orchestrator main menu, select Network -> Advanced Configuration and open the CloudMesh pane. Check the Overlay IP network address range and the AS Number that are used by the system for cloudmeshing; you cannot edit nor reuse these parameters. |
Checking CloudMesh Connections
|
1
|
Verify whether the CloudMesh configuration is operational by checking that there are supervised connections in the CloudMesh Connections panel of the Supervision -> Overview dashboard. |
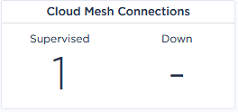
For each connected WAN router interface, one tunnel is created; refer to Use Case 3 diagram. If CloudMesh connections are displayed in the 'Down' column, check the alarms raised for the configured CloudMesh appliance in the Active Alarms and Event History dashboards.
|
3
|
On the Network -> Configuration window, click the  icon for the appropriate appliance. In the displayed window, select Tunnels -> IPsec to analyze the details of the created CloudMesh tunnels. icon for the appropriate appliance. In the displayed window, select Tunnels -> IPsec to analyze the details of the created CloudMesh tunnels. |