Attaching the Switch to a Two-Post
Rack
You can attach your switch to a two-post rack in either of two configurations:
The side of the switch has different sets of holes for attaching mounting brackets in
either configuration.
Brackets for a two-post mount are not included in the box with your switch. However,
they can be ordered separately using part number XN-2P-RMKIT-XA.
To attach your switch to a two-post rack, follow these steps:
-
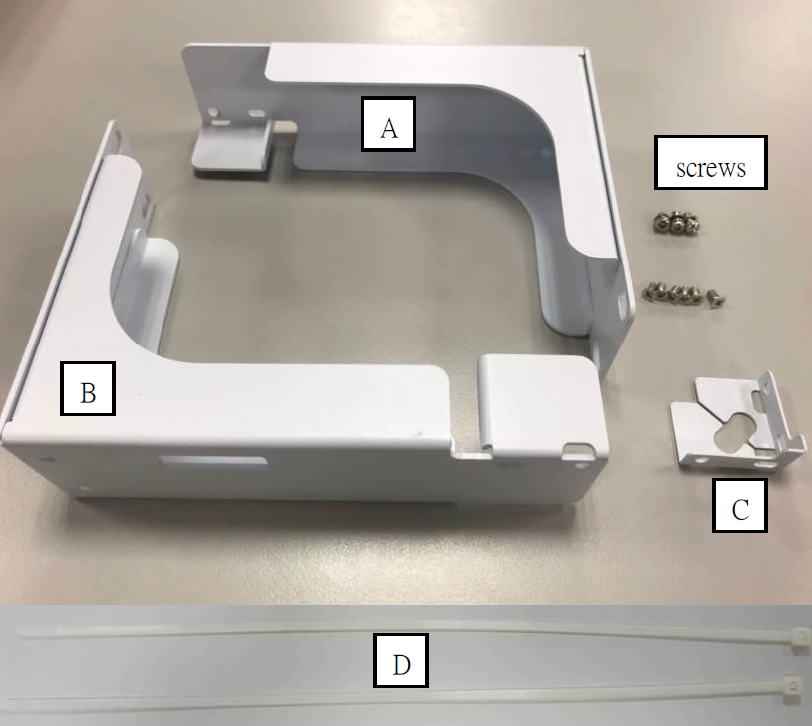
Remove all contents of the rack-mount kit.
Rack-Mount Kit
Components
-
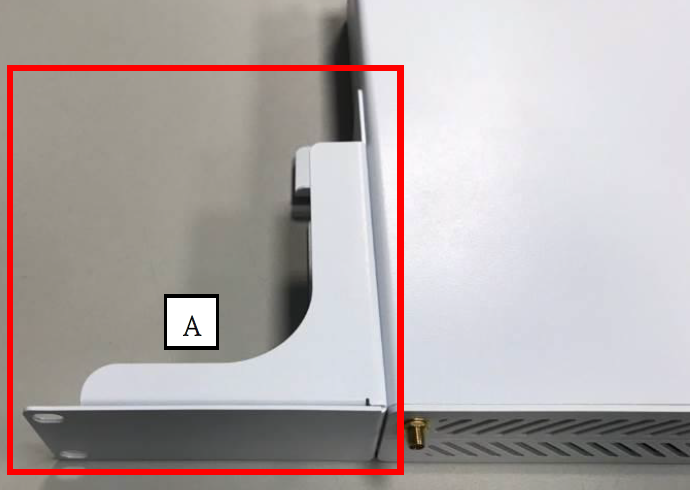
With the front of the XA1400
Series switch facing you, Align the A bracket to the left side of the switch.
-
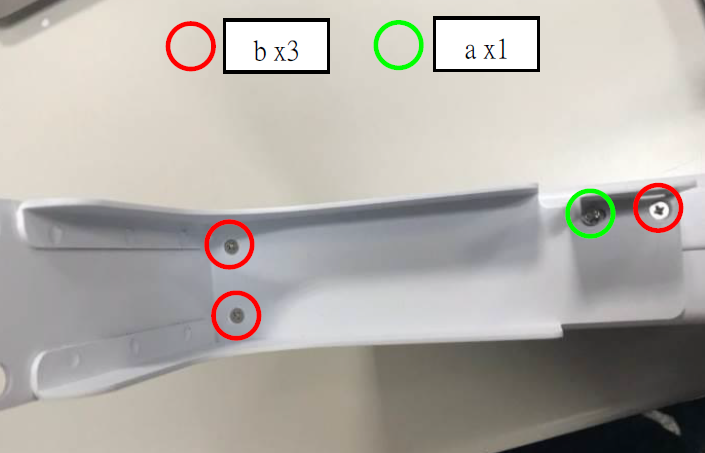
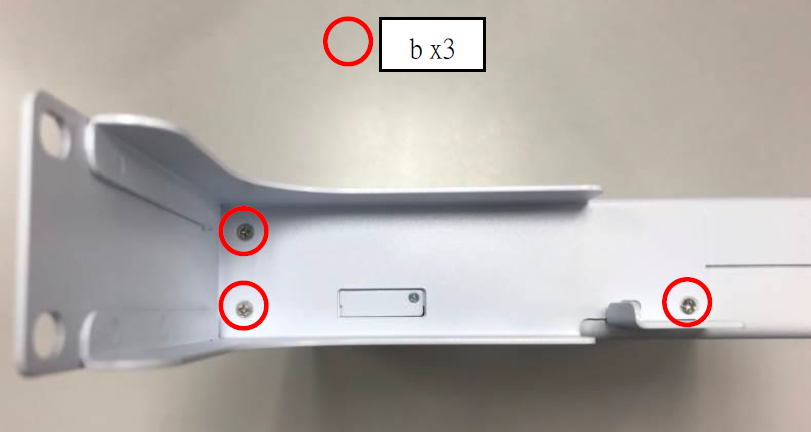
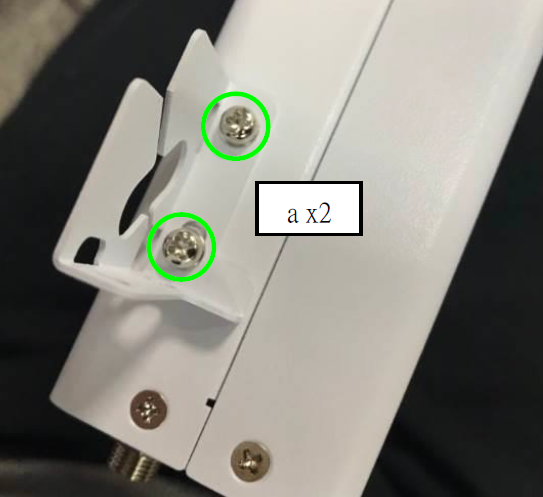
Secure the A bracket using the 3 (b) screws and 1 (a) screw.
-
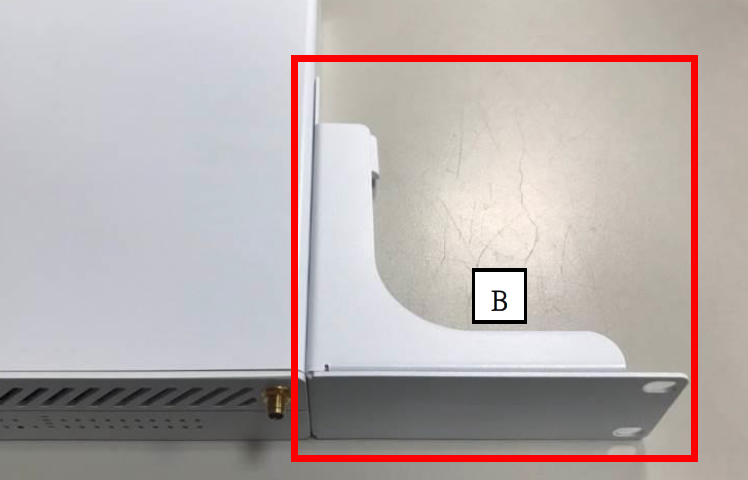
With the front of the XA1400
Series switch facing you, align the B bracket to the right side of the
switch.
-
Secure the B bracket using 3 (b) screws.
-
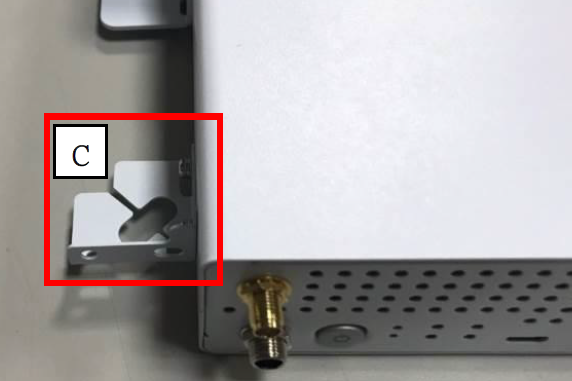
With the rear of the XA1400
Series switch facing you, align the C bracket to the left side of the
switch.
-
Secure the C bracket using 2 (a) screws.
-
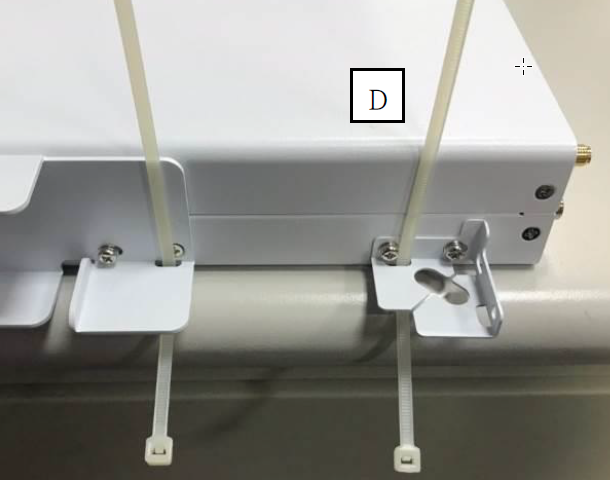
Insert the zip ties (D) into the
slots of the B and C brackets.
-
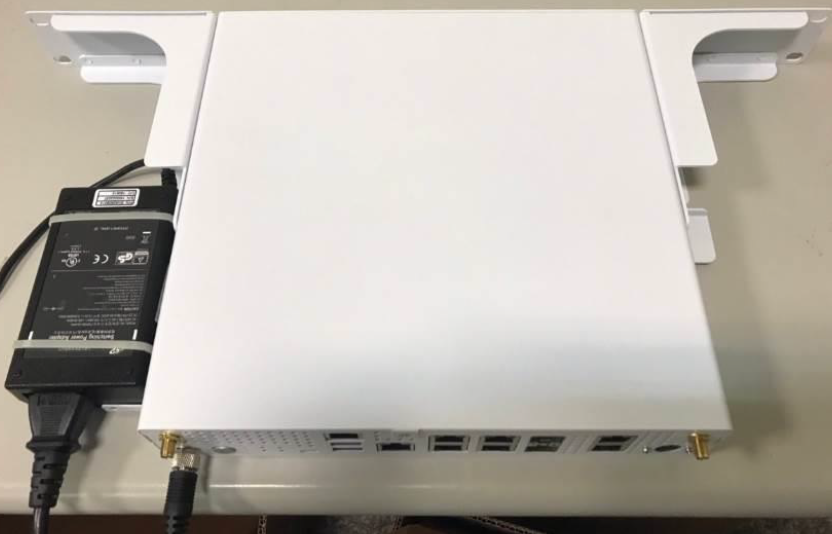
Secure the external power supply
and close the zip ties appropriately.
Secure External Power Supply
-
Final assembly should appear as follows:
Assembled MicroVSP in Two-Post Mount
The MicroVSP can now be installed in a standard 19" rack.

 Print
this page
Print
this page Email this topic
 Feedback
 View PDF
 Download EPUB