Mounting to a Suspended/Drop Ceiling
The AP-7632i can be mounted to a suspended/drop ceiling by
attaching an optional adapter to the mounting bracket. The optional adapter
(Universal Mounting Kit for EWLAN APs; purchasing Part Number KT-135628-01) must be
purchased separately.
-
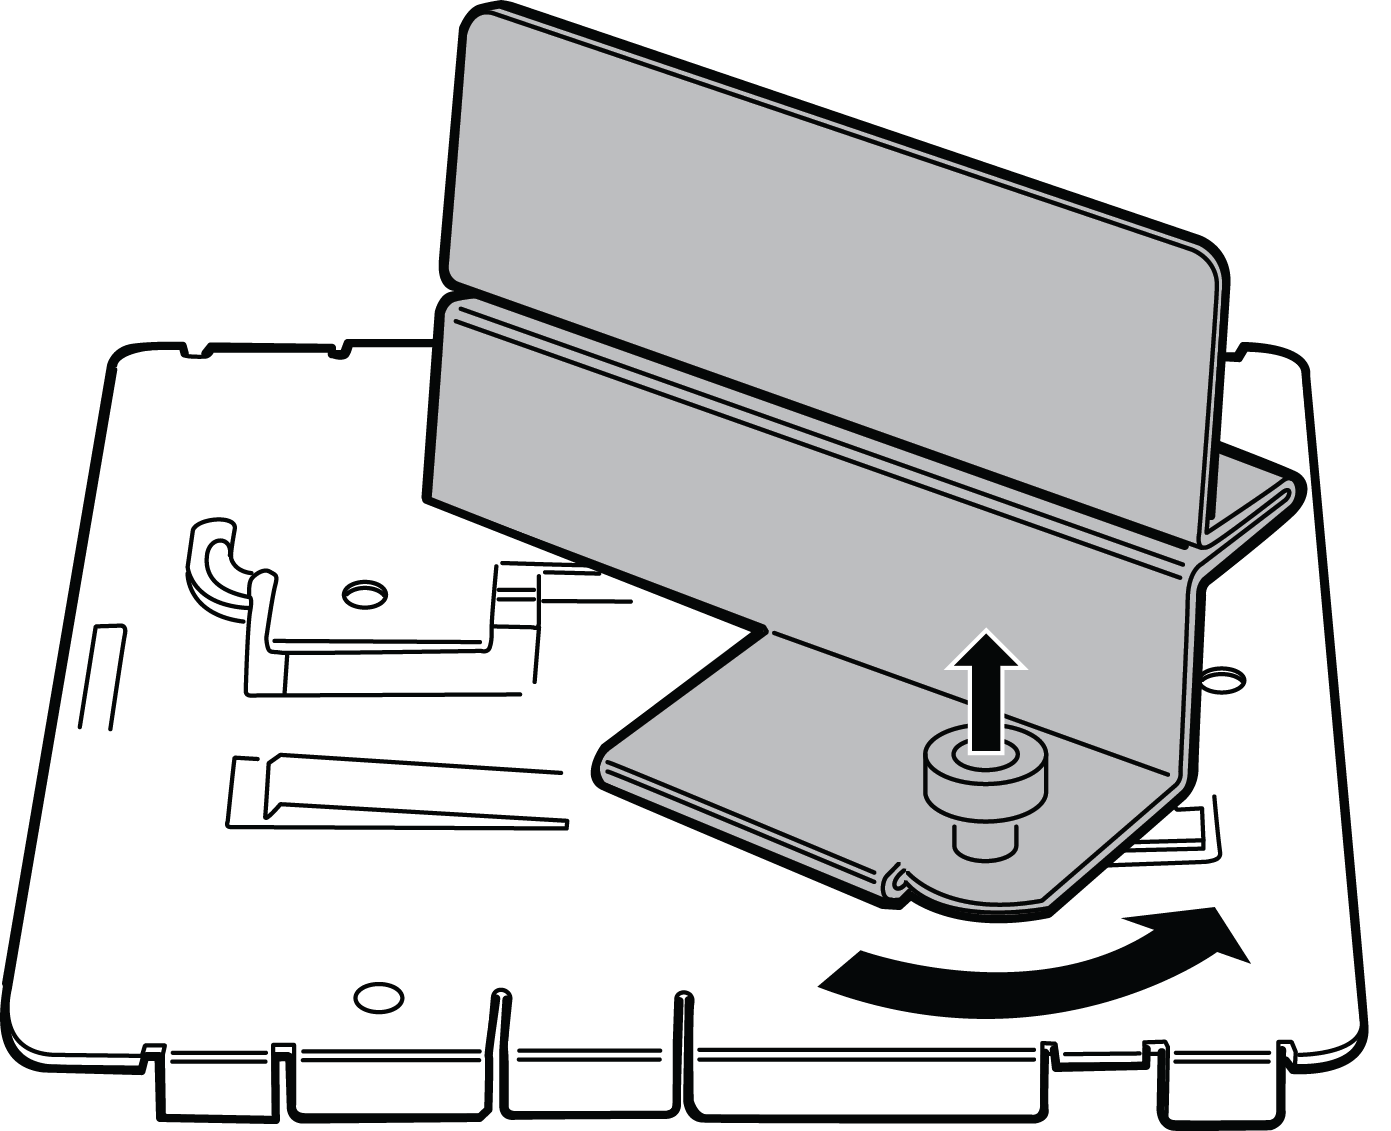
Attach the T-bar adaptor by pushing down the
mounting bracket‘s angled locking tabs and by pulling up the T-bar adapter‘s
locking pin.
-
Slide the T-bar holder onto the T-bar and replace the tiles to hold the adaptor
onto the T-bar.
-
Hold the AP and rock it back and forth to ensure that it is securely
mounted.
-
Attach the Ethernet cable‘s RJ45 connector to the LAN1/GE1 port.
Optional Installation: Mounting to a Suspended/Drop Ceiling using a T-bar
The AP-7632i can be mounted to a suspended/drop ceiling using an optional
WS-MBI-DCMTR01 multi t-bar adapter (ordering Part Number 30518).
-
Remove the mounting bracket from the back of the AP.
-
Remove the ceiling panels around the drop
ceiling T-bar rail.
-
Open the movable sliding part of the T-bar to
give the stationary and slider T-bar more space.
Installing the T-bar adaptor
-
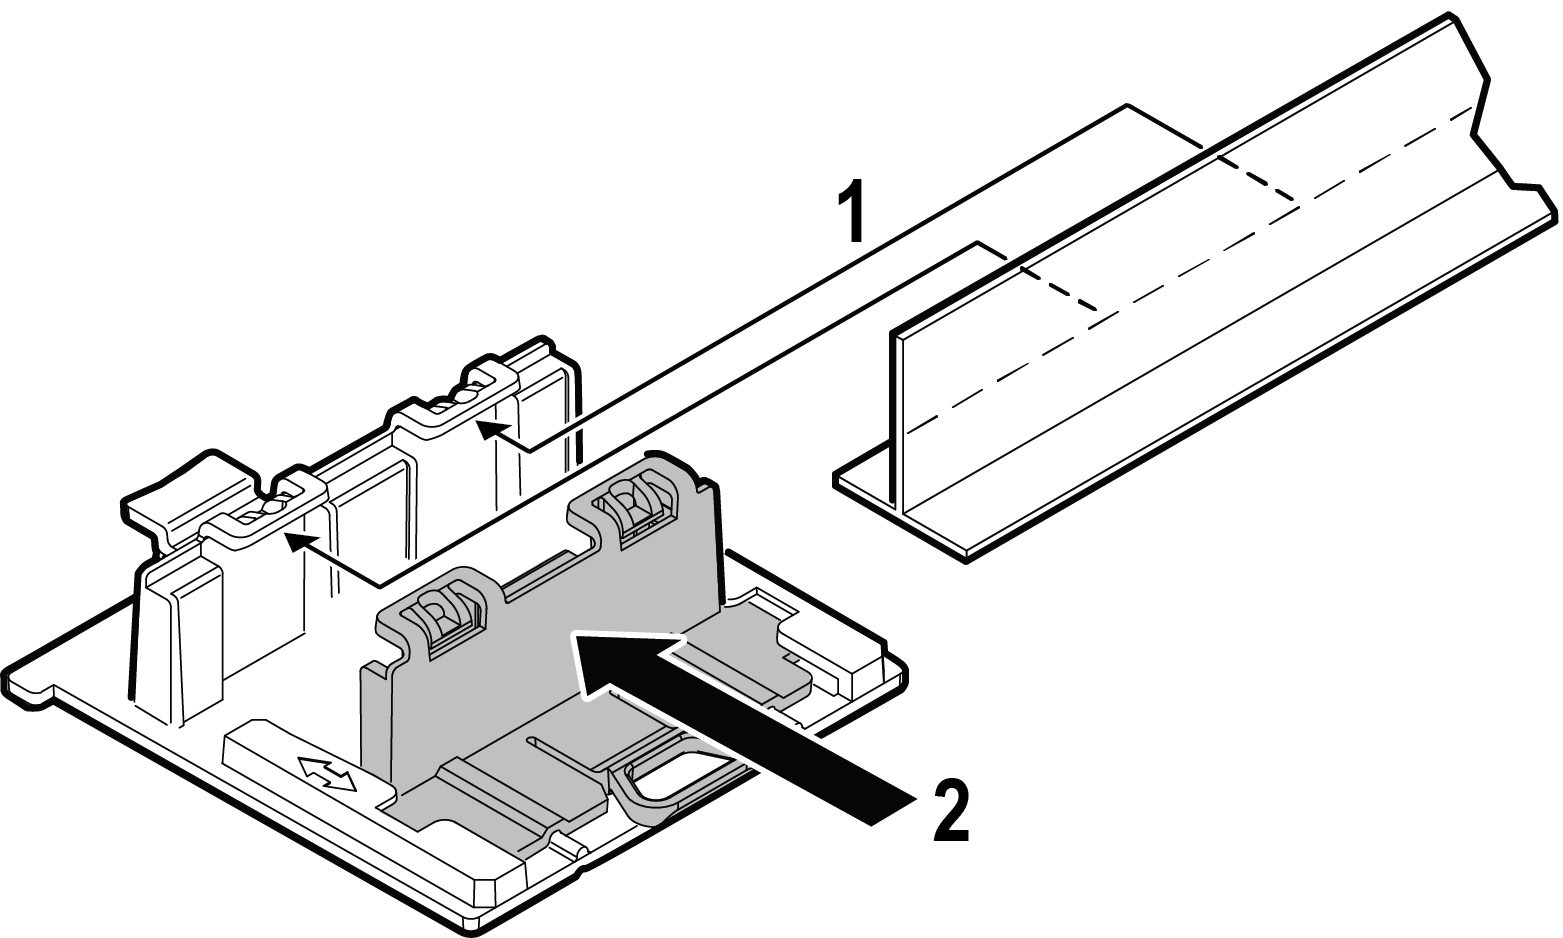
Hook the stationary end of the T-bar bracket
onto the T-bar.
-
Tilt the T-bar up slightly in such a way that
you are holding the stationary and movable sides of the bracket. 4 Squeeze
the bracket parts together until you hear the T-bar locking tab click into
place.
-
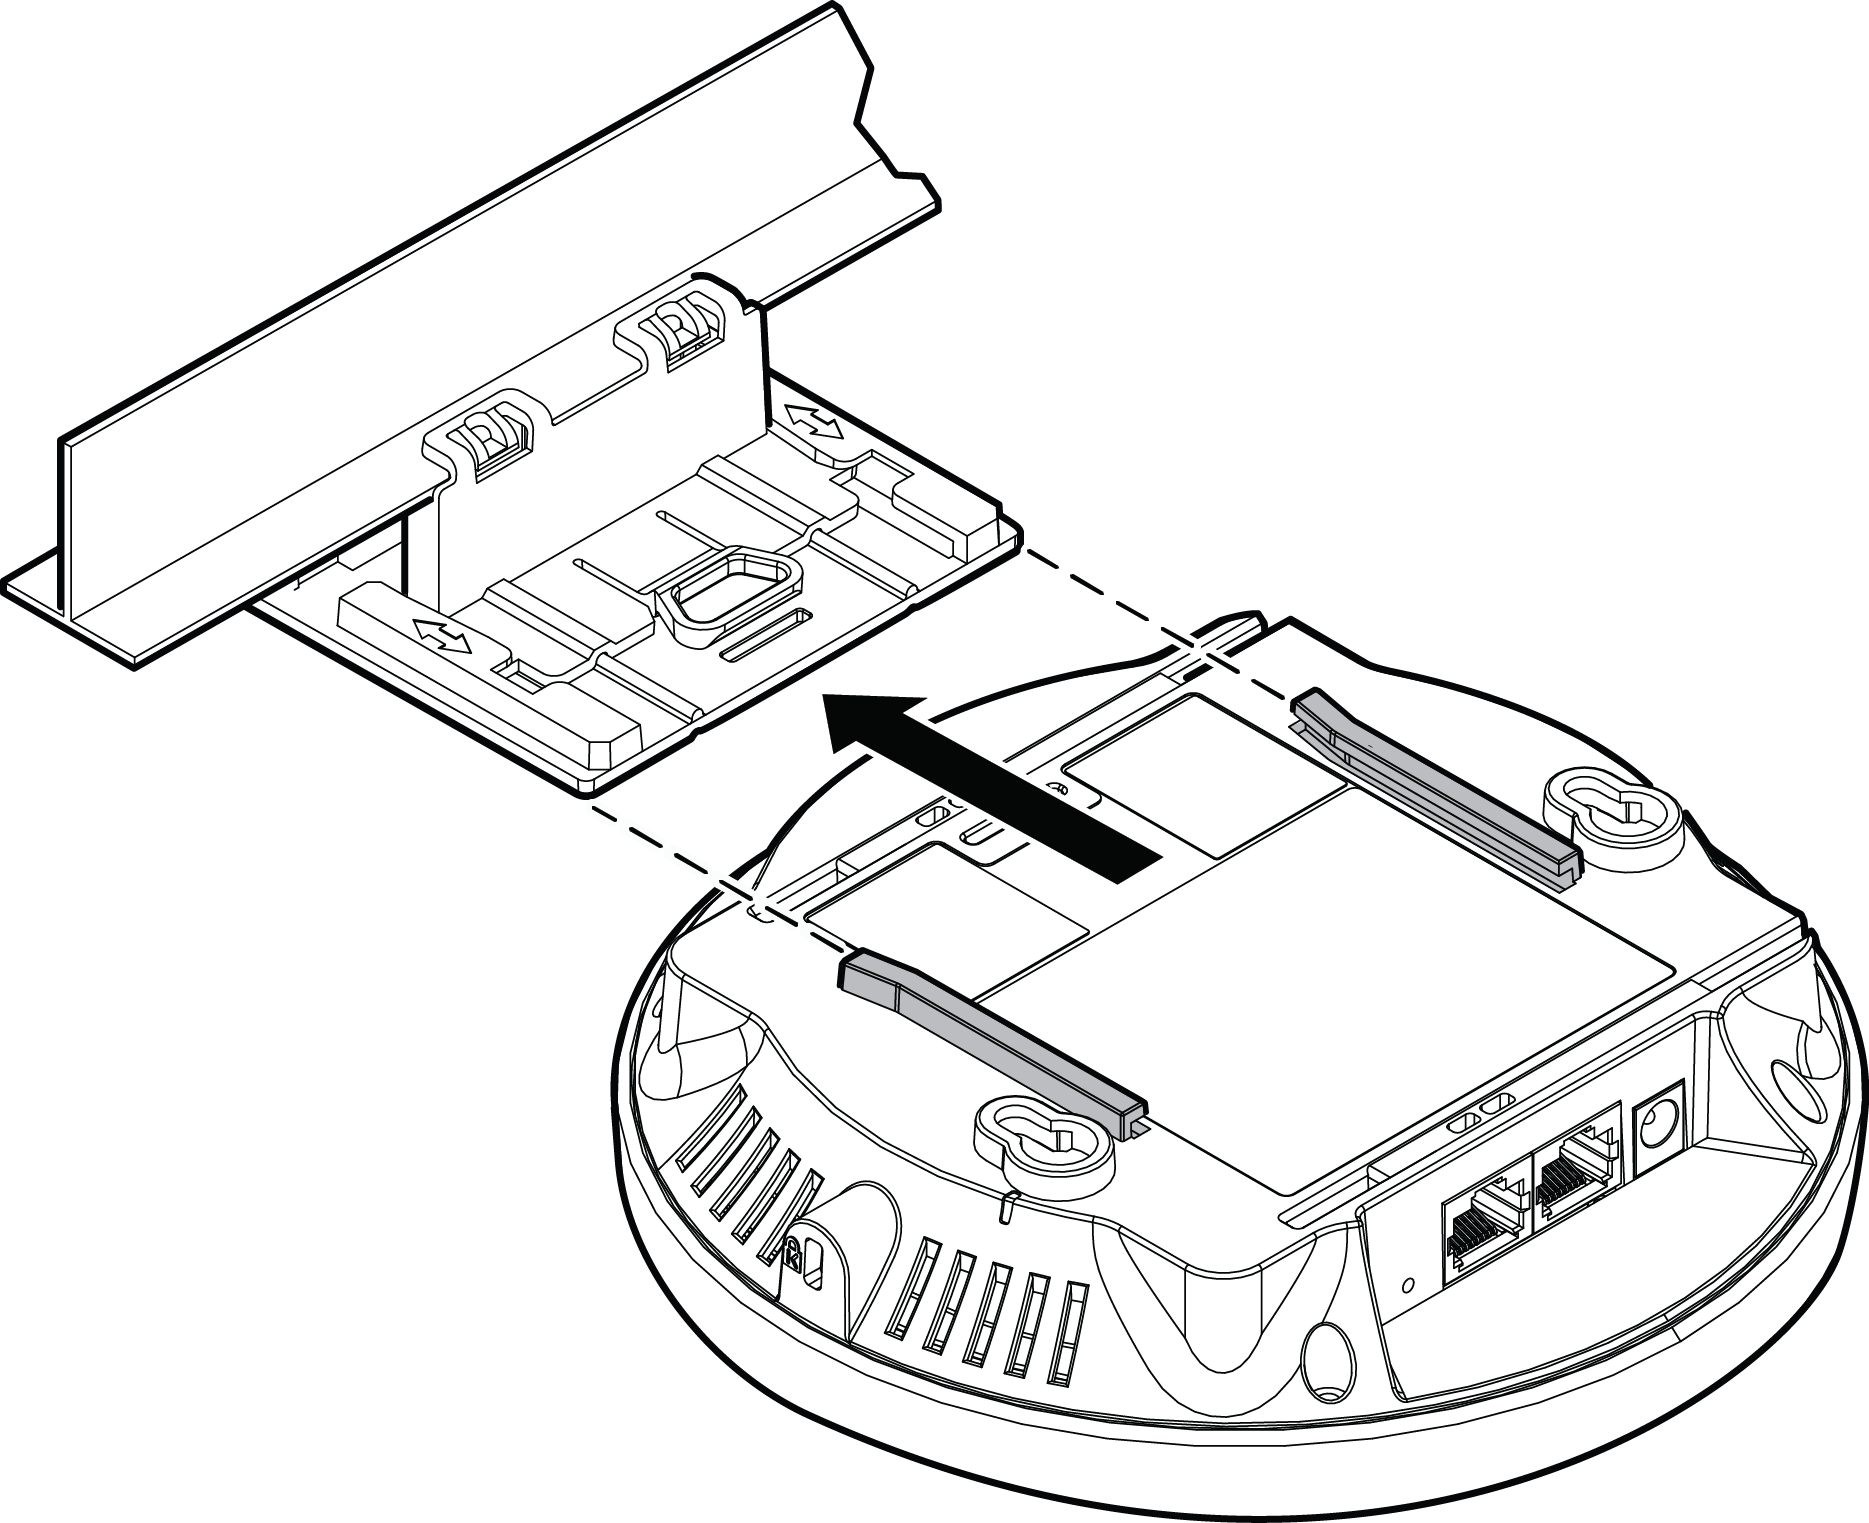
Slide the T-bar ceiling mount bracket base
into the back of the access point. The locking tab fits into a groove in the
outside of the AP.
-
Hold the AP and rock it back and forth to
ensure that it is securely mounted.
-
Attach the Ethernet cable‘s RJ45 connector to
the LAN1/GE1 port and place the ceiling tile back in place.
 Print
this page
Print
this page Email this topic
 Feedback
 View PDF
 Download EPUB