 Print
this page
Print
this page Email this topic
 Feedback
 View PDF
 Download EPUB
Mounting the WS-AP3825 to a Wall or Solid Ceiling
Screws for attaching the AP to a wall or
solid ceiling are supplied with the product. Use the following procedure to mount the
AP3825 to a flat wall.
- Determine the spot where the AP is to be mounted, preferably high up on the wall (near the ceiling for maximum radio wave dispersion) but in reach of the Ethernet cable and a wall power outlet if you are not able to use Power over Ethernet.
-
Drill two holes in the wall to match the center of
the two keyhole slots in the back of the AP. The location of the holes is
depicted in Drilling Template for Wall Mounting (measurements are in millimeters). For
a tight fit, the holes should be slightly smaller than the diameter of the
provided plastic anchors.
 Drilling Template for Wall Mounting
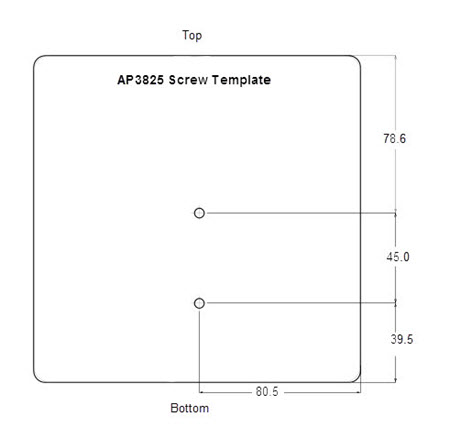
- Tap the plastic anchors into the holes with a hammer until they are flush with the wall, and screw the provided mounting screws into the anchors, with the head protruding 1/16" from the anchor.
-
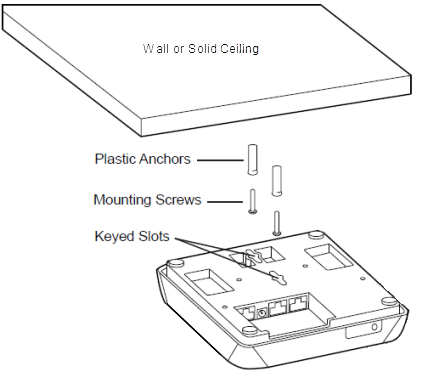
Place the back of the AP against the wall with the protruding mounting screw
heads fitting through the keyhole slots on the back of the AP, and slide the AP
down until the AP rests on the mounting screw heads. Mounting the WS-AP3825 to a Flat Wall or Solid Ceiling shows an
exploded view of this mounting method.
Mounting the WS-AP3825 to a Flat Wall or Solid Ceiling
- Plug the Ethernet cable into the RJ-45 port (and plug the power cord into the power port, if applicable) on the back of the AP.