You can attach your switch router to a two-post rack in mid-mount configuration.
Brackets for a two-post mount are not included in the box with your device. However,
they can be ordered separately using part numbers XN-2P-RKMT299 or
XN-2P-RKMT300.
SLX9740-40C 2-post rack
components
SLX9740-80C 2-post rack
components
To attach your device to a two-post rack, follow these steps:
On one side of the device,
attach one of the short mounting brackets to the switch router housing.
Position the bracket so
that the flange (ear) is positioned slightly more than halfway between
the front and back of the device, as shown in figure below: Attaching a Short
Mounting Bracket (Ear): Middle of Switch Router.
Attaching a
Short Mounting Bracket (Ear): Middle of Switch Router
Use six small mounting
screws (provided) to attach the bracket to the device.
Attach the other short mounting
bracket to the other side of the switch router housing, as you did in step
2.
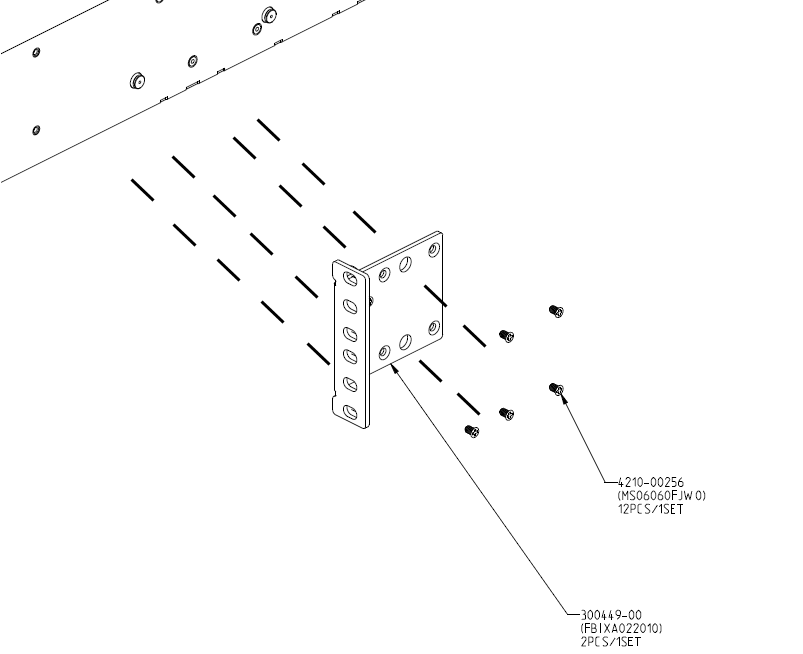
Attach a long mounting bracket
to one side of the switch router housing and to the rack post.
Position the long
bracket over the holes between the front and the middle of the device.
Orient it so that its flange (ear) rests against the rack post.
See the diagram below: Attaching a Long
Mounting Bracket: Middle of Switch Router.
Attaching a
Long Mounting Bracket: Middle of Switch Router
Use six small mounting
screws (provided) to attach the bracket to the device.
Secure the long bracket
to the rack post.
(Rack-mounting screws
are not provided.)
Repeat step 3 to attach the
other long bracket on the other side of the device.
Tilting the device slightly,
lift it into the rack so that the mounting brackets align with the rack
posts.
If the device cannot be tilted (because other equipment is mounted directly
above and below), remove one or both short mounting brackets from the
device. Lift the device into position, secure the flanges (ears) on the long
brackets to the rack posts, and then reattach the short brackets.
Secure the flanges (ears) on
both sides of the device to the rack posts, using screws that are appropriate
for the rack.
(Rack-mounting screws are not provided.)
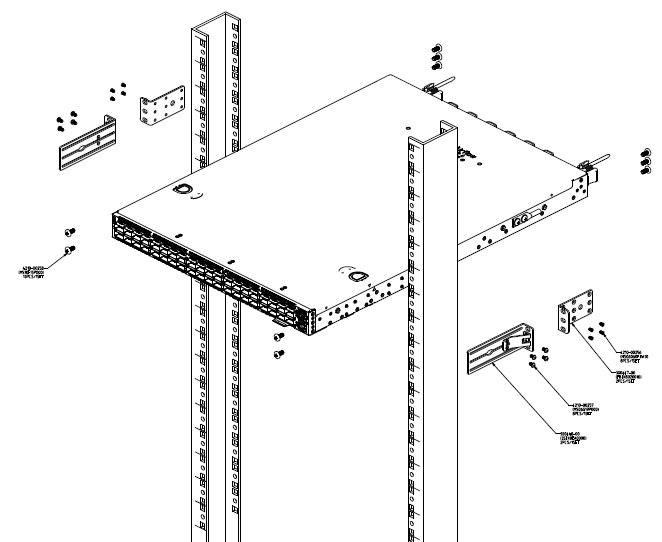
The completed installation is shown in the diagrams below: Two-Post Mid-Mount:
Complete.
Two-Post Mid-Mount:
Complete
For SLX9740-40C, install the
ground lug cables to the rack using an M6 screw and the four screws provided
(grounding screws for 2-post installation shipped with the swith in separate
bag).
SLX9740-40C grounding
location
Verify that the device is level
and is firmly attached to the rack.
If your device comes with installed AC power supplies, skip to the topic: Powering up the Device.
If your device does not have an installed power supply, install one or two power
supplies using the instructions in Installing Internal Power Supplies.