About this task
After you attach the bracket to a wall or junction/gang box and
connect the LAN/power, attach the AP to the bracket.
Procedure
-
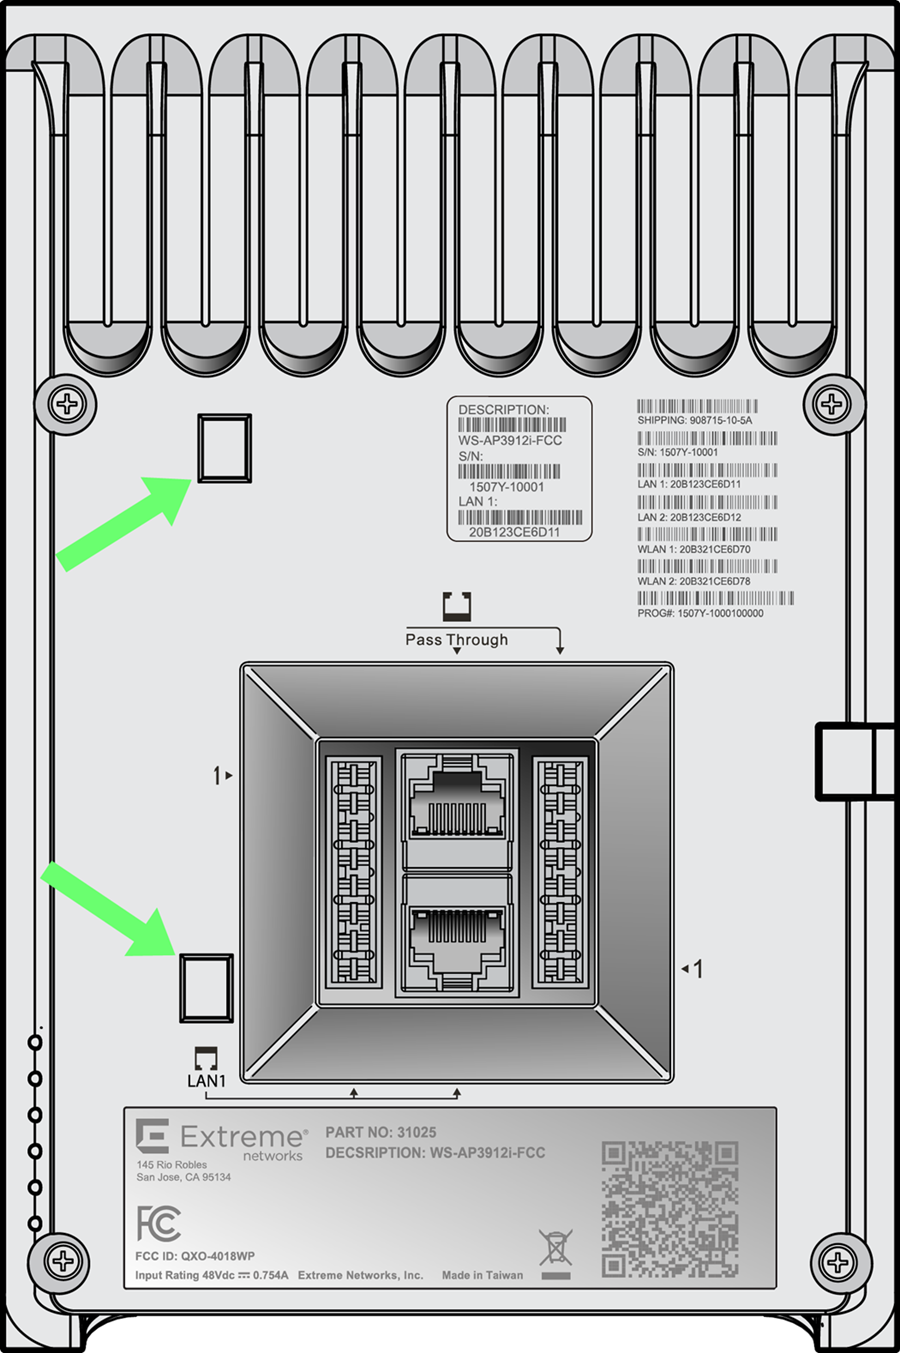
Line up the AP holes (marked
with arrows in the following diagram) on the rear with the two "L" shaped angled
tabs near the right side of the bracket (see Figure 10).
-
Insert the AP onto the tabs and
rotate it down so it is flat on the bracket.
-
Slide the AP approximately 1/4" to the left on
the two bracket tabs.
-
Attach and tighten the Security Torx screw to the
AP so that the AP is attached to the bracket. Torque the screw to 7
in-lbs.