Mounting the Bracket to a Wall

About this task

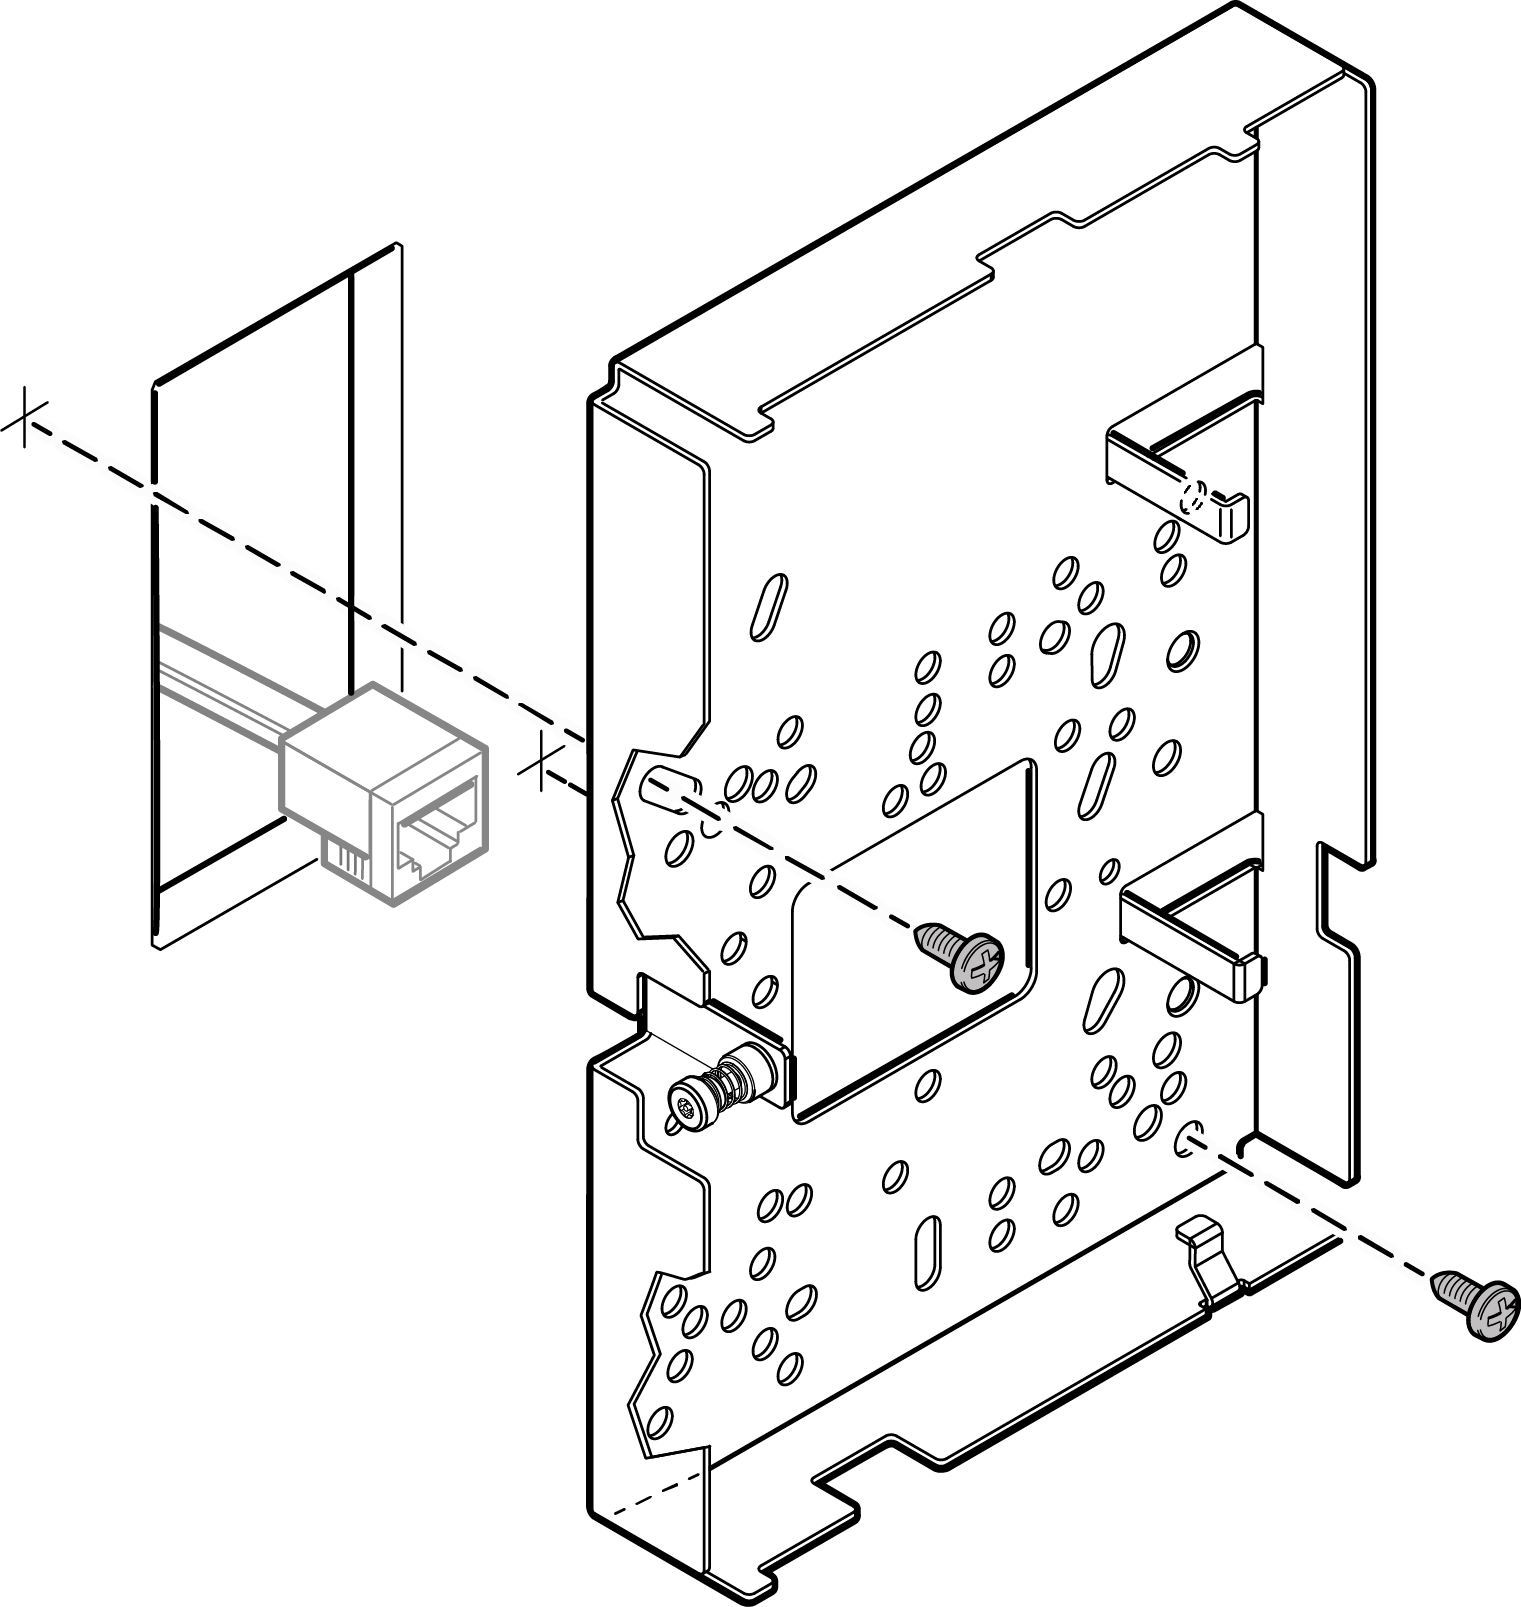
You can mount the AP using the mounting bracket that comes with the unit or the WS-MBI-WALL05 (#30521) bracket. If you are using the mounting bracket that comes attached to the AP, you have to create a hole in the wall and run a LAN cable through a wall.

Note

Note

You can also mount this AP to a wall and run a LAN cable between the AP and bracket without creating a hole in the wall.
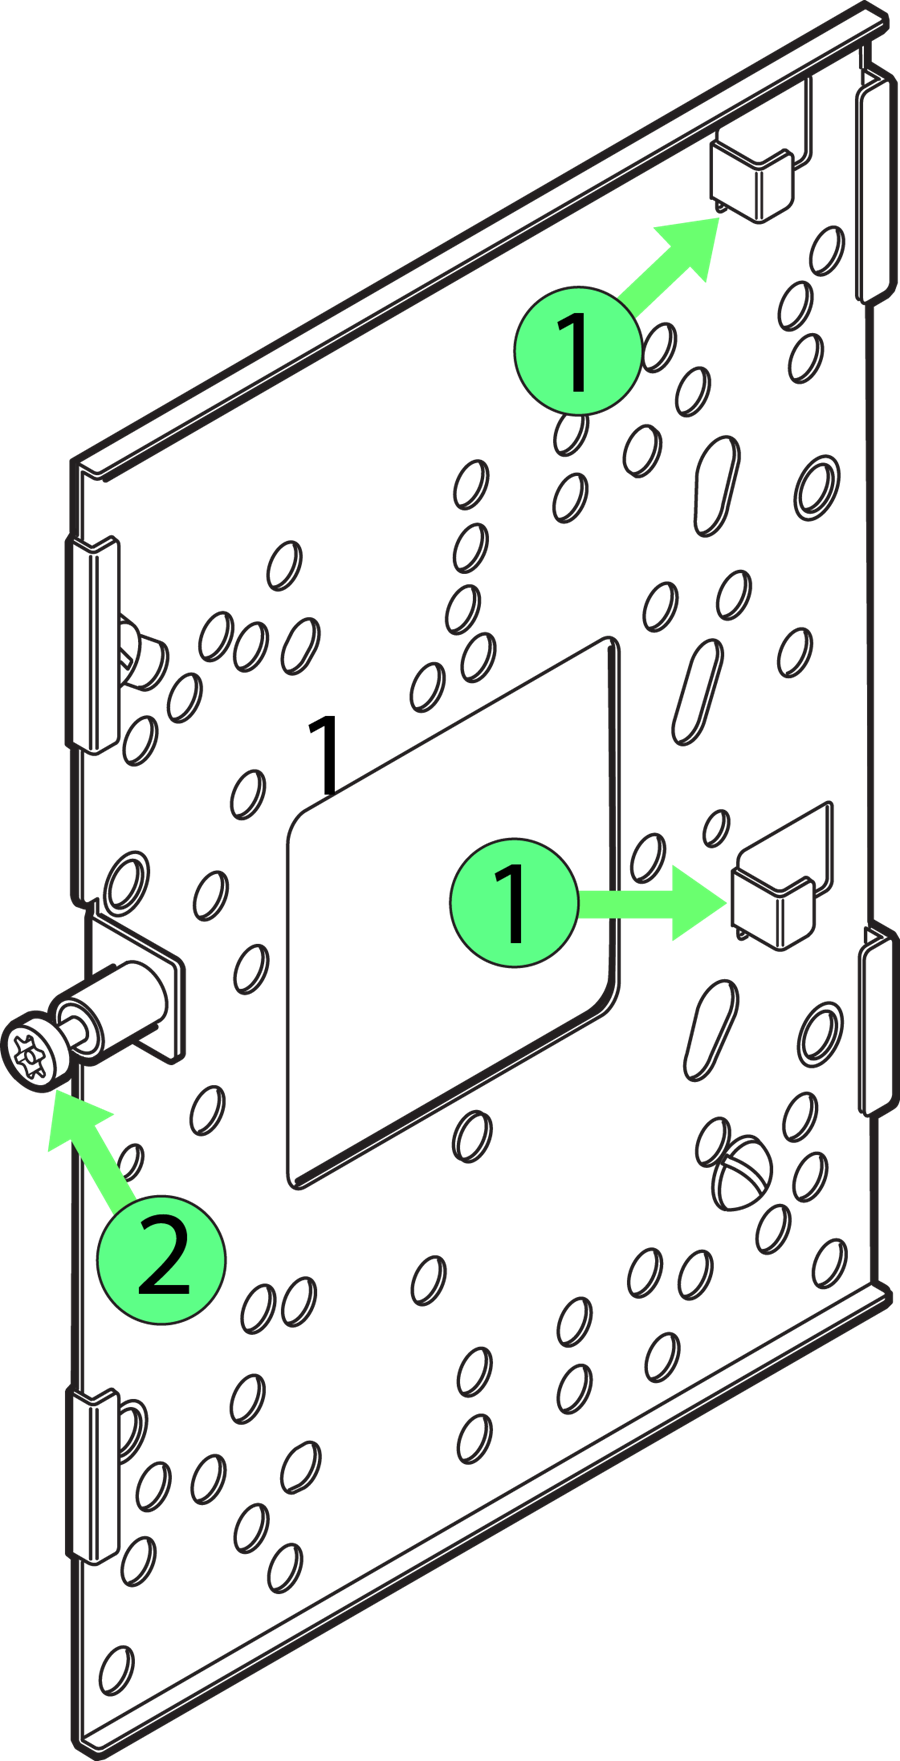
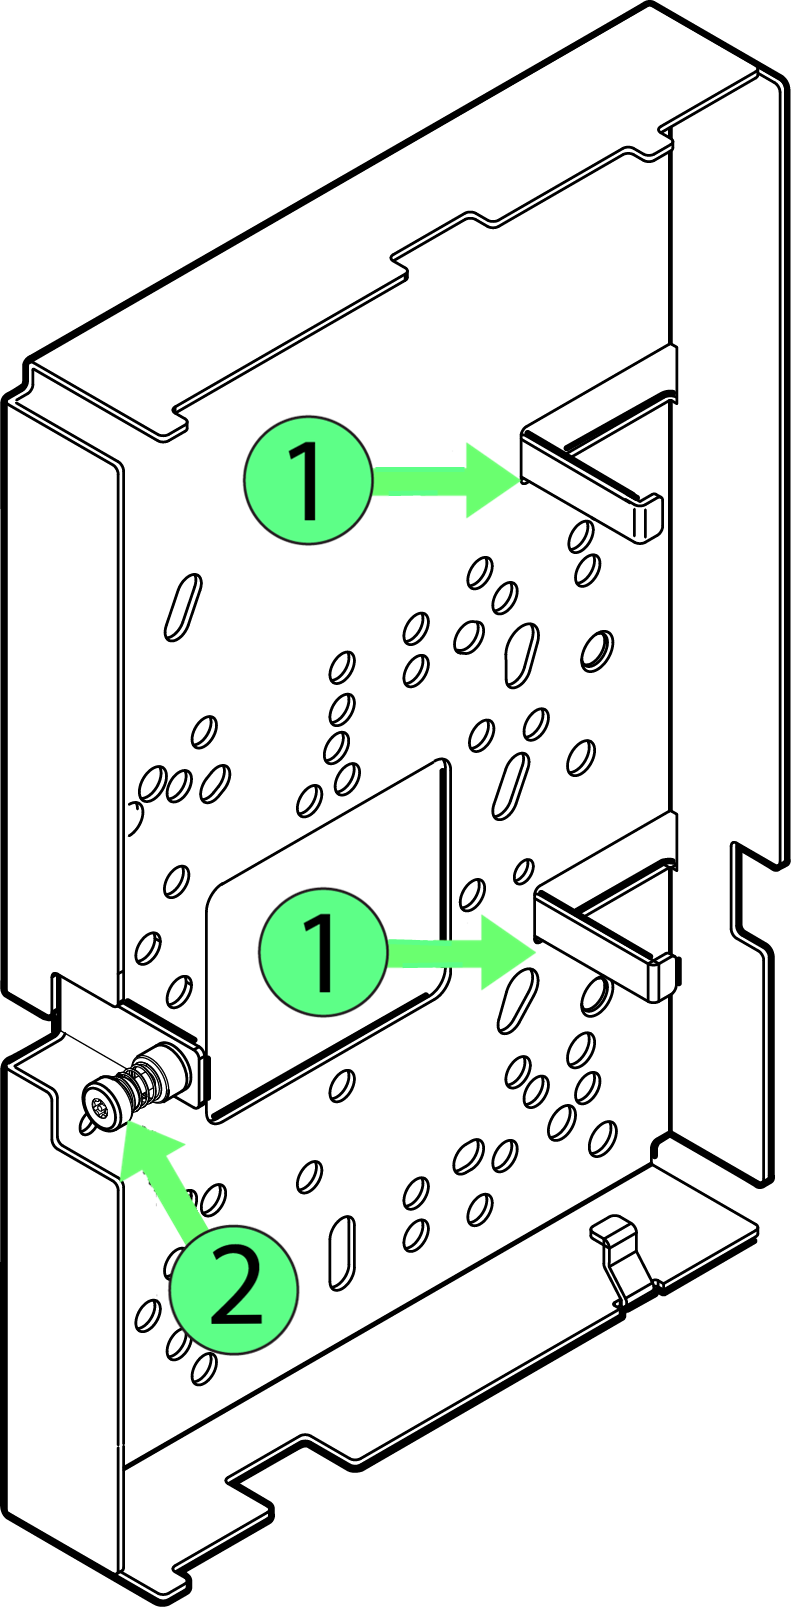
The WALL05 bracket is designed for wall, junction/gang box, and table configurations. The WS-MBI-WALL05 bracket can be used:
  • Without a hole in the wall.
  • On a table.
  • To physically secure the LAN cable when AP3912i is installed.
Click to expand in new window
AP3912i Mounting Bracket that comes attached to the unit
Click to expand in new window
AP3912i WALL05 Mounting Bracket
Table 1. AP3912i Mounting Bracket and WALL05 Bracket
Number Description
1 AP mounting tabs
2 Security Torx captive screw

To mount the mounting bracket or the WALL05 bracket to a wall:

Procedure

  1. Using either of the brackets as a guide, choose a location where it is feasible to place the AP‘s center.
    If the RJ45 connectors on the rear of the AP will be used for connecting the LAN1 cable without using the RJ45 loop cable or the RJ45 cable with a receptacle, the location must allow LAN cables to come out of the wall within the large, rectangular hole.
  2. When using the WALL05 bracket, you have the option to use a RJ45 loop cable or a RJ45 cable with a receptacle. Both the RJ45 loop cable and the RJ45 receptacle cable allows you to mount the WALL05 bracket on a wall without using the rear rectangular hole.
  3. Place the bracket against the wall. (The captive screw will be used to lock the AP in place.) Decide which two holes to use to mount the bracket to the wall. We recommend that the two holes be on opposite sides of the large, center opening.
  4. Mark the two hole centers.
  5. For drywall/plasterboard walls, drill two holes using a 1/4” or 6mm diameter drill bit.
  6. For drywall/plasterboard walls, screw the plastic anchors into the holes.
  7. Attach the wall plate bracket using the two wood screws. Torque the screw to 7.0 in-lbs.
    Click to expand in new window
    Attaching the WALL05 bracket on a wall with a hole
  8. Connect the LAN/power to the AP.
  9. Attach the AP to the mounting bracket.