Screws for attaching the AP to a wall are
supplied with the product. Use the following procedure to mount the AP3935 to a flat
wall:
Procedure
Determine the spot on the wall to mount the AP. Pick a spot near the ceiling,
but in reach of the Ethernet cable and if you are using external power, near a
wall power outlet.
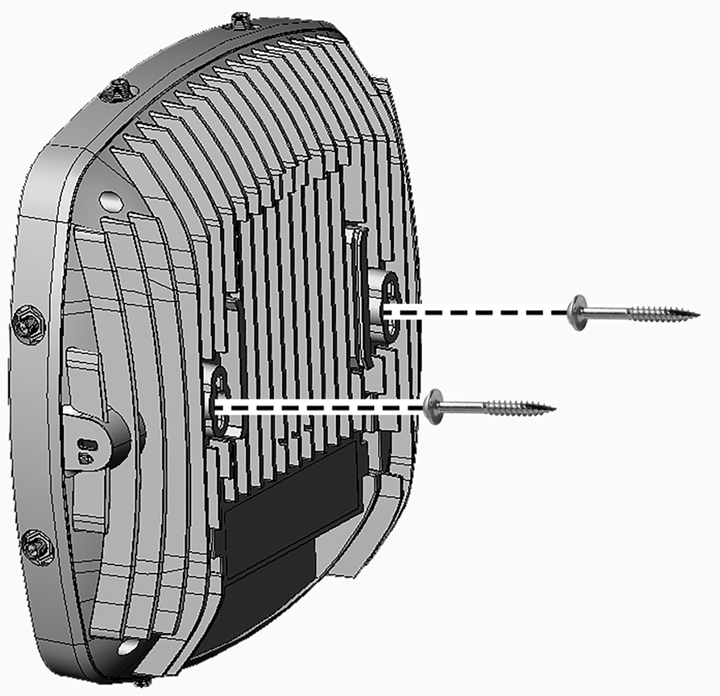
To mount the AP directly on the wall with two
screws, use the provided template and mark the two drill holes on the wall. In
drywall, the drill holes should be 6mm in diameter.
Drill two holes in the wall to match the center of the two keyhole slots in the
back of the AP bracket.
Screw the anchors into the holes until they are flush with the wall.
Screw the provided mounting screws into the anchors with the head protruding
about 5/32” from the anchor to the top of the screw.
Mounting the AP3935 to a Flat Wall
Place the back of the AP against the wall with the protruding mounting screw
heads fitting through the keyhole slots on the back of the AP. Slide the AP down
until the AP rests on the mounting screw heads.
When mounting the AP on a wall or flat ceiling, a Kensington lock provides
extra stability.
Note
The mounting bracket (30513, WS-MBI-WALL03) is optional when mounting the
AP on a wall. If mounting the AP on a flat ceiling, we recommend using the
mounting bracket (30513, WS-MBI-WALL03) for added security.