To mount the AP to a drop ceiling, use the mounting bracket that
is provided with the AP.
Procedure
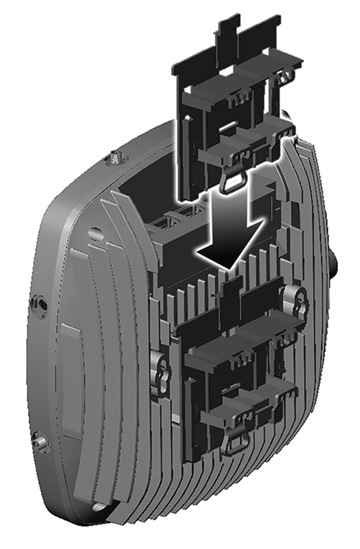
Slide the ceiling mount bracket base into the
metal base. The locking tab fits into the groove in the fins.
Attaching Mount Bracket to the Access
Point
Remove the ceiling panels around the drop ceiling T‐bar rail and verify that
the Ethernet cable can reach the AP at the mounting point.
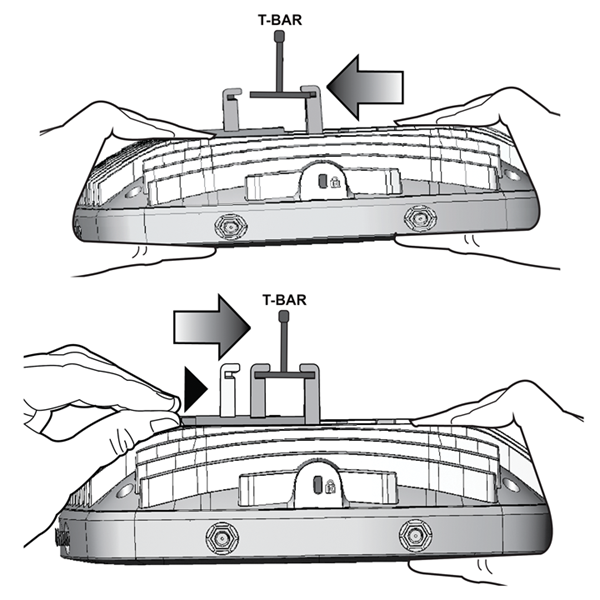
Slightly lift the movable T‐bar locking tab to
increase the space between the stationary and the movable T‐bar sides of the
bracket. Then hook the stationary end of the T‐bar bracket onto the T‐bar, as
shown in Attaching the AP3935i on a Drop Ceiling T-bar
Rail.
While holding the AP with one hand, reach the other hand over the T‐bar and
grasp both the stationary and movable sides of the bracket. Push the bracket
parts together so they both grasp the T‐bar and the locking tab clicks into
place.
While still holding the AP, rock it back and forth to ensure that it is
securely mounted.
Attaching the AP3935i on a Drop Ceiling T-bar
Rail
Make a hole through the ceiling panel closest to the power slot on the AP. Run
the Ethernet cable through the hole and into an RJ45 LAN port in the recessed
connector bay.
If necessary, cut the tiles for the cables, attach the cables to the AP, and
replace the tiles.