Two adapter plates come with the mounting kit. Adapter plates are used to secure the chassis to:
The adapter plates can be installed in either a flush or a recessed configuration of up to 3.8 cm (1.5 in.).
The SSA can be configured for air intake on either the chassis switch I /O port side or the power supply side. Adapter plate installation must align the adapter plate ears with the air intake side of the chassis.
To install the adapter plates, follow these steps:
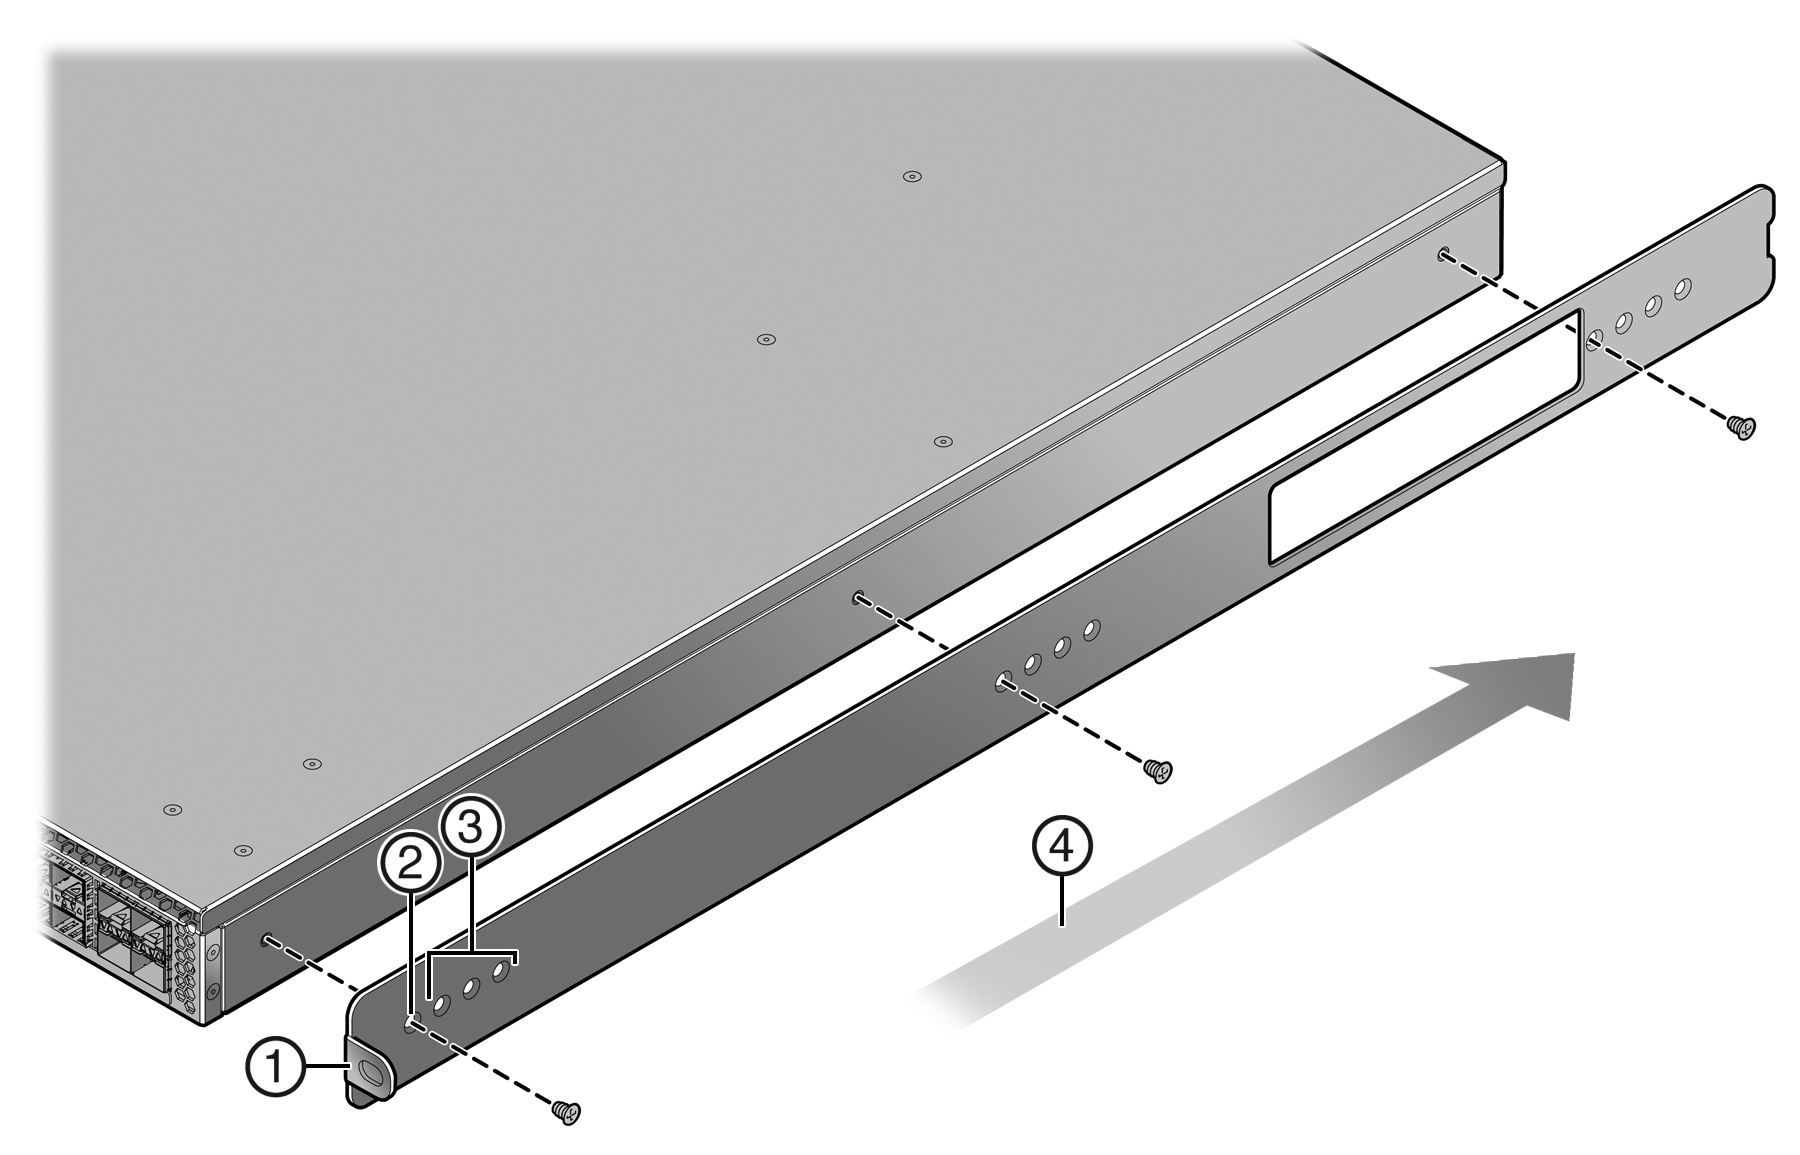
| 1 = Adapter plate (ear side) | 3 = Recess mount adapter plate screw holes (1.5 in.) |
| 2 = Flush mount adapter plate screw hole | 4 = Airflow direction |

Note
When recess mounting, use care that the installation does not result in openings above and below the chassis face at the inlet side that allow for hot air recirculation from the exhaust side of the rack or cabinet. This is especially the case for a cabinet with enclosed sides where the cold and hot aisles are meant to be isolated. Print
this page
Print
this page Email this topic
 Feedback
 View PDF
 Download EPUB