Mounting the AP using the Main Mounting
Bracket and KT-135628-01 Adaptor to a Flat T-bar
Mounting the AP to a suspended or drop
ceiling requires the optional adaptor (Universal Mounting Kit for WLAN APs; # KT- 135628-01).
The adaptor requires a flat t-bar and fits a ceiling tile with up to a 0.35” protrusion from
the bar.
Pre-Installation checklist:
T-bar width can be either 9/16” (15mm) or 15/16” (24mm).
T-bar bottom must be flat all the way across.
T-bar minimum base thickness: N/A; must
be structurally sound.
T-bar maximum base thickness: 0.055”. Due to manufacturing variation some adaptors may
be able to accommodate up to 0.060”.
Ceiling tile may protrude up to 0.3" below the T-bar.
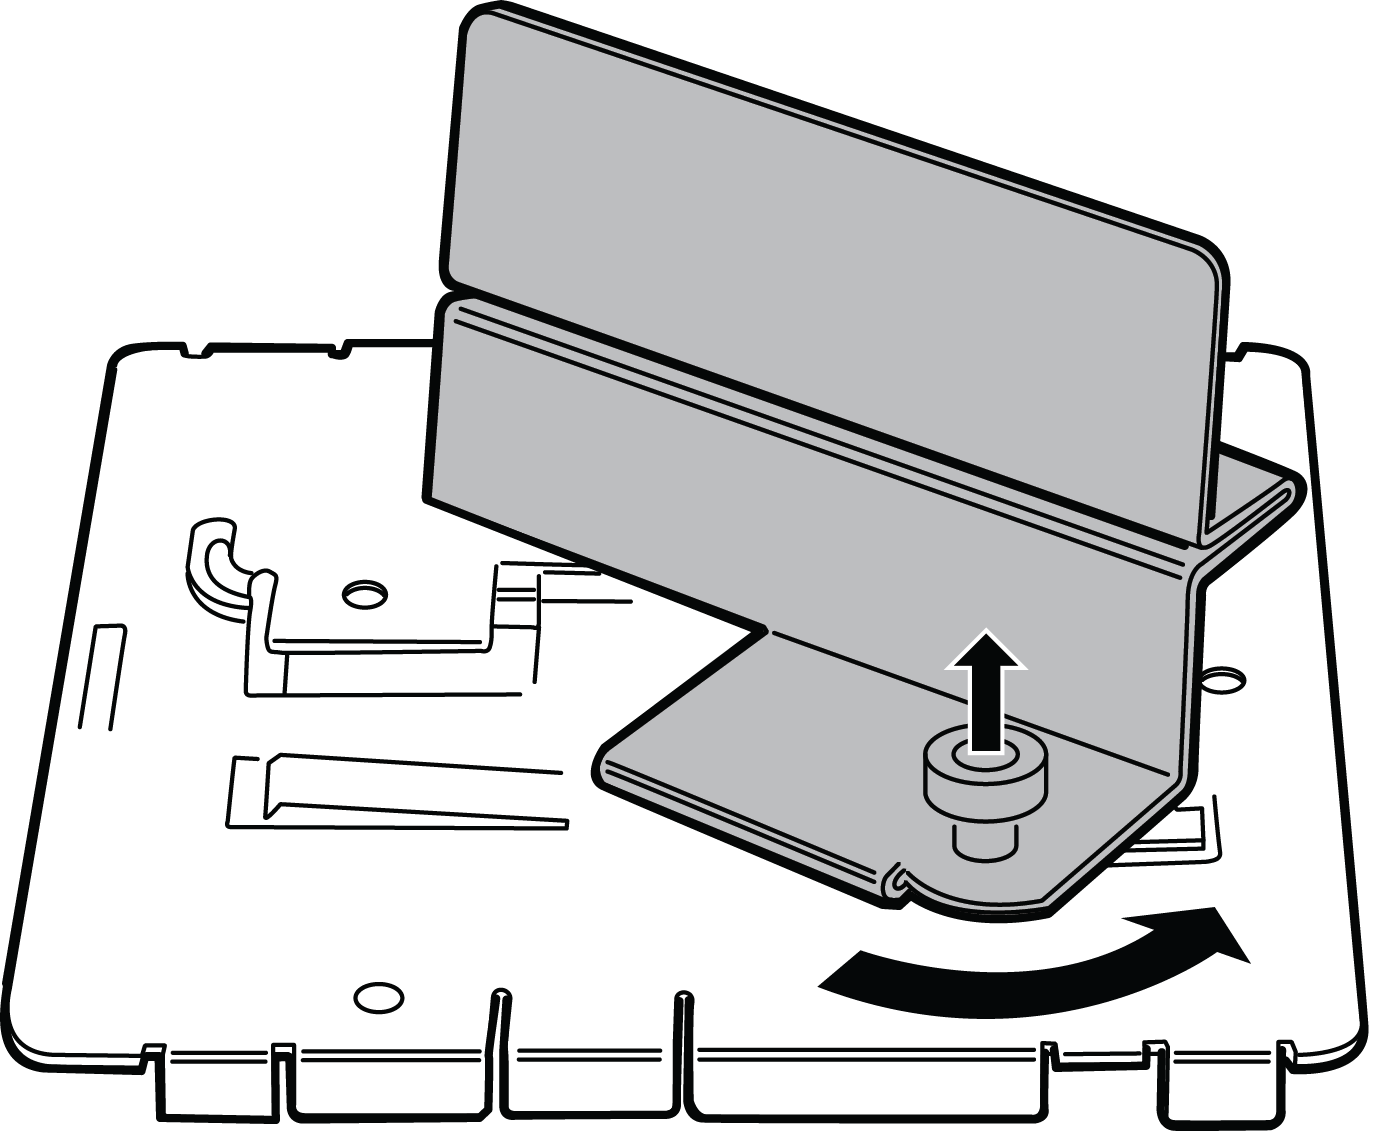
Attach the T-bar adaptor by lining up
the small bends on the adaptor with the long raised parts on the main bracket, pull up on
the adaptor‘s locking pin, and twist. Make sure the locking pin goes into the locking pin
hole on the main bracket and locks in place.
Attaching the adapter to the main bracket
Slide the T-bar holder onto the T-bar
and replace the tiles to hold the adaptor onto the T-bar.
Hold the AP and rock it back and forth
to ensure that it is securely mounted.
Attach the Ethernet cable‘s RJ45 connector to the LAN1/GE1 port.