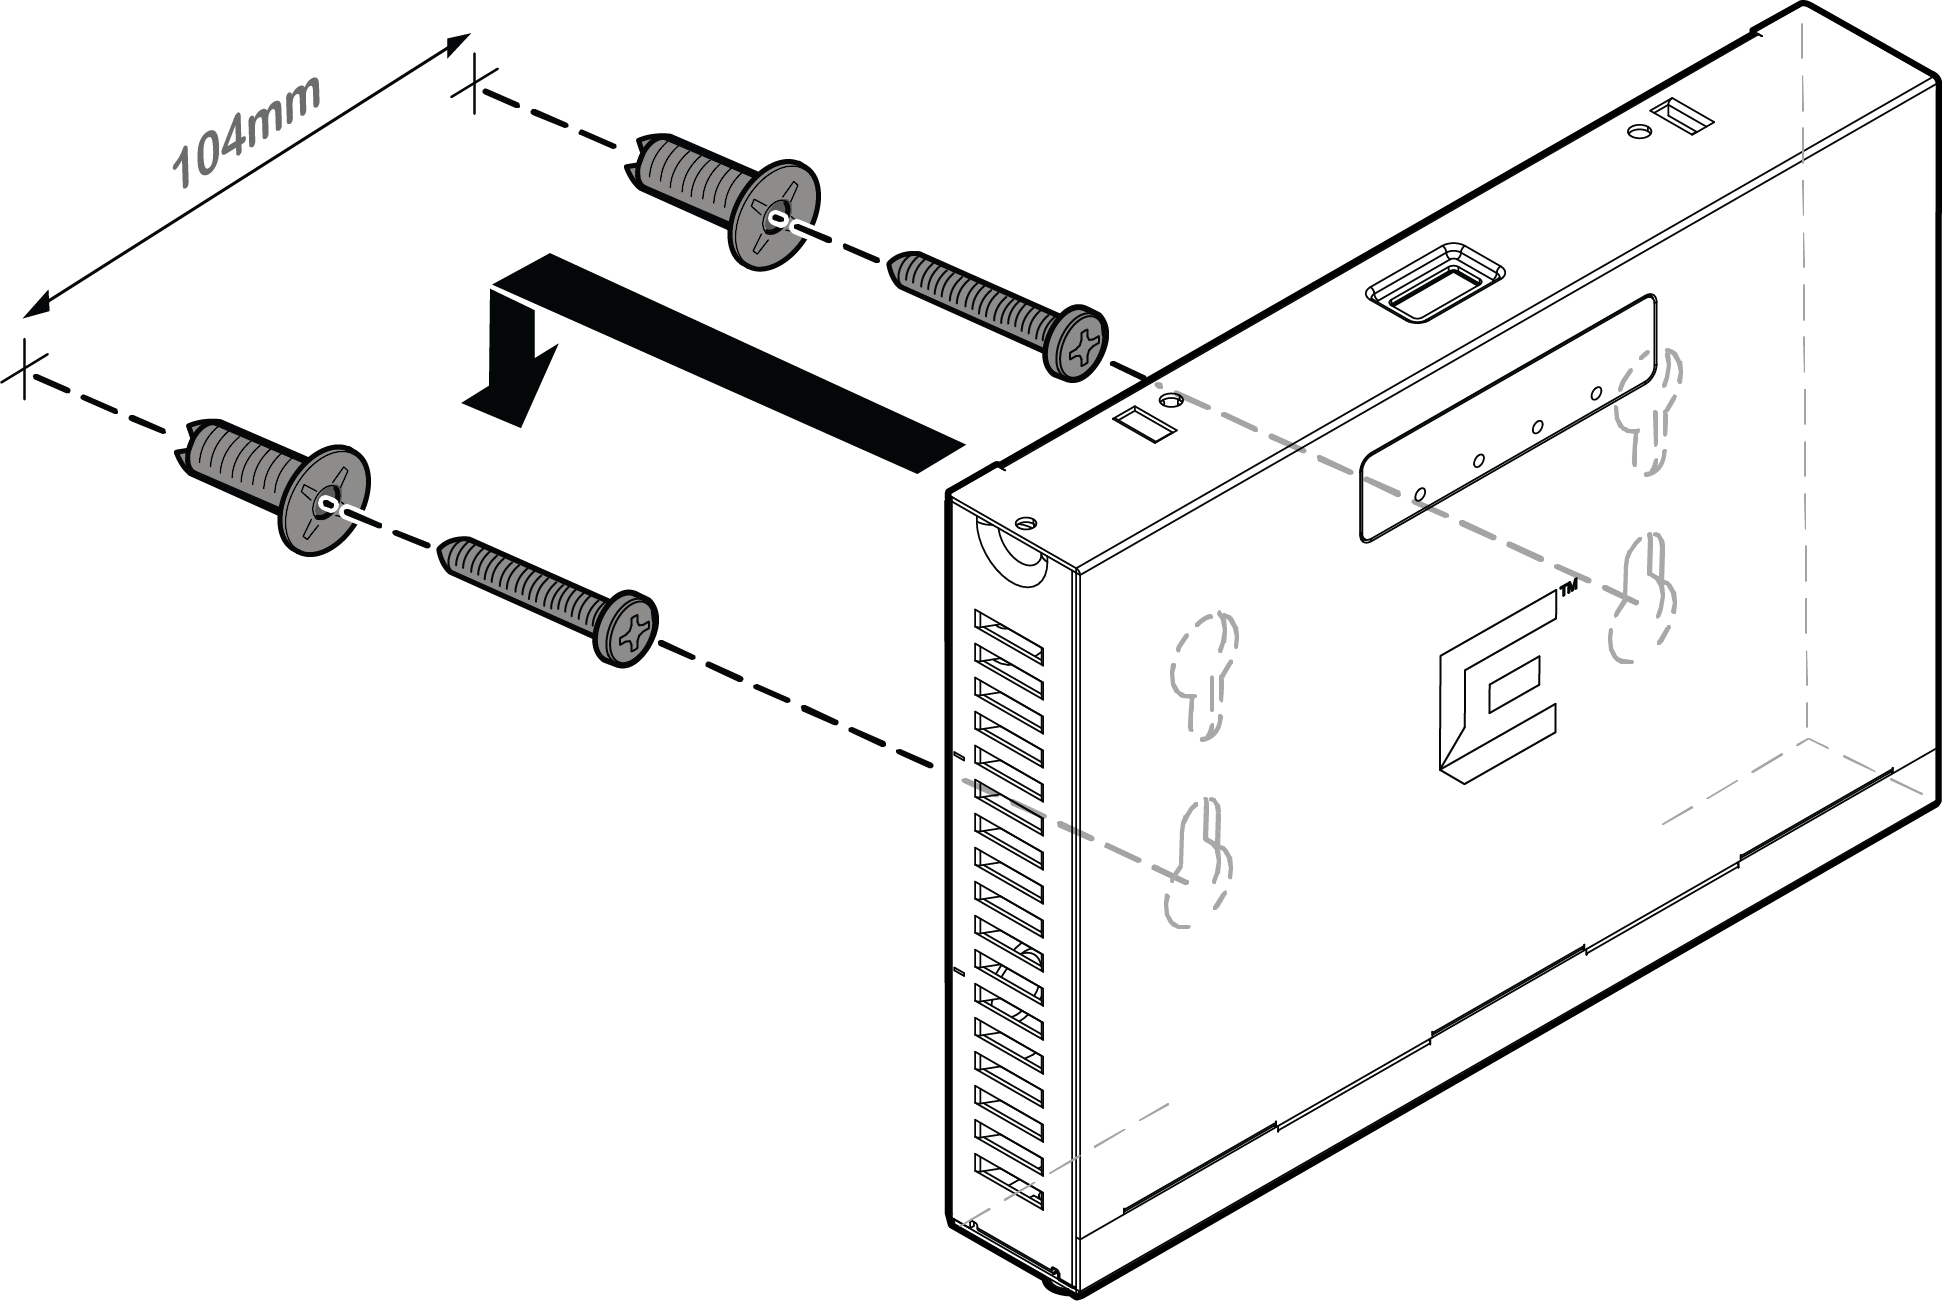
Mounting to a wall using the Philips Pan-head
screws
You can mount the AP3915e access point directly onto a dry/solid wall
using the Philips Pan-Head screws. This is an optional installation method and not the
preferred mode of installation.
Warning
This option can be used to mount only on a
wall where there is gravity to hold the screws and AP in place.
Caution
If the AP is mounted on a ceiling, it will fall off the screw heads.
Drill two holes 104 mm (4.100”) apart
from each other on the wall where you want to mount the AP.
Insert the screws into the holes and use
the screw-in anchors if needed.
Note
Leave 1/8” gap between the screw head and the wall.
Mounting the AP directly on a dry/wood wall using the Philips Pan-Head
screws
Insert the Ethernet cable‘s RJ45
connector into the LAN1/GE1 port.
Align the AP against the screw heads and slide it down. Ensure that the AP is secured
in place and tightened. If the AP is loose, unmount the AP and decrease the distance
between the screw head and the wall. Remount the AP.