Mounting to a Drop Ceiling
Use the T-bar bracket to mount the AP to a drop ceiling.
-
Remove the ceiling panels around the drop ceiling
T-bar rail and verify that the LAN 1 Ethernet cable can reach the AP at the
mounting point.
-
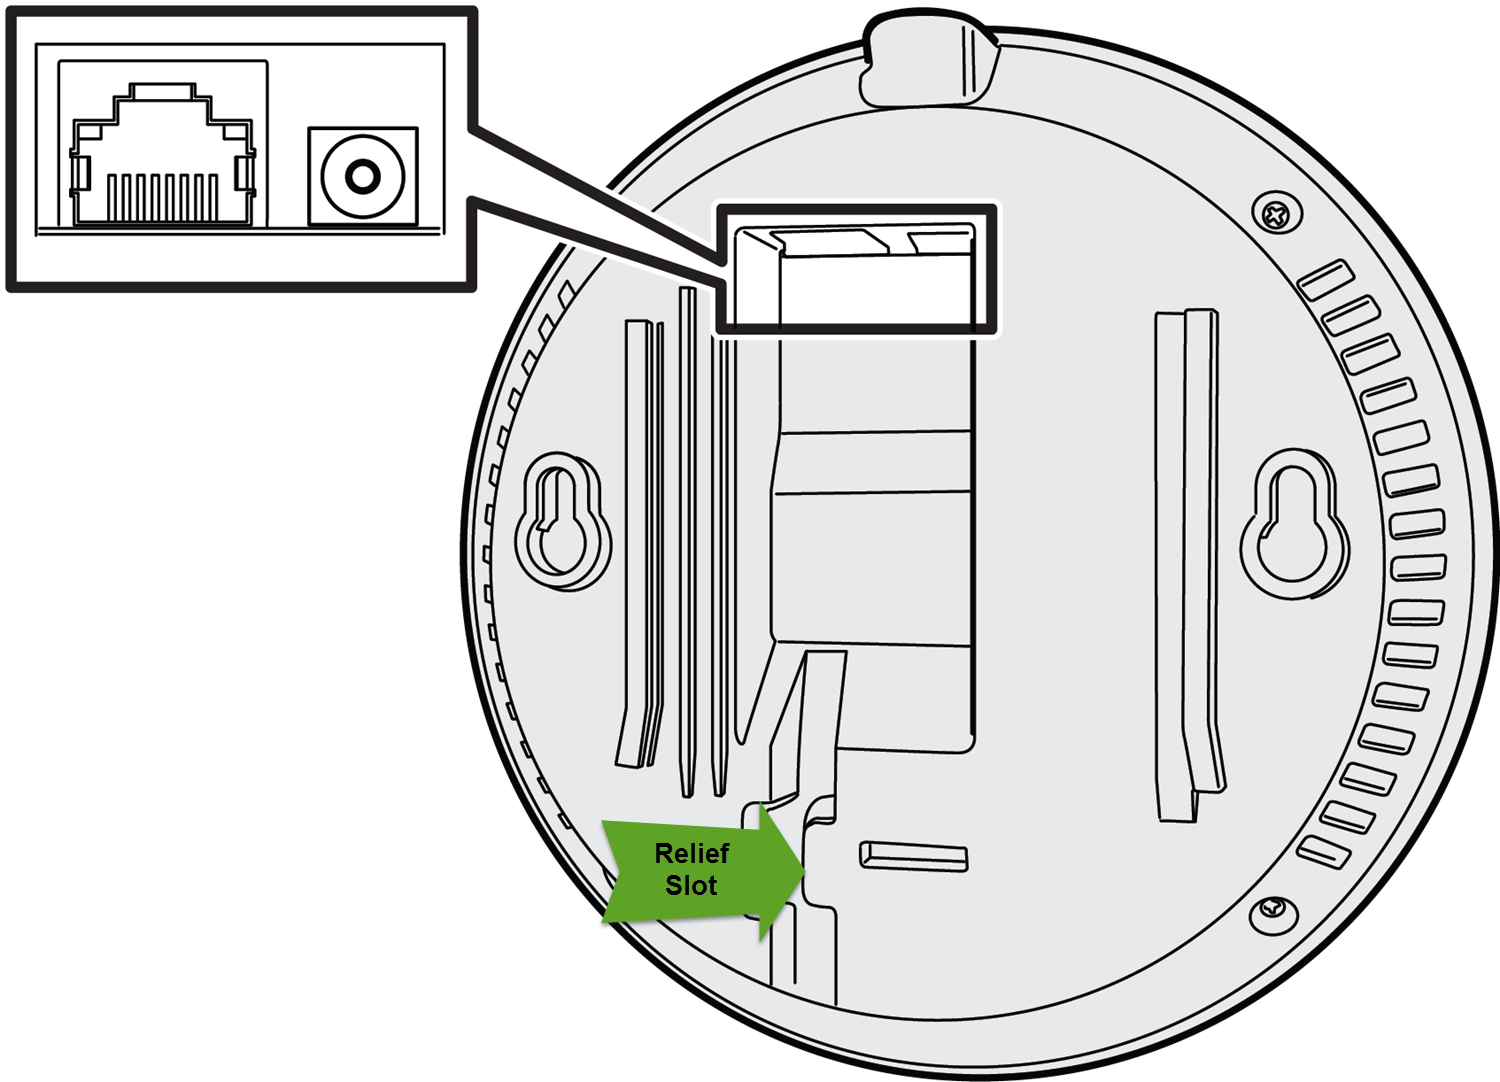
Connect the LAN/Ethernet cable (and power supply
cable, if applicable) to the back of the AP and then insert the cables into the
cable holding/strain relief slot.
| Item |
Description |
 |
LAN Ethernet Port |
 |
External Power DC 12V Connector |
-
If your LAN does not have PoE (Power over Ethernet), you must
also connect to an AC power source by plugging the external 12V DC adapter power
cord into the power connector on the back of the AP. (There is no wall mount
bracket for the 12V DC power supply.) Then plug the other end of power cord into
the AC electrical outlet.
-
Slide the T-bar ceiling mount bracket base into the access point‘s metal base.
The locking tab fits into the grooves in the outside center of the back of the
AP.
-
Slightly lift the movable T-bar locking tab to
increase the space between the stationary and the slider T-bar sides of the
bracket. Then hook the stationary end of the T-bar bracket onto the T-bar, as
shown in the following figure.
Mounting Bracket on T-bar
-
While holding the AP with one hand, reach the other hand over the T-bar and
grasp both the stationary and movable sides of the bracket. Push the bracket
parts together so they both grasp the T-bar and the locking tab clicks into
place.
-
While still holding the AP, rock it back and forth
to ensure that it is securely mounted.
-
(Optional) Attach the Kensington lock and cable
(or equivalent) to secure the AP.

 Print
this page
Print
this page Email this topic
 Feedback
 View PDF
 Download EPUB