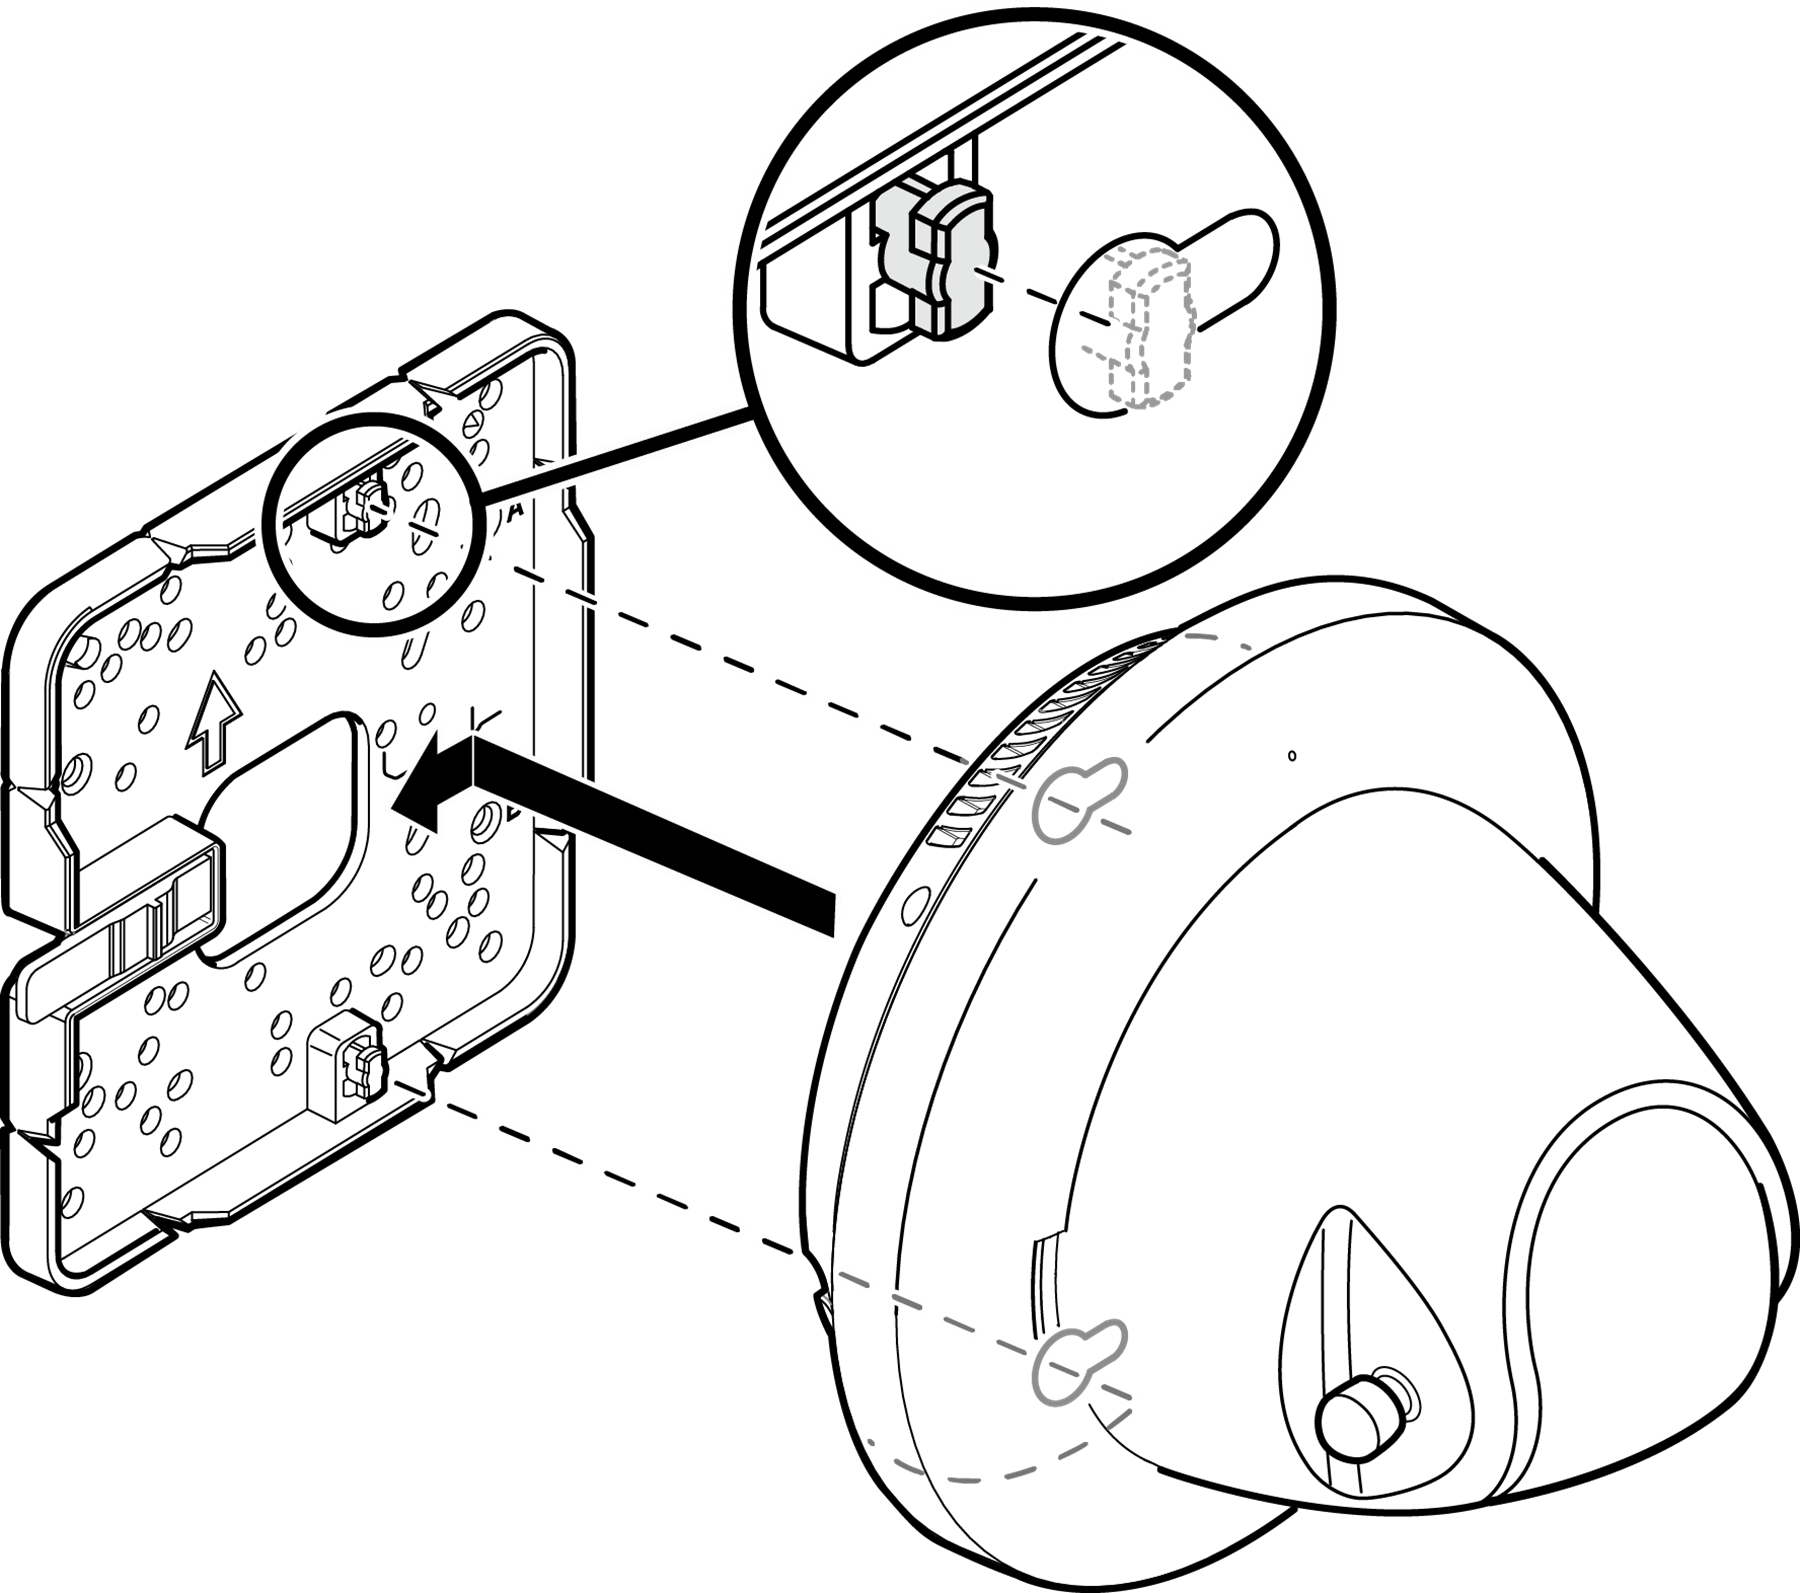
Mounting to a Flat Ceiling, Wall, or Junction/Gang Box

Mounting the AP to a flat ceiling, wall, or junction/gang box requires the WS-MBI-WALL04 bracket, which must be purchased separately.
Note

Note

If you are not installing on a double wide junction/gang box, then you can optionally break off the four corners along the cut lines.
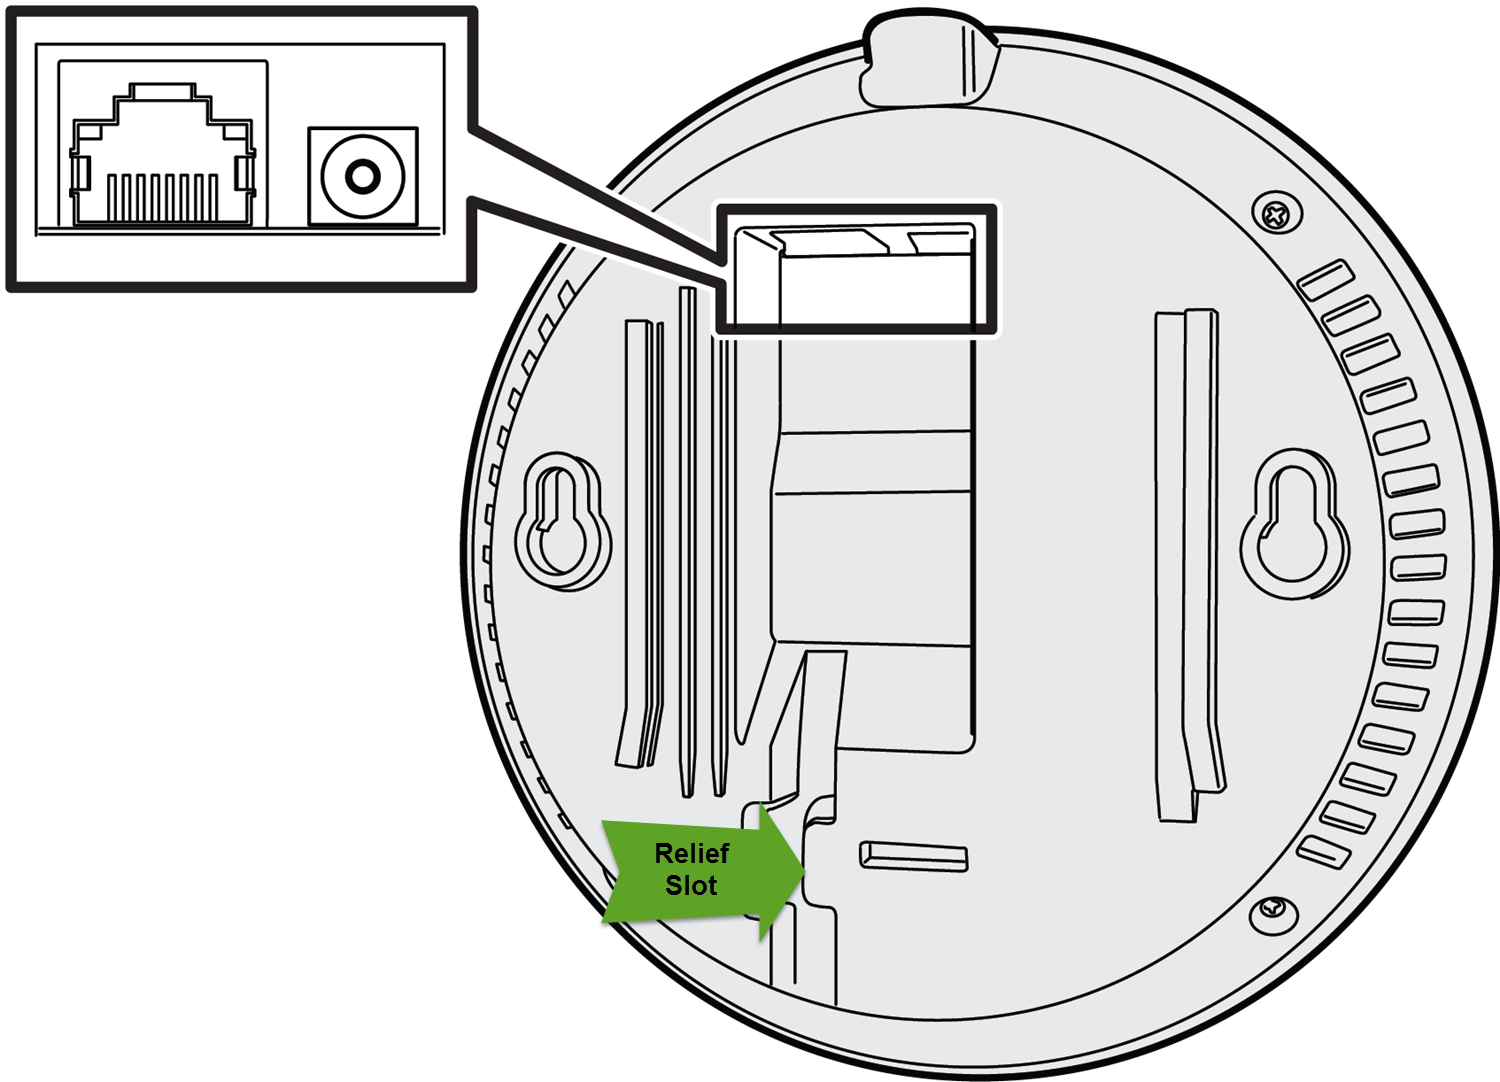
  1. Install the WS-MBI-WALL04 onto a wall, junction/gang box, or ceiling with 2 or 4 screws. The 2 screws should be as far apart as possible and must be on opposite sides of the large opening in the approximate center.
    Click to expand in new window
    WS-MBI-WALL04 Bracket
    _Graphics/AP3916_ins_WALL-04_to_wall_resized.png
    • If attaching the bracket to a plaster wall, or ceiling, it is recommended to use the holes marked “A” or “B” along with screw-in type anchors.
    • If attaching the bracket to junction/gang box, it is recommended to use pan-head machine screws.
  2. Connect the LAN/Ethernet cable (and power supply cable, if applicable) to the back of the AP and then insert the cables into the cable holding/strain relief slot.
    Click to expand in new window
    Rear View of AP
    _Graphics/AP3961i_rear_features-new2.png
    Item Description
    _Graphics/LAN.png LAN Ethernet Port
    _Graphics/DC.png External Power DC 12V Connector
  3. Align, and insert, the 2 keyhole receptacles on the AP3916ic with the 2 keyhole posts on the WS-MBI-WALL04.
    Click to expand in new window
    Attaching AP to Wall Bracket
    _Graphics/AP3916_install_to_WALL-04_brkt_resized.png
  4. Push the AP3916ic toward the left until the plastic locking mechanism clicks in place.
  5. Adjust the camera and set up the camera viewing software if desired.