Import and Place Controller Inventory
If you already have
ExtremeWireless or
ExtremeWireless WiNG APs, and a controller in your environment, you can
import a list of inventory. This action lets you manually place the existing APs and
guardians on the floor plan and view your coverage.

Note
If
you do not want to import controller inventory, skip this procedure and begin
with
Uploading a Floor Plan.
When you import inventory, the AutoPlace APs option is not
enabled. You must manually place your inventory.
To import inventory:
-
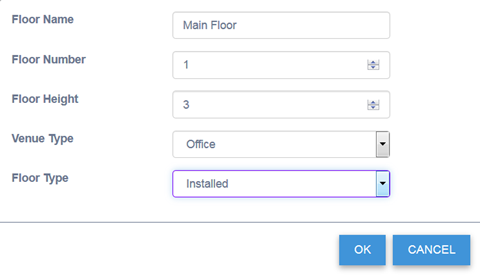
Clone or create a floor plan. In the Floor Plan dialog, set the floor type to Installed.
-
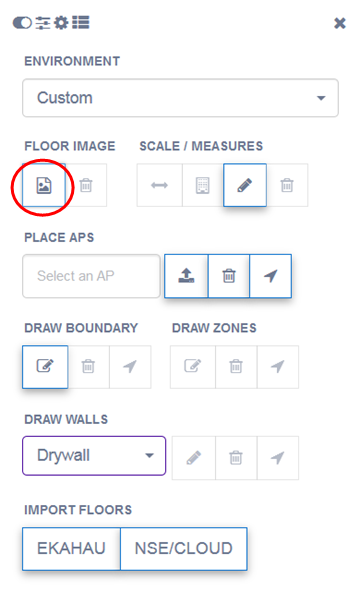
Select Draw Tools. Under
Floor Image, select
 .
.
Your file browser
opens.
-
Find and select your inventory XML file, and click
Open.
Your inventory is
uploaded.
-
Draw the boundary walls.
-
Draw the inner walls.
-
Click APs from the top menu. From the Select an AP/Guardian
drop-down list, select an inventory item and manually place it on the floor
plan. Repeat this step for each inventory item that you want to include in your
planning.
-
To clear the placement of inventory, click
Clear
APs/Guardians. From the pop-up menu, select whether to delete
everything, APs only, or Guardians only. You can also cancel the action.
-
To move an AP or Guardian to a different location
on the floor plan, select
 . Then select an item and drag it to a new
location.
. Then select an item and drag it to a new
location.
-
To view location readiness, click from the top menu.
-
To view a heat map, click . To view the channel map, click
Channels.
 Print
this page
Print
this page Email this topic
 Feedback
 View PDF
 Download EPUB