About this task
Ceiling mount requires holding the AP-8533 up against the T-bar of
a suspended ceiling grid and twisting the unit on to the T-bar. If deploying the
AP-8533 on a sculpted ceiling TBar, the Access Point mounting kit (Part No.
KT-135628-01) can optionally be used as well.
Procedure
- Install the mounting bracket on the T-bar, then
attach the mounting bracket using the mounting slots on the Access Point.
- To cable the access point using the Power Injector
solution (AP-PSBIAS-2P3-ATR), see Cabling the Access Point using Power Injector.
- To cable the access point using the approved AP-8533 power supply
(PWR-BGA48V45W0WW), seeCabling the Access Point using Power Adapter.

Caution
If not using an AP-PSBIAS-2P3-ATR
Power Injector, ensure only the AP-8533‘s designated power supply
(PWR-BGA48V45W0WW) is used to supply power to the Access Point. Using an
incorrectly rated power supply could damage the Access Point and void the
product warranty. Do not actually connect to the power source until the
cabling portion of the installation is complete.
- Verify the unit has power by observing the LEDs.
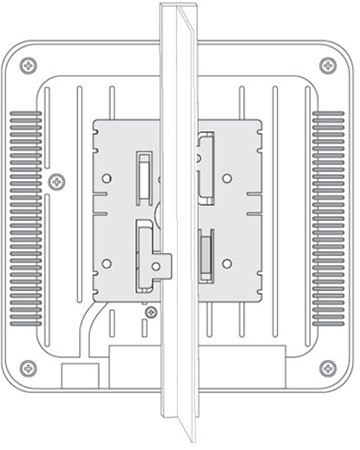
- Align the bottom of the ceiling T-bar with the back of the Access Point.
- Orient the Access Point chassis by its length and the length of the ceiling
T-bar.
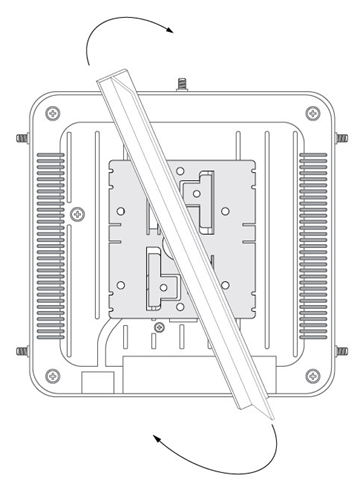
- Rotate the Access Point chassis 45 degrees clockwise.
- Push the back of the Access Point chassis on to the bottom of the ceiling
T-bar.
- Rotate the Access Point chassis 45 degrees counter-clockwise. The clips click
as they fasten to the T-bar.
The Access Point is ready to configure.