Synchronize Users and Groups with
Microsoft Entra ID
Before you begin
In the Universal ZTNAIdentity Providers window, from the Sync Users and User
Groups section, select and review the Setup
Guidelines.
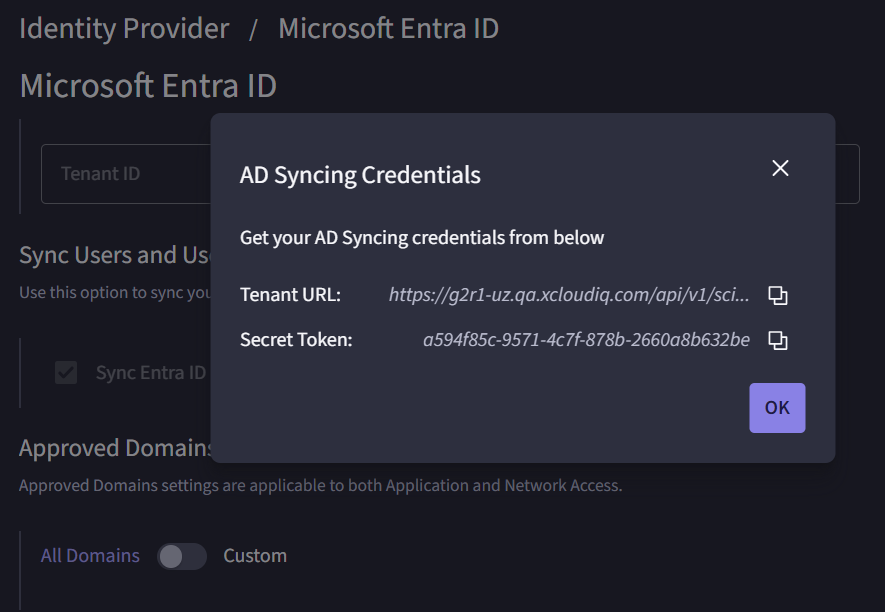
Take note of Tenant URL and Secret Token in Universal ZTNA.
About this task
To synchronize users and groups in Microsoft Entra ID, you must create a provisioning
application that will publish changes from Entra ID to Universal ZTNA. Use
this task to create the provisioning application and synchronize users and user
groups with Microsoft Entra ID.
Procedure
In Microsoft Entra ID, go to Manage > Enterprise
Applications.
Select New application
.
In the Browse Microsoft Entra
Gallery, select Create your own
application and configure application settings.
In the What's
the name of your app? field, enter an application name
that includes "Provisioning" so that it can be easily located.
Under What are
you looking to do with your application?, select the
Integrate
any other application you don't find in the gallery
(Non-gallery) radio button.
Go to Manage > Properties and configure properties.
Set both Assignment
Required and Visible to
Users to No.
Click Save.
Go to Manage > Provisioning and configure provisioning settings.
Change the Provisioning Mode to Automatic.
Expand Admin Credentials and enter the Tenant
URL and Secret Token noted from
Universal ZTNA.
On the Identity Providers
page in Universal ZTNA, select the Sync AD Users and User
Groups check box and configure settings.
In the Confirm AD Syncing dialog, select
Confirm.
Select Validate Information.
Select Update.
Update Identity
Provider dialog box appears.
Select Confirm.
A new dialog
appears with the Tenant URL and Secret token.
Copy the Tenant URL and Secret
token for use in the Microsoft Entra ID
application.
Enter the Tenant URL and Secret
token into the Microsoft Entra ID application and select
Test Connection. On the resulting success
message, select Save.
A Scope section is created.
Return to Manage > Enterprise Applicationsto the overview tab for the created provisioning application in
Microsoft Entra ID.
Return to Universal ZTNA,
select Sync all users
and groups from the Scope drop-down
list.
Under Provisioning
Status, select On.
Select Save.
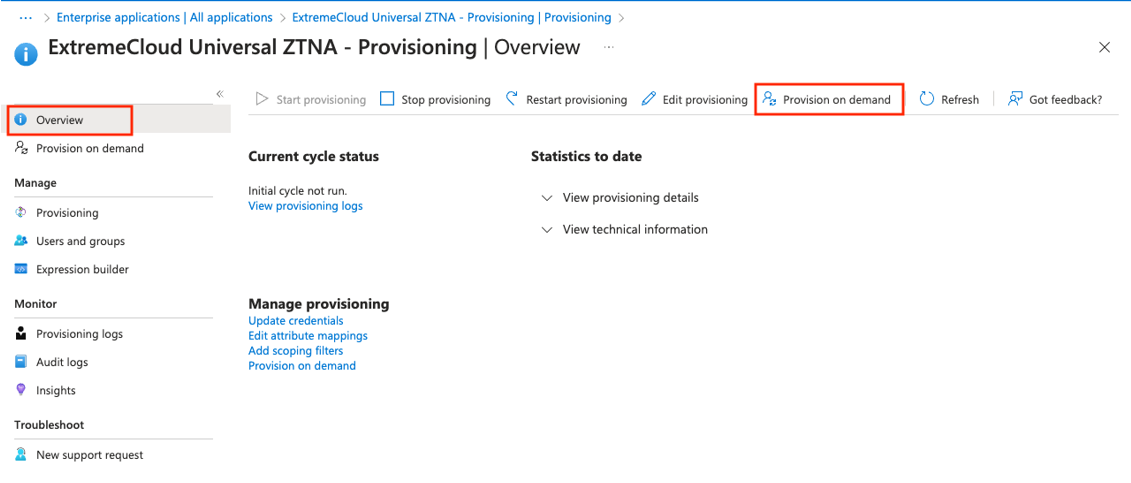
Provisioning can take up to an hour to start. Select Provision on Demand
from the
Provisioning Overview to start an immediate provisioning
cycle.
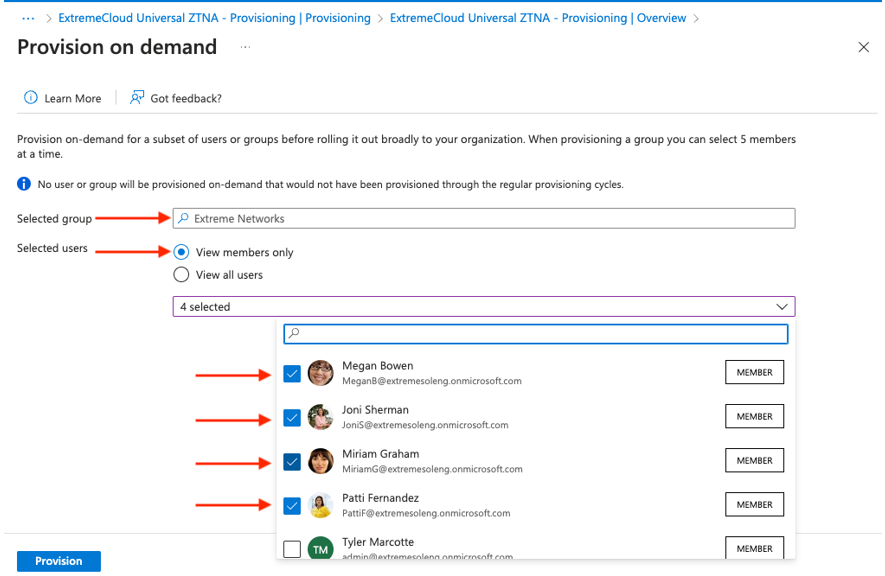
Select the group or users to
provision at that moment.
Optional: Once provisioning is complete,
review the logs for possible provisioning issues.
Results
In Universal ZTNA, the users and user groups are shown as synced.