 Print
this page
Print
this page Email this topic
 Feedback
 View PDF
 Download EPUB
Mounting to a Solid Wall with an Articulated Bracket
To mount to a solid wall:
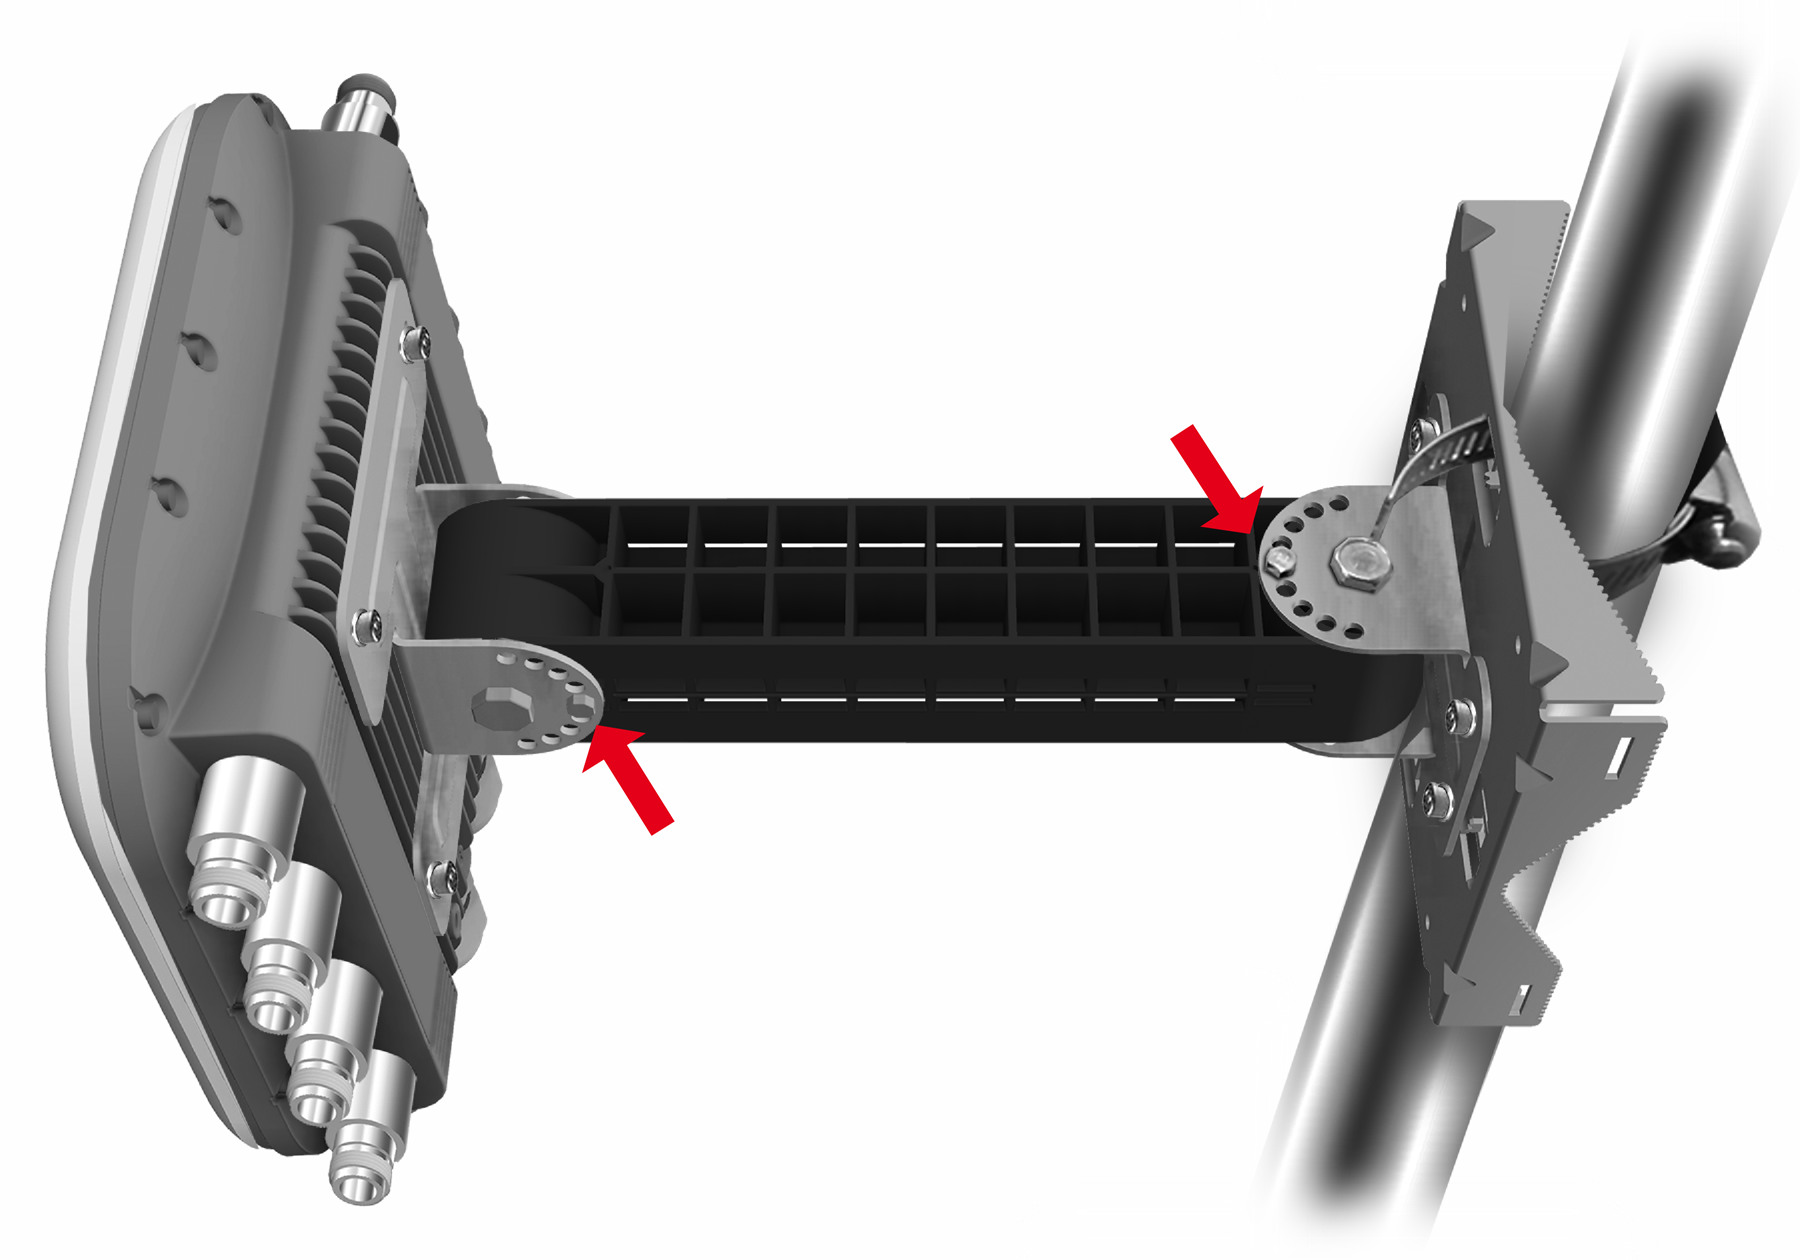
Articulating Mount (WS-MBO-ART01) for AP3965
-
Use the small bracket holes as a template to mark
the attachment holes in the wall, verifying that the AP orientation will be
upright with the black glands at the bottom.
Important
The wall must be strong enough to support the AP during inclement weather. - Select the proper drill bit and drill the four, marked holes.
- Use four strong screws and anchors to attach the small bracket to the wall. Torque the screws and bolts to a minimum of 24 in-lbs., with a maximum of 65 in-lbs.
- Attach the AP to the large bracket with four M4 screws. Torque the screws to 12.0 in-lbs.
- If the AP needs to be tilted up or down, remove the screw (see red arrows in previous figure) and tilt the AP to the desired angle. Re-insert the screw into the center hole in the black part of WS-MBO-ART01. Torque the screw and nut to 12 in-lbs.
- If the AP needs to be turned sideways, remove the screw (see red arrows in previous figure) and tilt the AP to the desired angle. Re-insert the screw into the center hole in the black part of WS-MBO-ART01. Torque the screw and nut to 12 in-lbs.
- Remove the black gland cap and the gasket under it. Then separate the gasket from its plastic cage.
- Attach the gland parts to the LAN cables and insert the LAN cables into the mating connectors in the AP. For more information, see Attaching Antennas.
- Hand tighten the gland nuts and then tighten the nuts to a torque of 10 in-lbs.
- Dress (adjust) the LAN and ground wires.