 Print
this page
Print
this page Email this topic
 Feedback
 View PDF
 Download EPUB
Mounting to a Pole with an Articulated Bracket
To attach the AP3965 and articulating mount to a pole:
Articulating Mount (WS-MBO-ART01) for AP3965
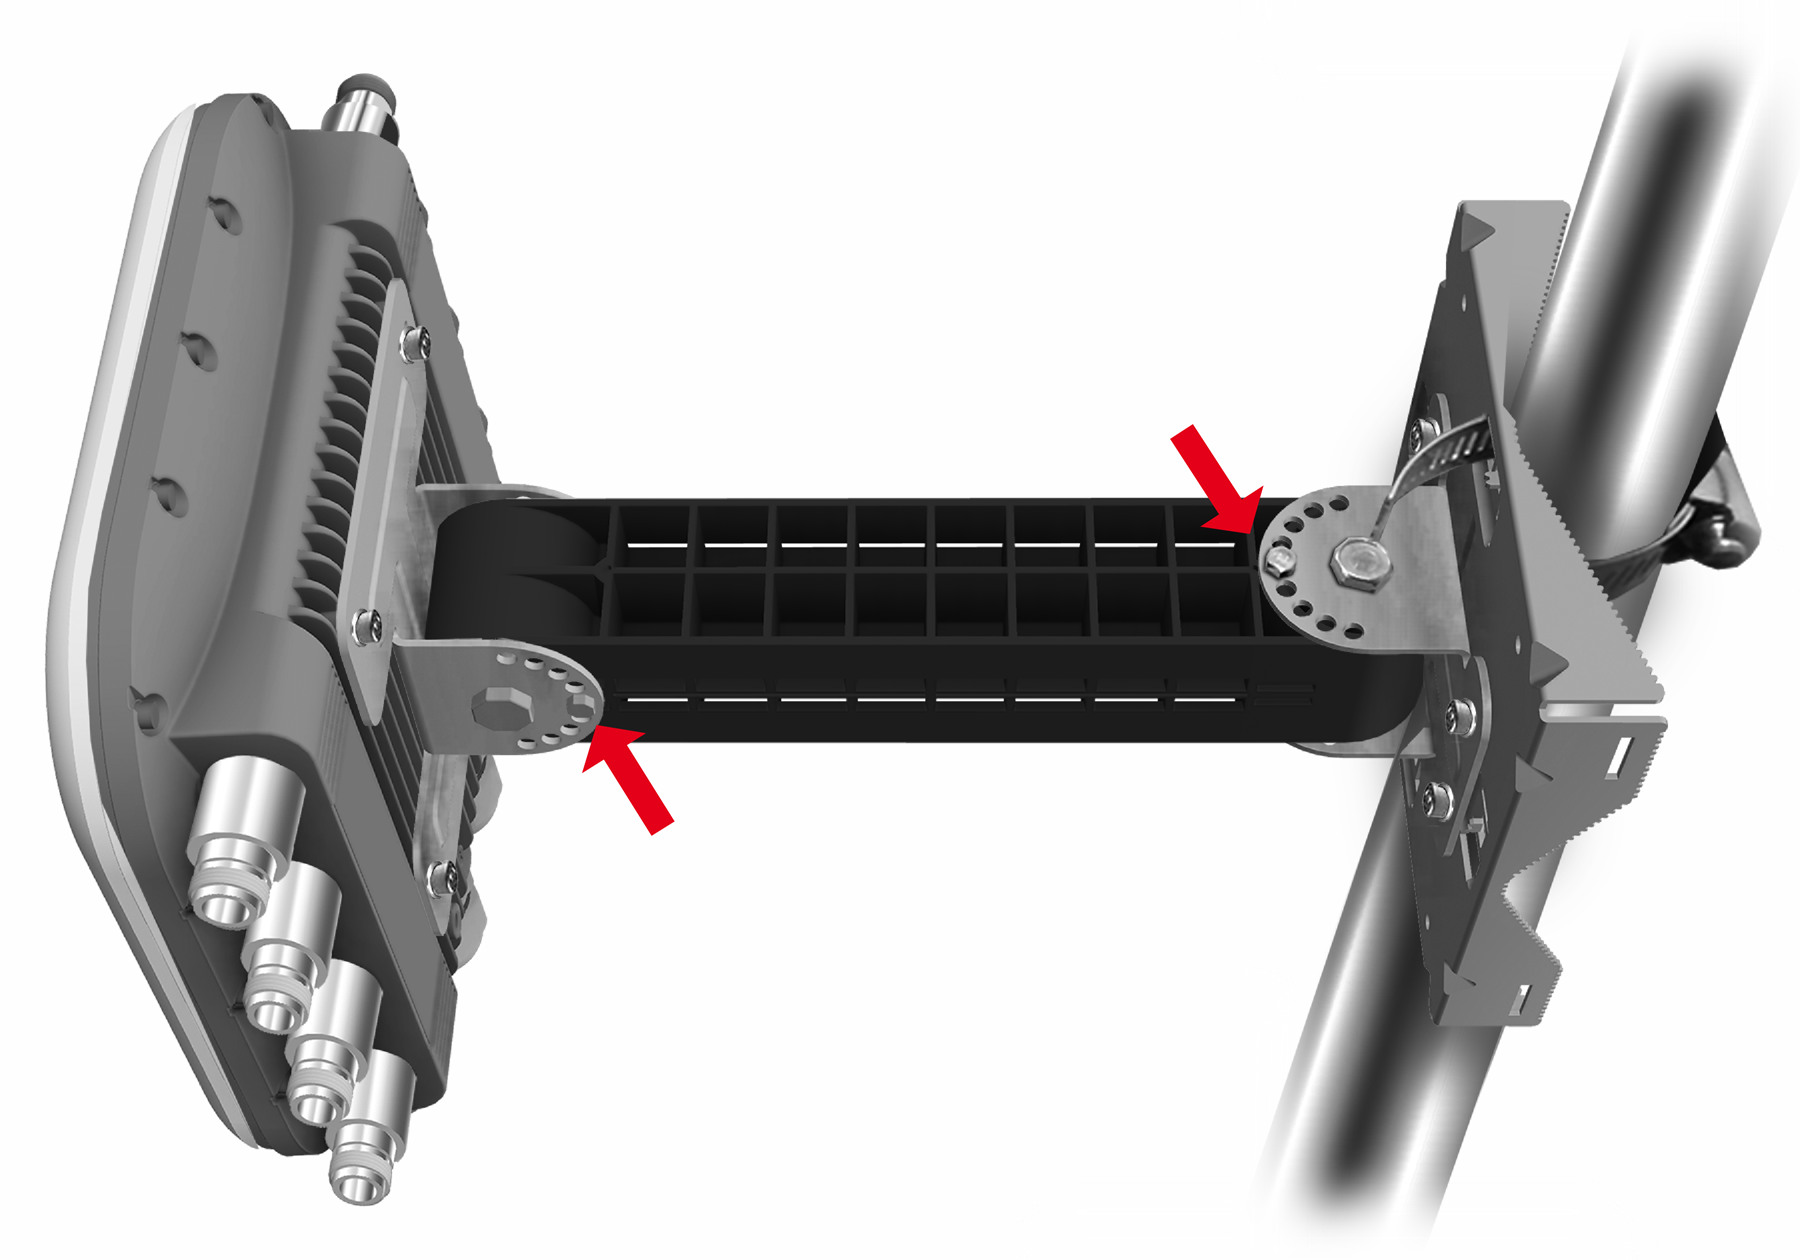
- Attach the small bracket on the WS-MBO-ART01 to the pole bracket with four M4 screws, verifying that the AP orientation will be upright before you tighten the brackets screws. Torque the screws to 12 in-lbs.
- Insert two cable/pipe clamps into the pole bracket. Attach the clamps to the pole where desired. Torque the clamp screws to 12 in-lbs.
- Attach the AP to the large bracket with four M4 screws. Torque the screws to 12.0 in-lbs.
- If the AP needs to be tilted up or down, remove the screw (see red arrows in previous figure) and tilt the AP to the desired angle. Re-insert the screw into the center hole in the black part of WS-MBO-ART01. Torque the screw and nut to 12 in-lbs.
- If the AP needs to be turned sideways, remove the screw (see red arrows in previous figure) and tilt the AP to the desired angle. Re-insert the screw into the center hole in the black part of WS-MBO-ART01. Torque the screw and nut to 12 in-lbs.
- Remove the black gland cap and the gasket under it. Then separate the gasket from its plastic cage.
- Attach the gland parts to the LAN cables and insert the LAN cables into the mating connectors in the AP. For more information, see Attaching Antennas.
- Hand tighten the gland nuts and then tighten the nuts to a torque of 10 in-lbs.
- Dress (adjust) the LAN and ground wires.