Mount the AP onto a wall using the Main
Mounting Bracket and the Flat Metal Easy-Attach adaptor
About this task
The access point can also be mounted onto a
wall or a solid flat ceiling by attaching a flat metal easy-attach adaptor to the main
mounting bracket. The flat metal easy-attach adaptor (#37210) must be purchased
separately.
Procedure
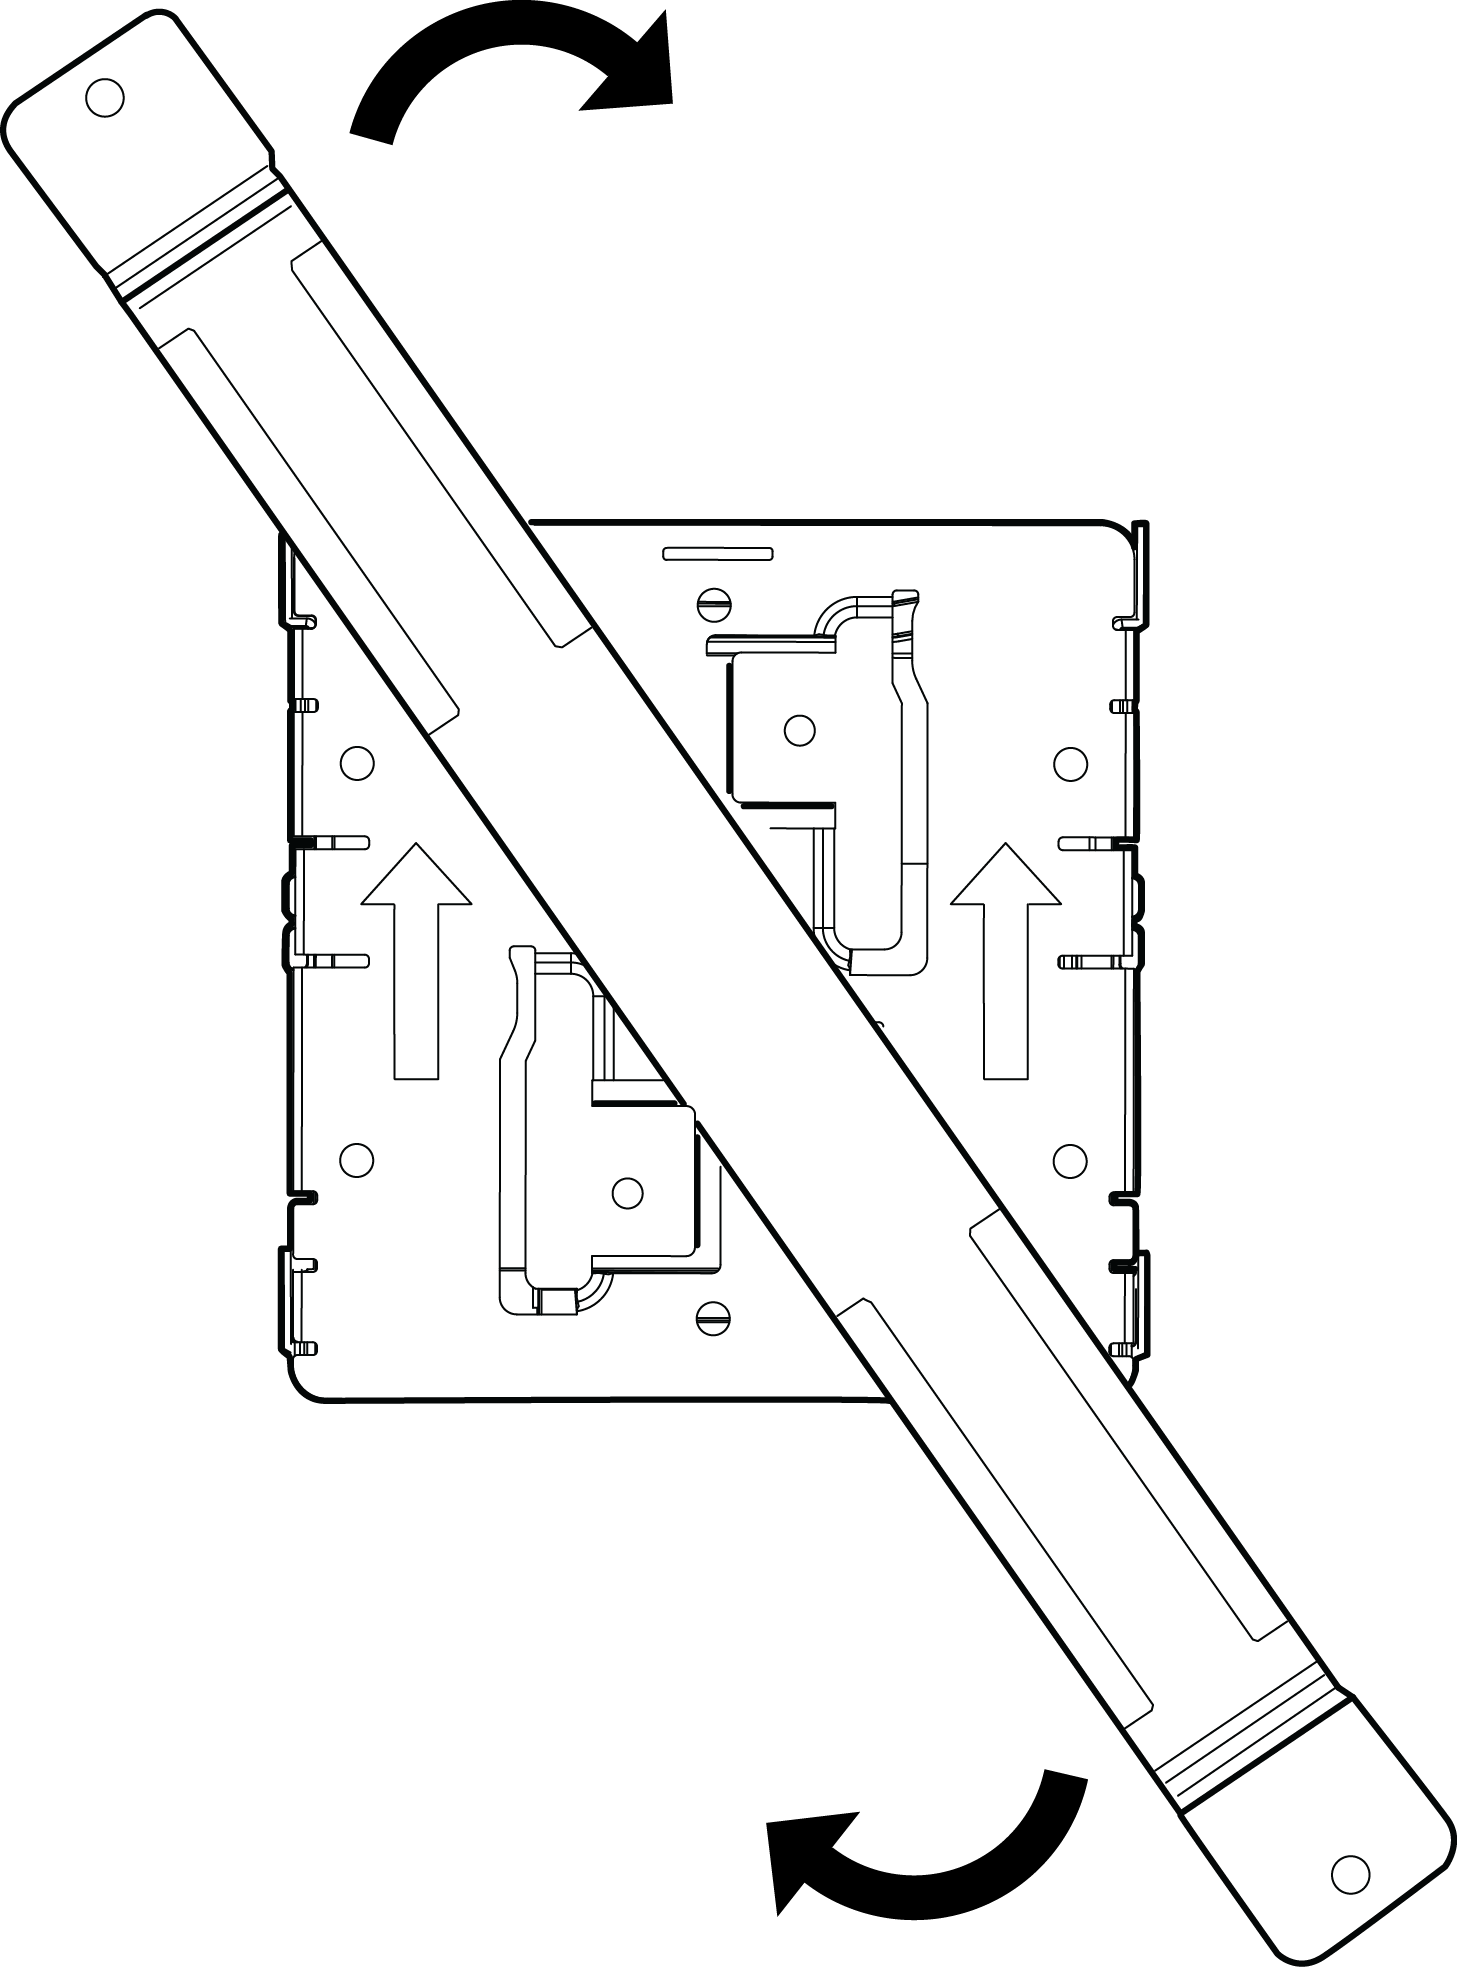
Attach the flat metal easy-attach
adaptor to the main mounting bracket. Keep the easy-attach adaptor to the center of the
main mounting bracket's hinges, push and rotate it.
Attaching the optional flat metal
easy-attach adaptor to the main mounting bracket
Use the easy-attach adaptor's end holes
as a template to mark the attachment holes.
Drill two holes on the wall where you
want to mount the access point.
Attach the main mounting bracket with the easy-attach adaptor to the access
point.
Connect the LAN cable to the back of the
access point.
Hold the access point to the wall,
insert the two screws onto the mounting holes of the flat metal easy-attach adaptor.
Tighten the two screws until you lock it into place.