ExtremeWireless™ AP510e
>
Install the Access Point
>
Mount to a Suspended/Drop Ceiling
> Mounting the access point using the WS-MBI-DCFLUSH Bracket to a flat T-bar
Published April 2023
Search this document
Print this page
Email this page
View PDF
Previous
Next
Preface
Text Conventions
Providing Feedback to Us
Getting Help
Documentation and Training
Overview
New in this Guide
AP510e Features
AP510e Powering Methods
AP510e LEDs Status
Install the Access Point
Verify the Box Contents
Mount and Connect the AP
Mounting Brackets and Accessories Usage
Mount the AP on a Dry or Wood Wall/Solid Flat Ceiling
Mount the access point to a wall using the Main Mounting Bracket
Install a Security Torx Locking Screw
Mount the AP to a wall using the WS-MBI-WALL04 bracket
Mount the AP onto a wall using the Main Mounting Bracket and the Flat Metal Easy-Attach adaptor
Mount the access point to a wall using the Phillips pan-head screws
Mount to a Suspended/Drop Ceiling
Mount the access point using the Main Mounting Bracket to a Flat T-bar
Mounting the access point using the Main Mounting Bracket with KT-135628-01 adaptor to a flat T-bar
Mounting the access point using the WS-MBI-DCFLUSH Bracket to a flat T-bar
Mounting the AP using the WS-MBI-DCMTR01 Bracket
Mount the AP to a Junction/Gang box
Mount the access point to a Beam
Install the AIO-DQ15021-RPSMA Antenna
Antenna Information
Supported Antennas
Operational Description of Antenna Configuration and RF Output Power Setting
Antenna configurations for external antenna models
AP510e Antenna Information
Specifications
Regulatory and Compliance Information
Safety Guidelines
FCC Declaration of Conformity Statement
FCC Radiation Exposure Statement
FCC OEM Integrator Note
Industry Canada Notice
Detachable Antenna Usage
Korea BLE Antennas Support
Supplement to Product Instructions
NCC Statement
Brazil Agência Nacional De Telecomunicações (Anatel) Statement
MPE Distance - Mobile Devices
CE Statement
European Waste Electrical and Electronic Equipment (WEEE) Notice
Hazardous Substances
Declaration of Conformity in Languages of the European Community
Mounting the access point using the WS-MBI-DCFLUSH Bracket to a flat T-bar
About this task
The optional WS-MBI-DCFLUSH (#37211) bracket is used for T-bar installations without the main mounting bracket.
Pre-Installation checklist:
T-bar width must be 9/16” (15 mm), 15/16” (24mm), 1.5” (38 mm).
T-bar bottom must be flat all the way across.
T-bar minimum base thickness: N/A; must be structurally sound.
T-bar maximum base thickness is 0.080” (2mm).
Ceiling tile must be flat all the way across.
Maximum ceiling tile protrusion allowed is 0.015” (0.38 mm).
Procedure
Remove the ceiling panels around the drop ceiling T-bar rail.
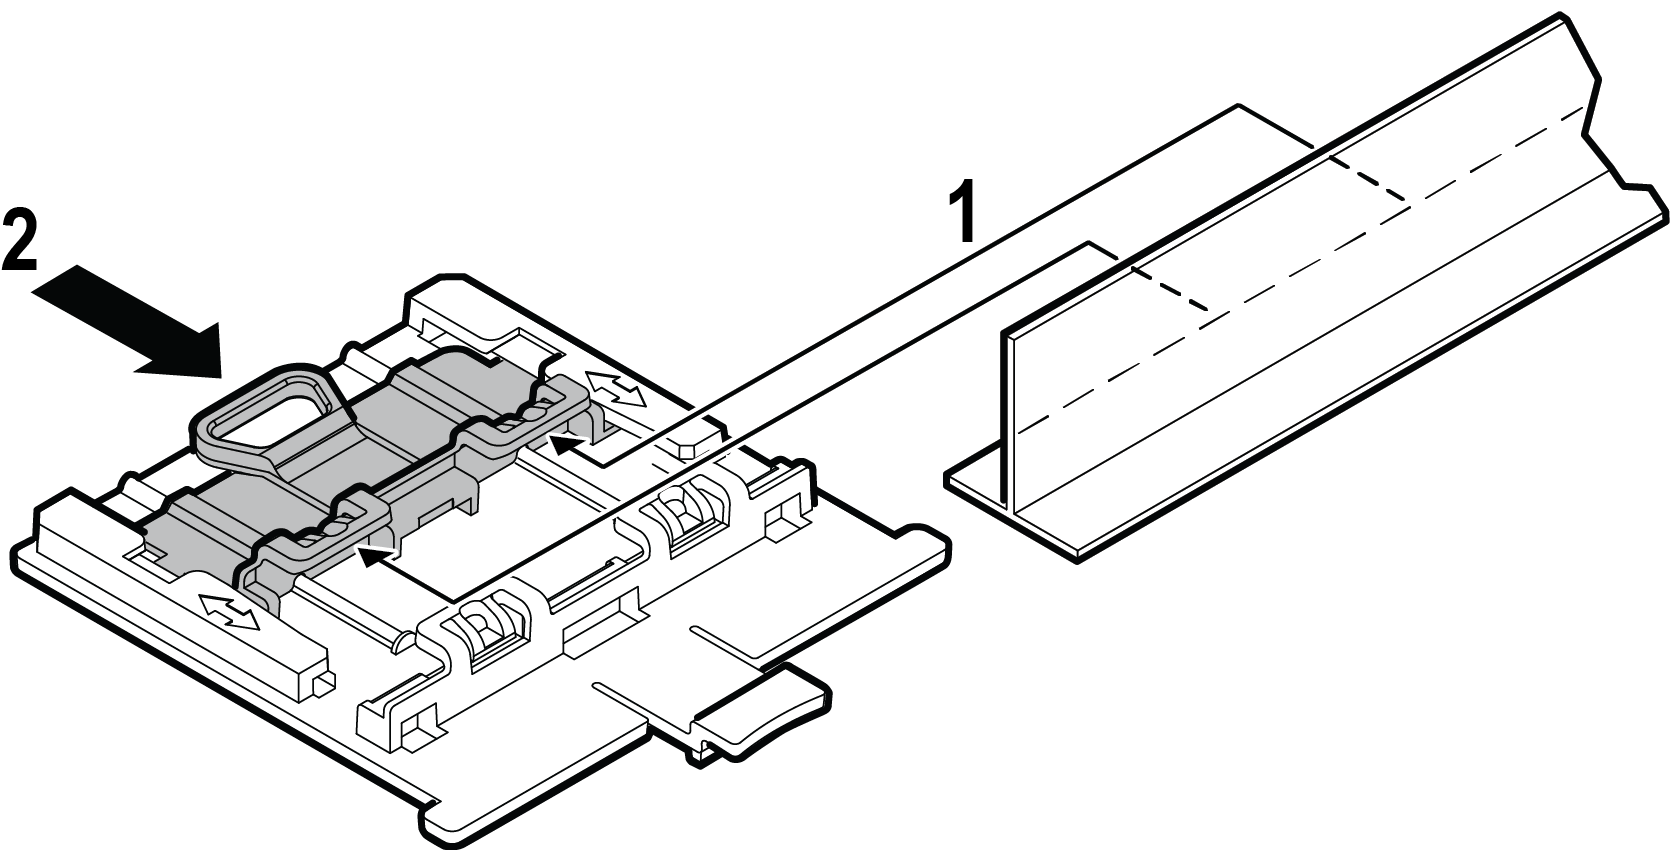
Open the movable sliding part of the DCFLUSH bracket to give the stationary and slider T-bar more space.
DCFLUSH bracket parts
Label
Description
1
T-bar
2
Movable sliding part of the DCFLUSH bracket
Hook the stationary end of the DCFLUSH bracket onto the T-bar.
Tilt the T-bar up slightly in such a way that you are holding the stationary and movable sides of the bracket.
Squeeze the bracket parts together until you hear the T-bar locking tab click into place.
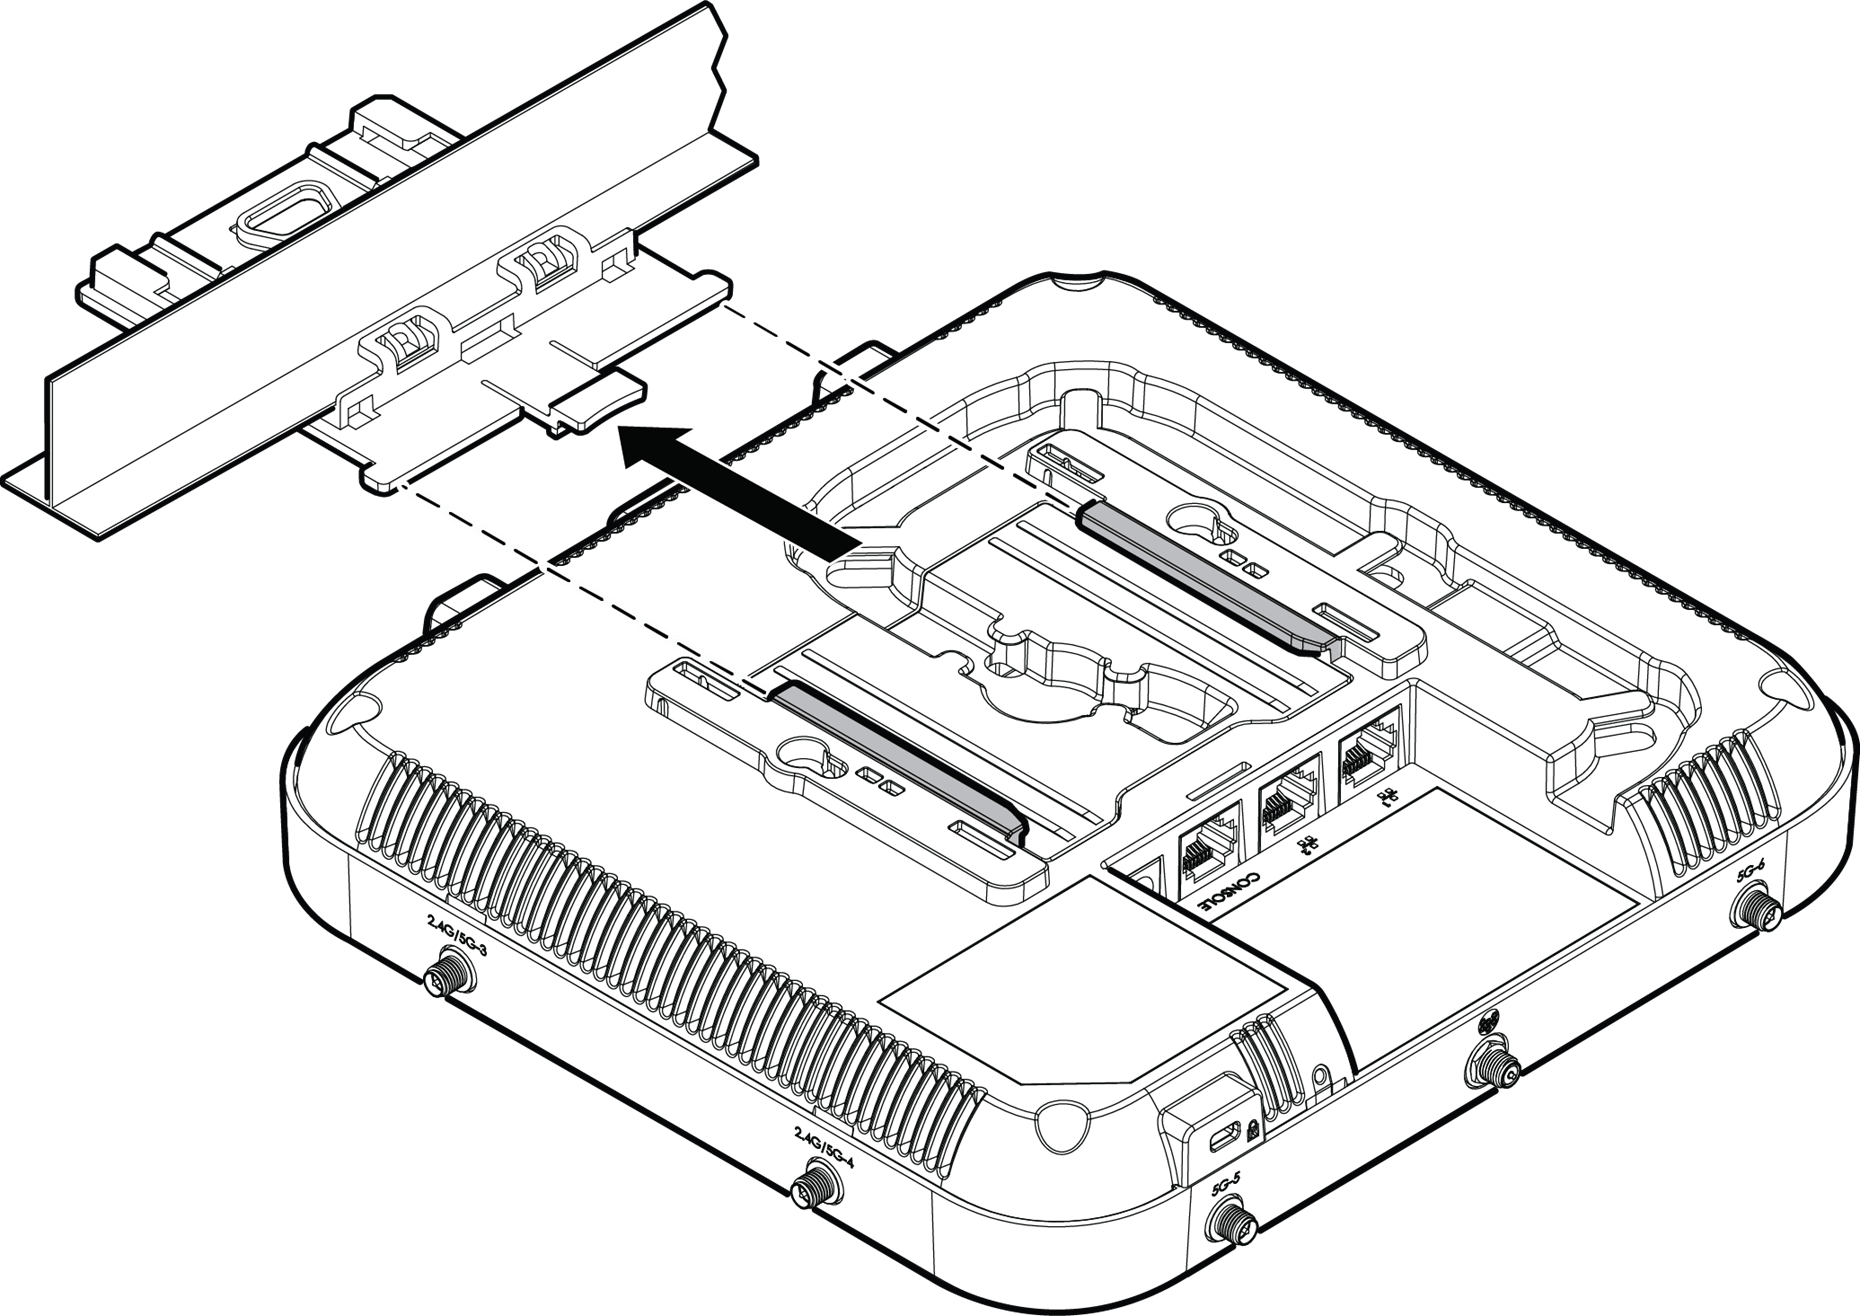
Slide the T-bar ceiling mount bracket base into the back of the access point.
The locking tab fits into a groove in the outside of the access point.
Attaching the DCFLUSH bracket to the access point
Hold the access point and rock it back and forth to ensure that it is securely mounted.
Attach the Ethernet cable‘s RJ45 connector to the LAN1 port.
Place the ceiling tile back in place.