VSP 4900 Series switches support the following power supplies:
The 350 W AC power supplies (part numbers XN-ACPWR-350W-FB and 10953) provide front-to-back airflow and are compatible with VSP4900-24S and VSP4900-24XE switches that have the same airflow direction as the power supplies.
The 715 W AC power supplies (part numbers XN-ACPWR-715W-FB and 10951) provide front-to-back airflow and are compatible with VSP4900-48P and VSP4900-12MXU-12XE switches that have the same airflow direction as the power supplies.
The 1100 W AC power supplies (part numbers XN-ACPWR-1100W-FB and 10941) provide front-to-back airflow and are compatible with VSP4900-48P and VSP4900-12MXU-12XE switches that have the same airflow direction as the power supplies.
The 2000 W AC power supplies (part numbers XN-ACPWR-2000W-FB and XN-ACPWR-2000W-F) provide front-to-back airflow) and are compatible with VSP4900-48P and VSP4900-12MXU-12XE switches that have the same airflow direction as the power supplies.
Warning
Be sure to disconnect all power cables before you disconnect the chassis ground wire.
Warning
Make sure that the AC power supply circuit is not overloaded. Use proper over-current protection, such as a circuit-breaker, to prevent over-current conditions.
Pre-Installation Requirements
You need the following tools and materials to replace a power supply:
Thermal protective gloves
AC power cord, if you are not re-using the cord from the removed power supply
Use the following instructions to remove and replace a power supply in the switch.
Remove a Power Supply
Caution
Disconnect the AC power cord from the wall outlet and from the power supply before removing an AC power supply.
Use the following instructions to remove a power supply.
Attach an ESD-preventive wrist strap to your bare wrist and connect the metal end to an appropriate ground point on the rack.
Caution
Power supplies can become very hot during operation. Wear thermal protective gloves when you remove a power supply from an operating switch.
Note the orientation and the airflow direction of the installed power supply, and the location of the latching tab on the power supply.
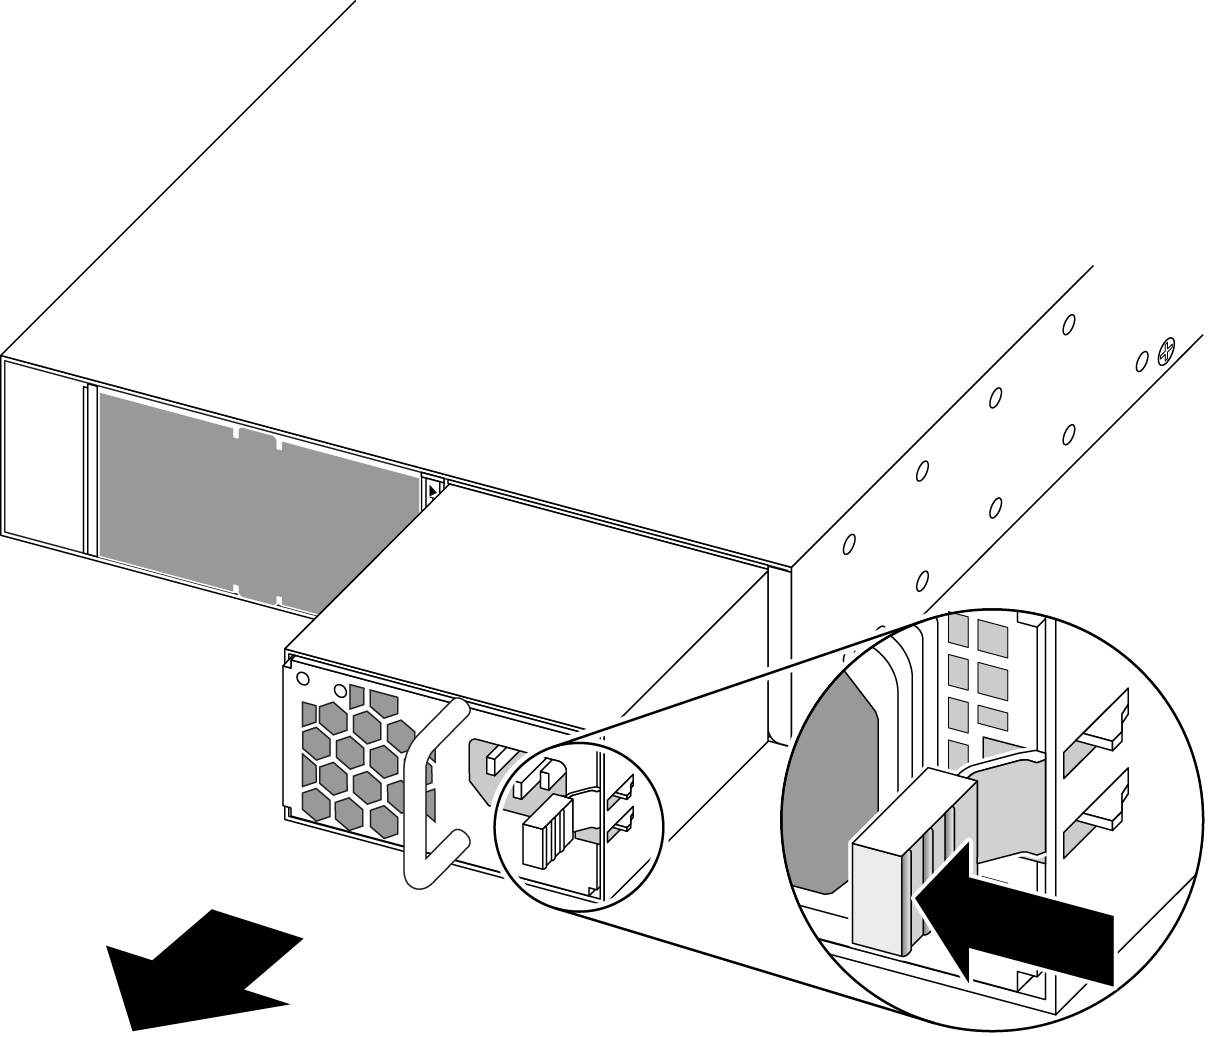
Push the latching tab toward the power supply handle and pull outward on the handle to disengage the power supply internal connectors.
Remove a Power Supply
Carefully slide the power supply the rest of the way out of the switch.
Note
If you are not installing a replacement power supply, install a cover over the unoccupied power supply bay. Unoccupied bays must always be covered to maintain proper system ventilation and EMI levels.
Replace or Install a Power Supply
Use the following instructions to replace or install a power supply.
Attach an ESD-preventive wrist strap to your bare wrist and connect the metal end to an appropriate ground point on the rack.
If necessary, remove a blank panel from the back of the switch.
Ensure that the orientation of the power supply is correct, and that the new power supply's airflow direction (front-to-back or back-to-front) is compatible with the installed fan modules and any other installed power supplies.
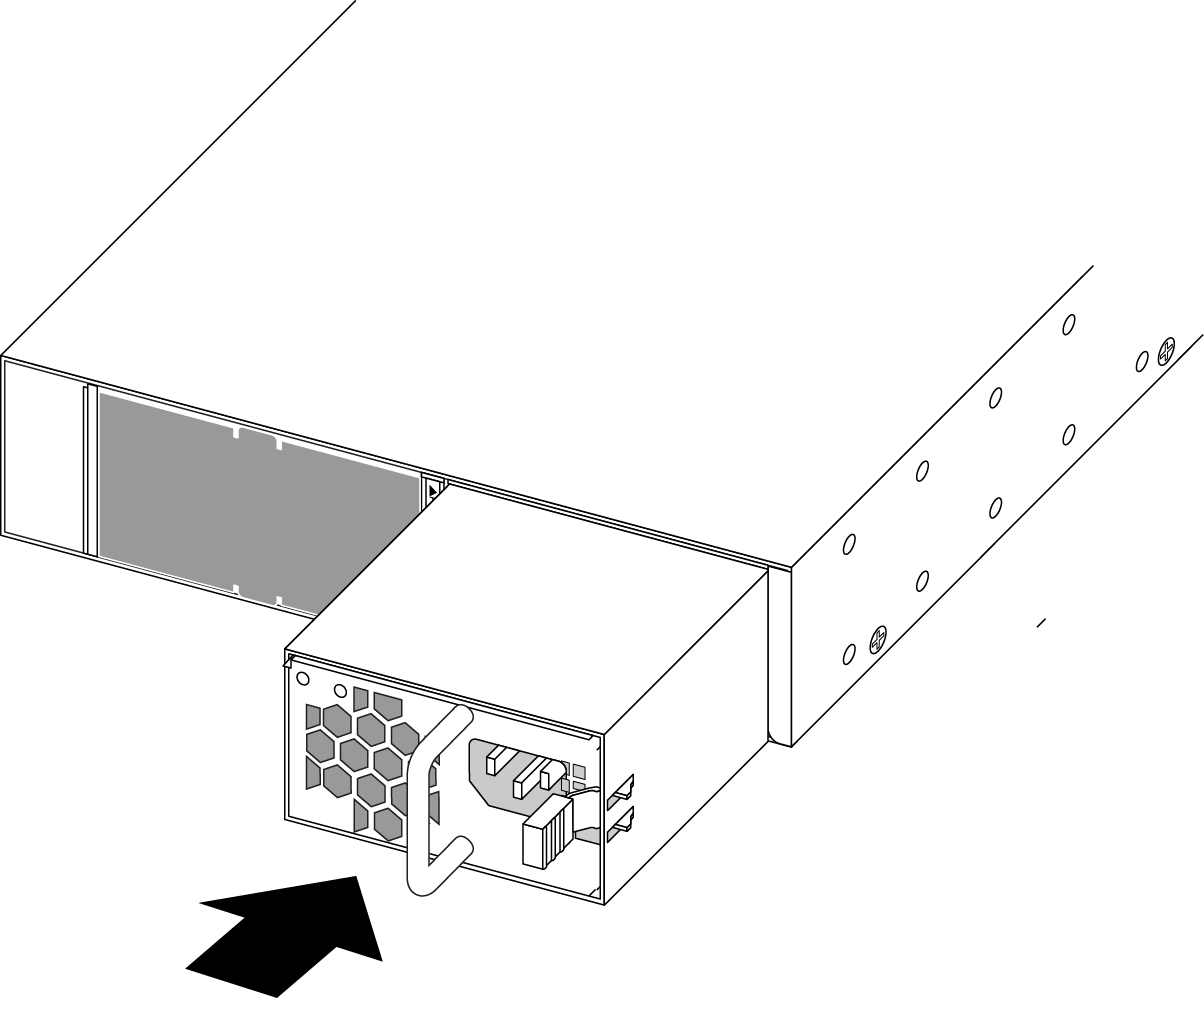
Carefully slide the power supply all the way into the power supply slot.
Install a Power Supply
Push the power supply in until the latch snaps into place.
Do not slam the power supply into the switch.
Note
Be sure to install a cover over any unoccupied power supply slots. Unoccupied power supply slots must always be covered to maintain proper system ventilation and EMI levels.
To install or replace a second power supply repeat this procedure.
After installing an AC power supply, connect the power cord to the power supply and to a grounded AC power outlet.
Warning
Always make sure that the source outlet is properly grounded before plugging the AC power cord into the AC power supply.
If the power supply is equipped with a power cord retainer, use the retainer to secure the power cord to the power supply.