VSP 4900 Series switches support the following VIMs:
VIM5-4X versatile interface module that provides four 10-GbE (SFP+) ports.
VIM5-4XE versatile interface module that provides four 10-GbE (SFP+) ports, LRM/MACsec capable.
VIM5-2Y versatile interface module that provides two 25-GbE (SFP28) ports.
VIM5-4Y versatile interface modulethat provides four 25-GbE (SFP28) ports.
VIM5-4YE versatile interface module that provides four 25-GbE (SFP28) MACsec capable ports.
VIM5-2Q versatile interface module that provides two 40-GbE (QSFP) ports.
You need the following tools and materials to install a VIM module:
ESD-preventive wrist strap
Phillips head screwdriver
Warning
VIMs are not hot-swappable. Disconnect power to the switch before removing an installed VIM and installing a new one.
Remove a VIM module
Use the following instructions to remove a VIM module.
Attach the ESD wrist strap to your wrist and connect the metal end to an appropriate ground point on the rack.
Ensure that the switch is completely powered down.
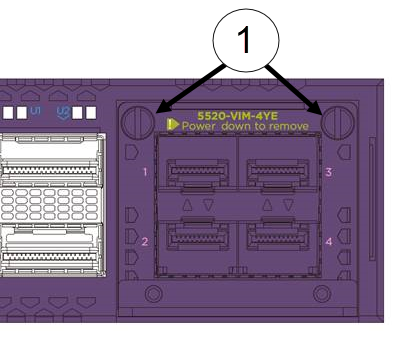
Remove the screws that secure the VIM module in the VIM slot using the Phillips head screwdriver. Save the retaining screws to secure the new VIM module in the switch.
VIM Module Inserted in Slot
1 = VIM module retaining screw locations
Slide the VIM module out of the VIM slot and set it aside.
Replace a VIM module
Use the following instructions to replace a VIM module.
Attach the ESD wrist strap to your wrist and connect the metal end to an appropriate ground point on the rack.
Ensure that the switch is completely powered down.
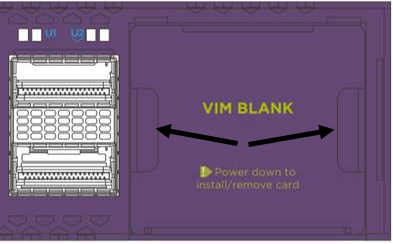
Remove the VIM cover (if necessary). Squeeze the sides to release the plate, and pull down from the top to open. The plate will remain attached at the bottom.
Removing a slot Cover Plate (VIM slot cover shown)
1 = VIM cover locations to squeeze
Remove the new VIM module from its anti-static packaging.
Install the VIM module in the switch:
Carefully slide the VIM module into the switch.
Insert and tighten the retaining screws you previously removed, using the Phillips head screwdriver.