VSP 4900 Series switches support the XN-SSD-001-120 solid-state drive.
You need the following tools and materials to install an SSD module:
ESD-preventive wrist strap
#2 Phillips head screwdriver
Warning
SSD modules are not hot- swappable. To prevent damage to the switch or SSD module, the switch must be powered OFF when removing or installing SSD modules.
Remove an SSD
Attach the ESD wrist strap to your wrist and connect the metal end to an appropriate ground point on the rack.
Ensure that the switch is completely powered down.
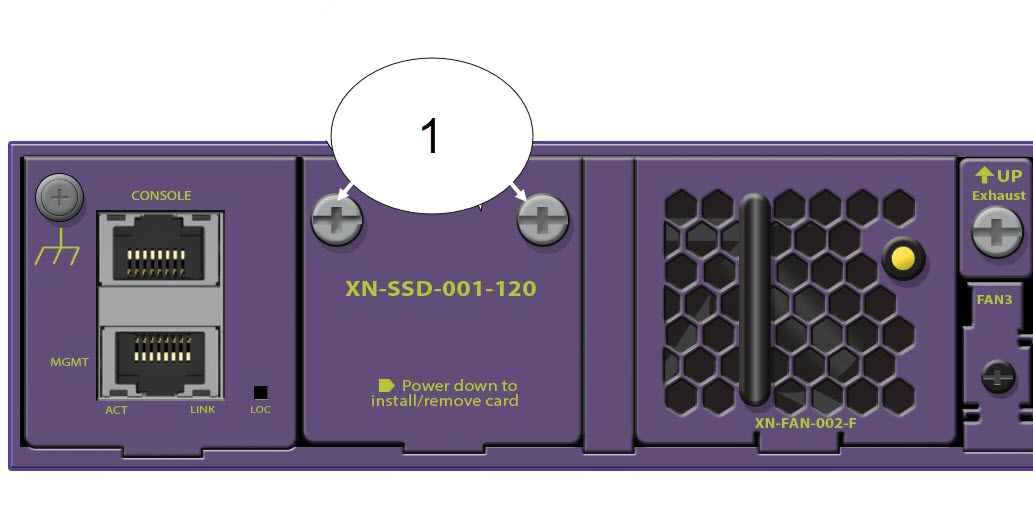
Remove the screws that secure the SSD module in the SSD slot in the rear of the switch using the #2 Phillips head screwdriver. Save the retaining screws to secure the new SSD module in the switch.
SSD Module Inserted in Slot
1 = SSD blank retaining screw location
Slide the SSD module out of the SSD slot and set it aside.
Replace an SSD
Attach the ESD wrist strap to your wrist and connect the metal end to an appropriate ground point on the rack.
Ensure that the switch is completely powered down.
Remove the rear panel SSD cover (if necessary) by removing the screws that hold the SSD cover over the SSD module slot, using the #2 Phillips head screwdriver.
SSD Cover
1 = SSD cover retaining screw location
Remove the new SSD module from its packaging.
Install the SSD module in the switch:
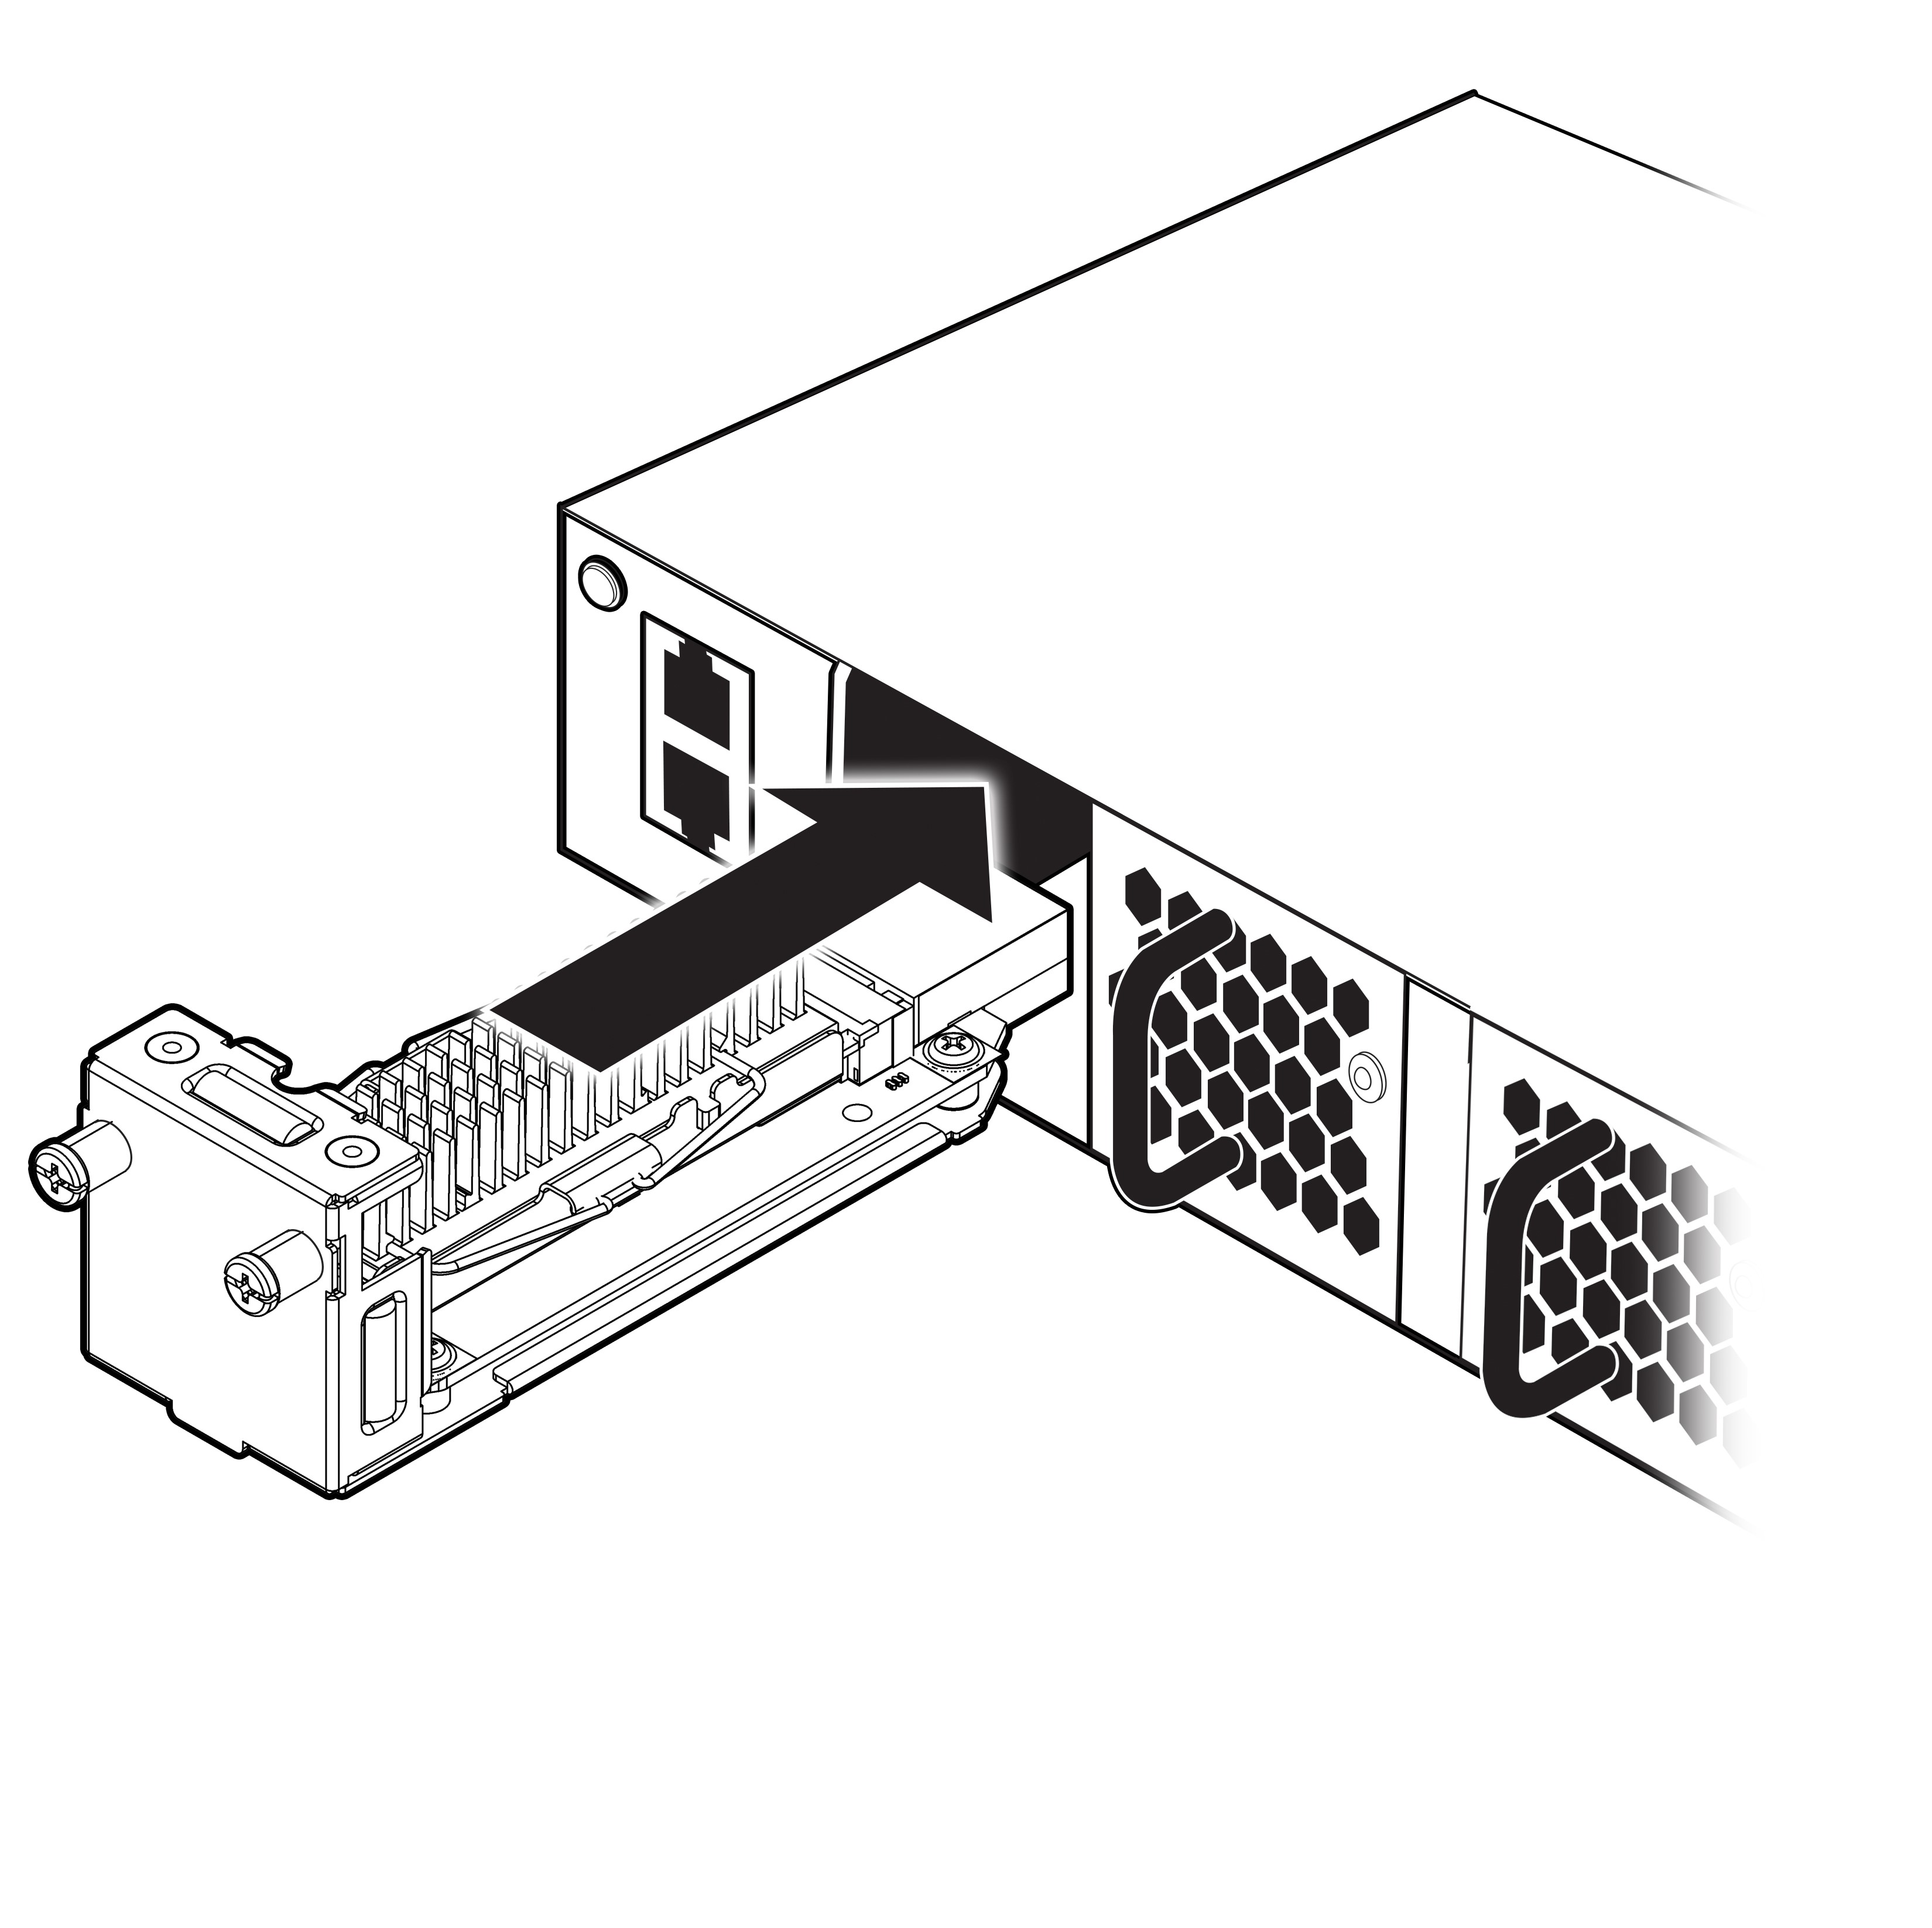
Carefully slide the SSD module into the slot on the rear panel until it is firmly in place.
Insert and tighten the retaining screws you previously removed, using the Phillips head screwdriver.