Installing a Clock Module
Before you install the clock module on the E4G-200 router, have
the following items on hand:
- ESD-preventive wrist strap
- #1 Phillips screwdriver
You can install a clock module without powering down the router.
However, you will need to reboot the router to initialize the newly installed clock
module.

Note
The router might reboot itself when the installation is complete. Because of this,
we recommend that you perform the installation during off-peak hours.
-
Attach an ESD-preventive wrist strap to your bare
wrist and connect the metal end to an appropriate ground point on
the rack.
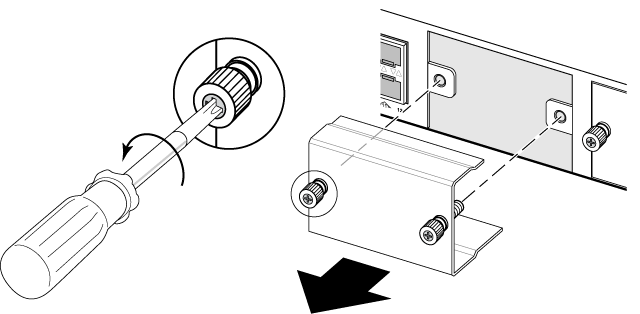
-
On the front panel of the E4G-200 router, loosen
the screws that hold the cover on the clock module slot.
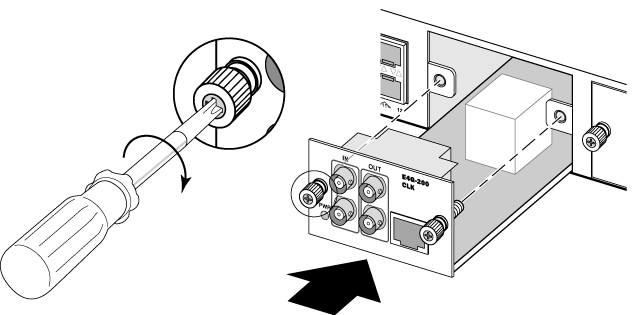
-
Align the clock module with the card guides and
carefully slide the module all the way into the slot.
-
Align and securely tighten the retaining screws as
shown in the following figure.
Installing a Clock Module
-
To initialize the clock module, reboot the router.
Save the slot cover to re-use in case you remove the clock module
later. An unoccupied module slot must be covered to ensure satisfactory EMI levels
and to maintain adequate airflow through the router.
 Print
this page
Print
this page Email this topic
 Feedback
 View PDF
 Download EPUB