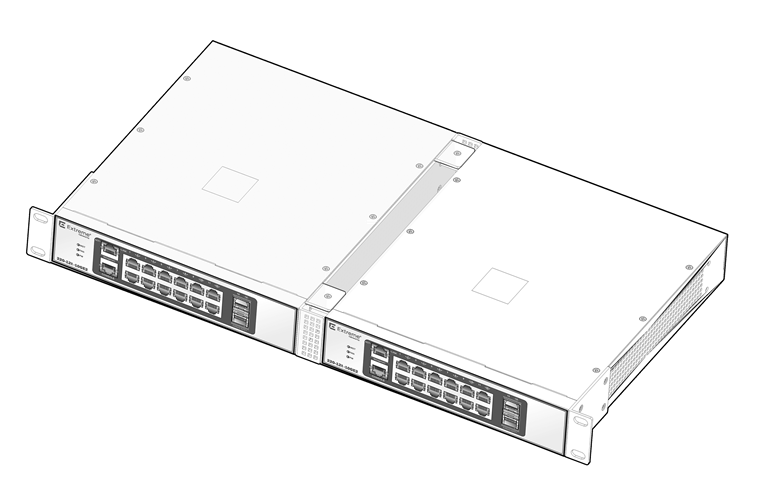
Mounting Two 12-Port Switches in a Rack Side by Side
The 12-port 210 and 220 switch models are constructed so that two of them can fit
side by side into a standard rack.
To mount two 12-port switches together in a rack, you will need the
following equipment:
- 200-Series Dual Rack Mount Kit (separately orderable; part number
16572), which includes:
- Two short mounting brackets
- One long and two short middle-support brackets,
for connecting the switches together
- Twenty bracket screws
- Standard rack-mounting hardware (not included)
- Screws for the rack-mounting hardware (not
included)
- No. 1 Phillips screwdriver for attaching bracket
hardware (a magnetic screwdriver is recommended)
- Flat-head screwdriver for mounting the switches in the rack
The instructions in this section pertain to the following switch
models:
- ExtremeSwitching 210-12t-GE2 switch
- ExtremeSwitching 210-12p-GE2 switch
- ExtremeSwitching 220-12t-10GE2 switch
- ExtremeSwitching 220-12p-10GE2 switch
To mount the switches, follow these steps.
-
Place both switches on a flat, stable
surface.
-
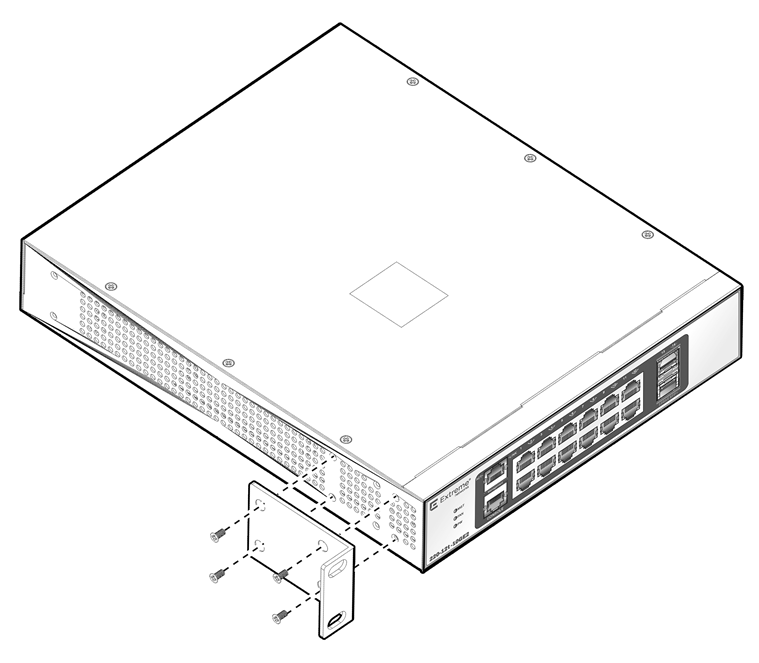
Attach mounting hardware to the first switch.
-
Using four chassis screws, attach a short
bracket to the left side of the switch.
-
Using four chassis screws, attach the long
middle-support bracket to the right side of the switch.
-
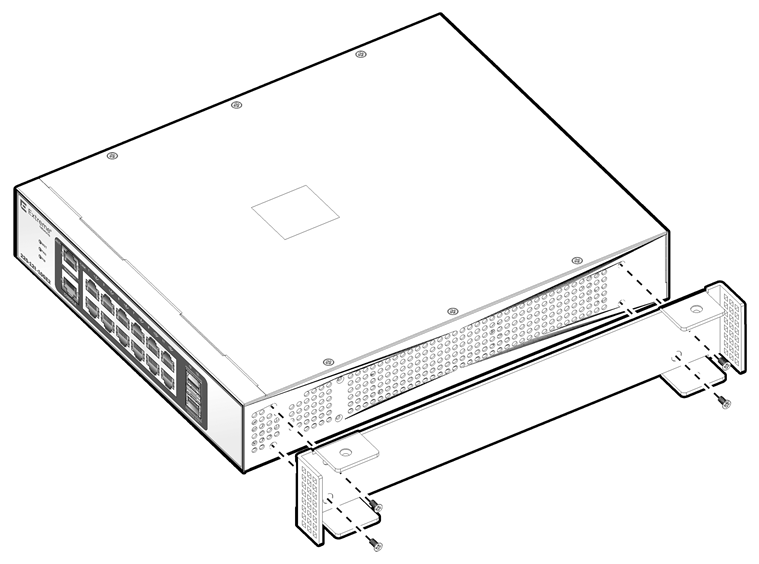
Attach mounting hardware to the second switch.
-
Using two chassis screws, attach a short
middle-support bracket to the left side of the switch, at the front
end.
-
Using two chassis screws, attach the other
short middle-support bracket to the left side of the switch, at the
rear.
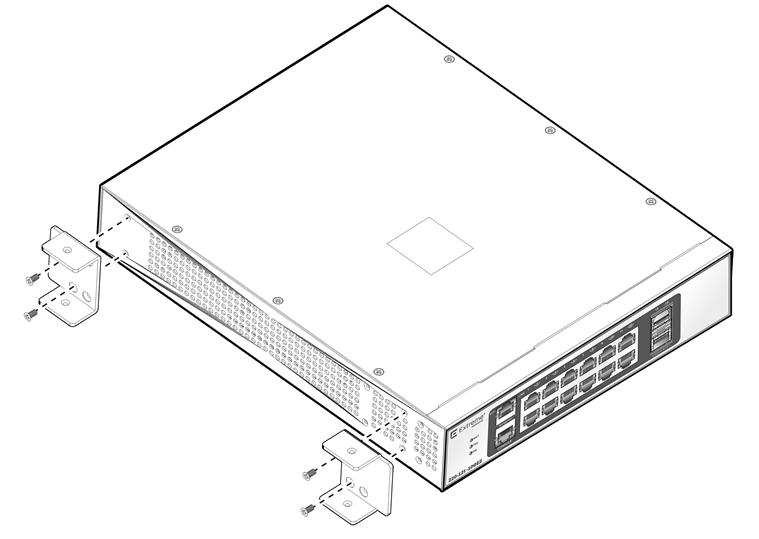
-
Using four chassis screws, attach a short
mounting bracket to the right side of the switch, as shown in Dual-Mount: Attaching a Short Bracket to the First Switch.
-
Slip the short connecting brackets into both ends
of the long connecting bracket.
-
Using the four remaining chassis screws, attach
the connecting brackets to each other.
-
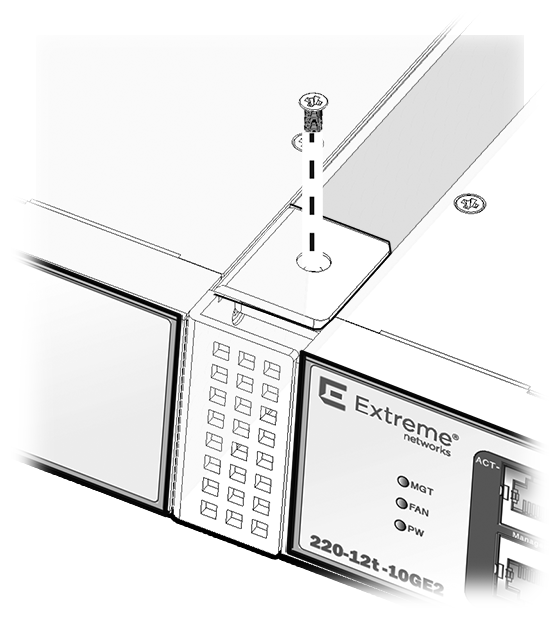
Attach the switches to the rack using rack-mounting hardware (not
provided).
After the switches are securely in place, install optional
components using the instructions in Installing Optional Components.
Then connect power to the switch. See Connecting Power to the Switch.
 Print
this page
Print
this page Email this topic
 Feedback
 View PDF
 Download EPUB