Mounting a Single 12-Port Switch in a Rack
To mount a single 12-port switches in a standard rack, you will need the
following equipment:
- Short mounting bracket (included in the packaging with
your switch)
- Long mounting bracket (included)
- Eight bracket screws (included)
- Standard rack-mounting hardware (not included)
- Screws for the rack-mounting hardware (not
included)
- No. 1 Phillips screwdriver for attaching bracket hardware (a magnetic
screwdriver is recommended)
- Flat-head screwdriver for mounting the switch in the rack
The instructions in this section pertain to the following switch
models:
- ExtremeSwitching 210-12t-GE2 switch
- ExtremeSwitching 210-12p-GE2 switch
- ExtremeSwitching 220-12t-10GE2 switch
- ExtremeSwitching 220-12p-10GE2 switch
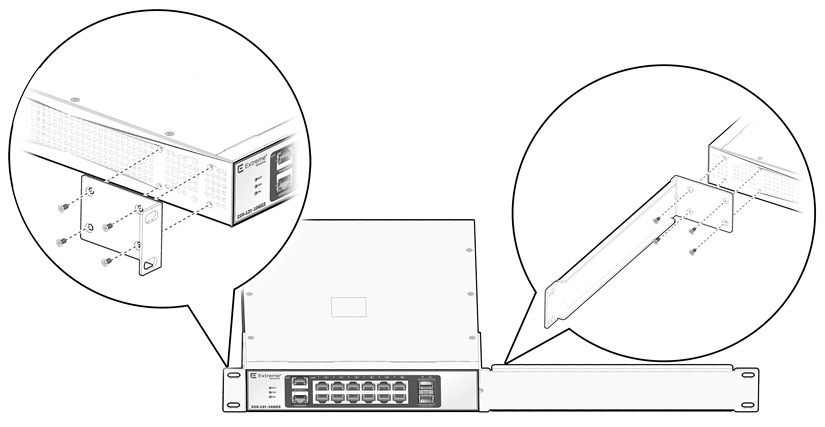
To mount the switch, follow these steps.
-
Place the switch on a flat, stable surface.
-
Using four chassis screws, attach the short
bracket to the side of the switch that will be closest to the edge of the
rack.
-
Using four chassis screws, attach the long bracket
to the other side of the switch.
-
Attach the brackets to the rack using
rack-mounting hardware (not provided).
 Print
this page
Print
this page Email this topic
 Feedback
 View PDF
 Download EPUB