Mounting a 12-Port Switch on a Wall
The 12-port 210 and 220 switch models are constructed so that they can be mounted on
a wall. The wall should be strong enough to support the weight of the switch and its
attached cables.
When the switch is attached to the wall, its front end will face down.
To mount a 12-port switch on a wall, you will need the following
equipment:
- 200-Series Wall Mount Kit (separately orderable; part number 16573),
which includes:
- Two short wall-mounting brackets
- Eight bracket screws
- Four anchor screws
- Four hollow anchors, rated to hold the weight of
the switch (about 2.5 kg, or 5.5 lb)
- No. 1 Phillips screwdriver for attaching bracket
hardware (a magnetic screwdriver is recommended)
- Flat-head screwdriver for mounting the switches in the rack
The instructions in this section pertain to the following switch
models:
- ExtremeSwitching 210-12t-GE2 switch
- ExtremeSwitching 210-12p-GE2 switch
- ExtremeSwitching 220-12t-10GE2 switch
- ExtremeSwitching 220-12p-10GE2 switch
To mount the switch on a wall, follow these steps.
-
Using the two holes in each short mounting
bracket, mark the places on the wall where the switch assembly will be mounted.
Each mounting bracket has two mounting holes, so you
will make four marks.
The marks should be approximately 23
cm (9 in) apart. (The brackets are designed to allow some imprecision in the
placement of the mounting screws.) Be sure to position the marks so that the
switch will be level.
-
Drill a hole at each mark.
The hole should be about 30 mm (1.2 in) deep. For walls made of wood or
drywall, the hole diameter should be between 6 and 7 mm (about 0.25 in).
-
Insert a drywall or hollow anchor into each
hole.
Gently tap each anchor with a hammer, if necessary, to ensure that it is
inserted tightly.
-
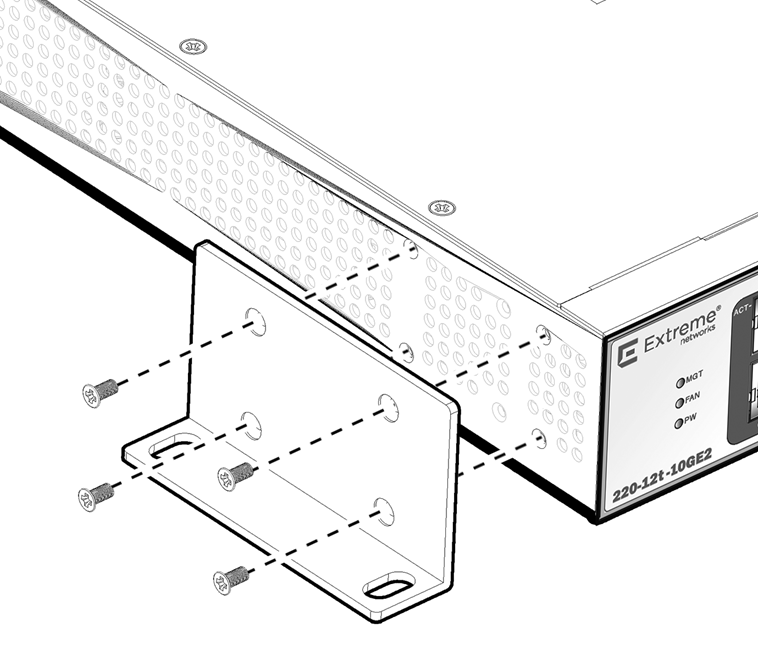
Using four chassis screws, attach a wall-mounting
bracket to the left side of the switch, at the front end.
-
In the same way, attach a wall-mounting bracket to
the right side of the switch.

Caution
Two people should perform the following steps: one to
hold the switch in place and one to attach it to the wall.
-
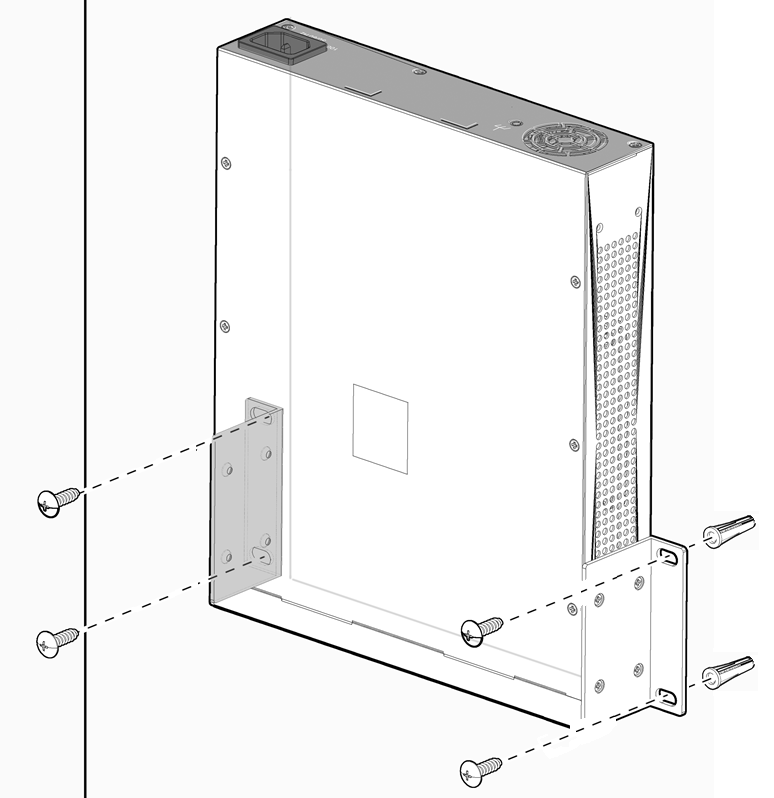
Mount the switch assembly on the wall by screwing
an anchor screw through each hole in the wall-mounting brackets into the
anchors.
-
Check that all screws have been securely fastened and that the switch is firmly
attached to the wall.
 Print
this page
Print
this page Email this topic
 Feedback
 View PDF
 Download EPUB