Removing a Power Supply
Do not remove the power supply in power supply bay PS1 until a replacement power supply
is available.
To remove a power supply from
the SSA
switch, follow these steps:
-
Use appropriate antistatic protection when handling power supplies.
-
If a power cord retention clip is securing the power cord, push down on the retention clip clamp tab to open the clamp and disengage the power cord from the clamp.
-
Unplug the associated power cord from the AC inlet.
-
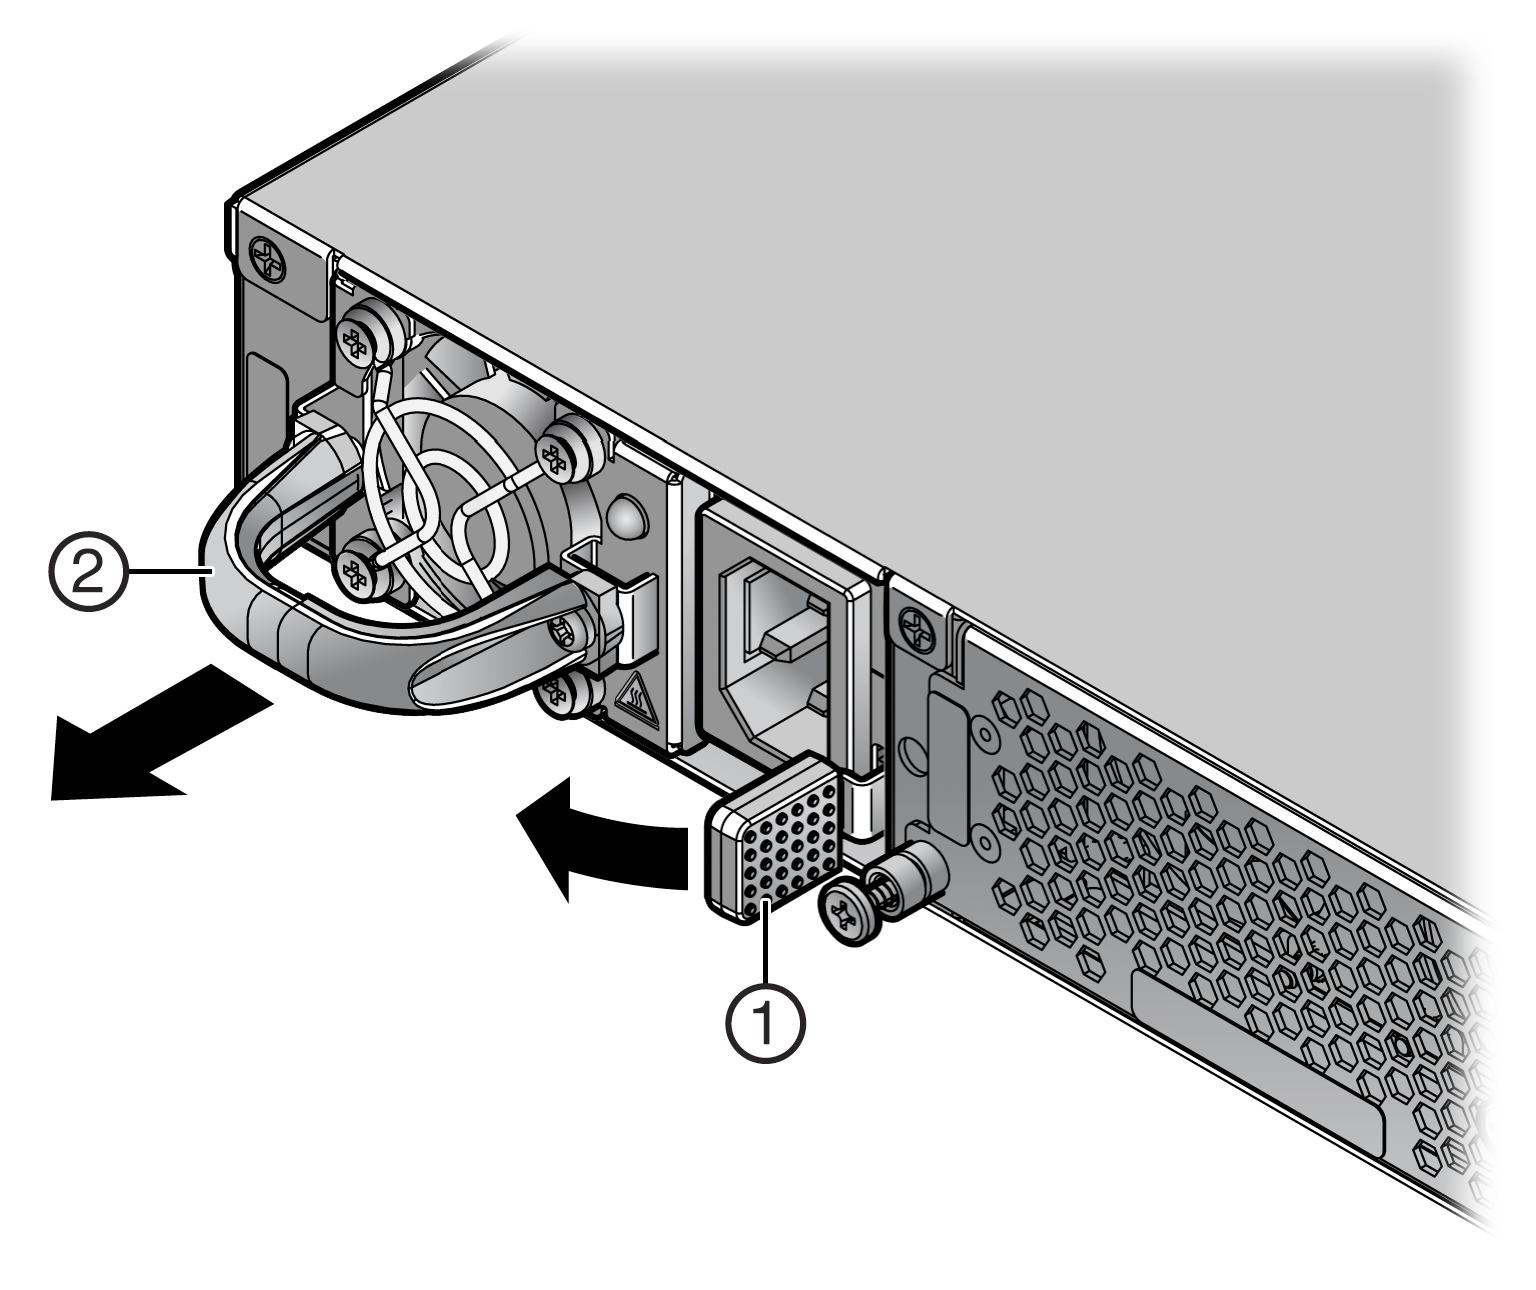
Remove the power supply by simultaneously pressing the power supply lock tab to the left, grasping the handle, and pulling the power supply straight out of the SSA switch.
-
If you are removing the power supply from power supply bay PS2, and you are not immediately installing another power supply, reinstall the coverplate that comes with the SSA switch over the empty PS2 power supply bay.

Caution
If you plan
to operate the chassis with only one power supply, the power supply must be installed in
the left power slot labeled PS1 and the coverplate must be in place in the right power
slot to contain EMI radiation and ensure proper air circulation.
Precaución: Si desea trabajar sólo con una fuente de poder, no olvide colocar la
tapa en el compartimiento de la fuente de poder que haya eliminado, para reducir la
interferencia electromagnética y para asegurar una buena ventilación.
 Print
this page
Print
this page Email this topic
 Feedback
 View PDF
 Download EPUB