
Warning
Before rack-mounting the device, ensure that the rack can support it without compromising stability. Otherwise, personal injury and/or equipment damage may result.Advertencia: Antes de montar el equipo en el rack, asegurarse que el rack puede soportar su peso sin comprometer su propia estabilidad, de otra forma, daño personal o del equipo puede ocurrir.
Warnhinweis: Überzeugen Sie sich vor dem Einbau des Gerätes in das Rack von dessen Stabilität, ansonsten könnten Personenschäden oder Schäden am Gerät die Folge sein.
Avertissements: Avant de monter l'appareil sur le bâti, assurez-vous que l'étagère peut en supporter le poids sans en compromettre la stabilité. Cela pourrait, dans le cas contraire, entraîner des blessures ou des dommages au matériel.

Note
To secure the SSA switch to the rack, follow these steps:
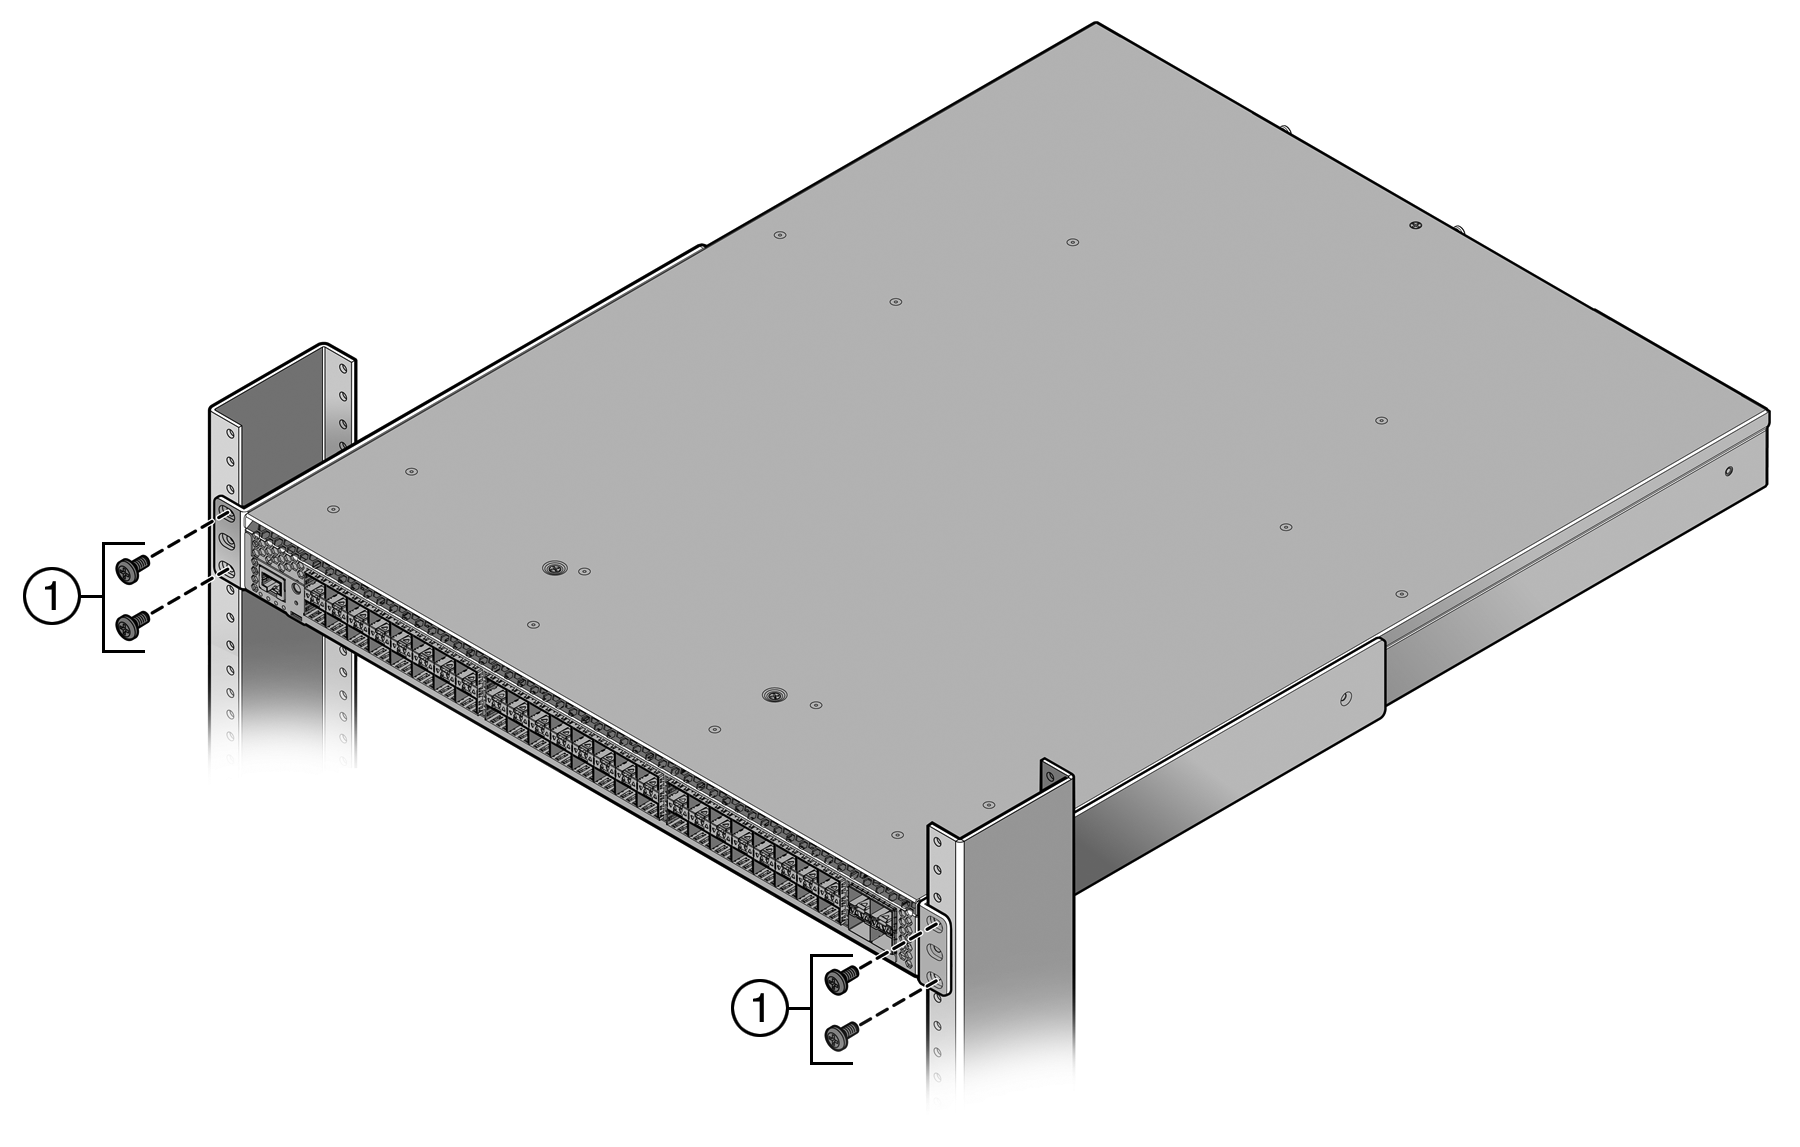
| 1 = 4 to 6 screws or fasteners appropriate to the rack |
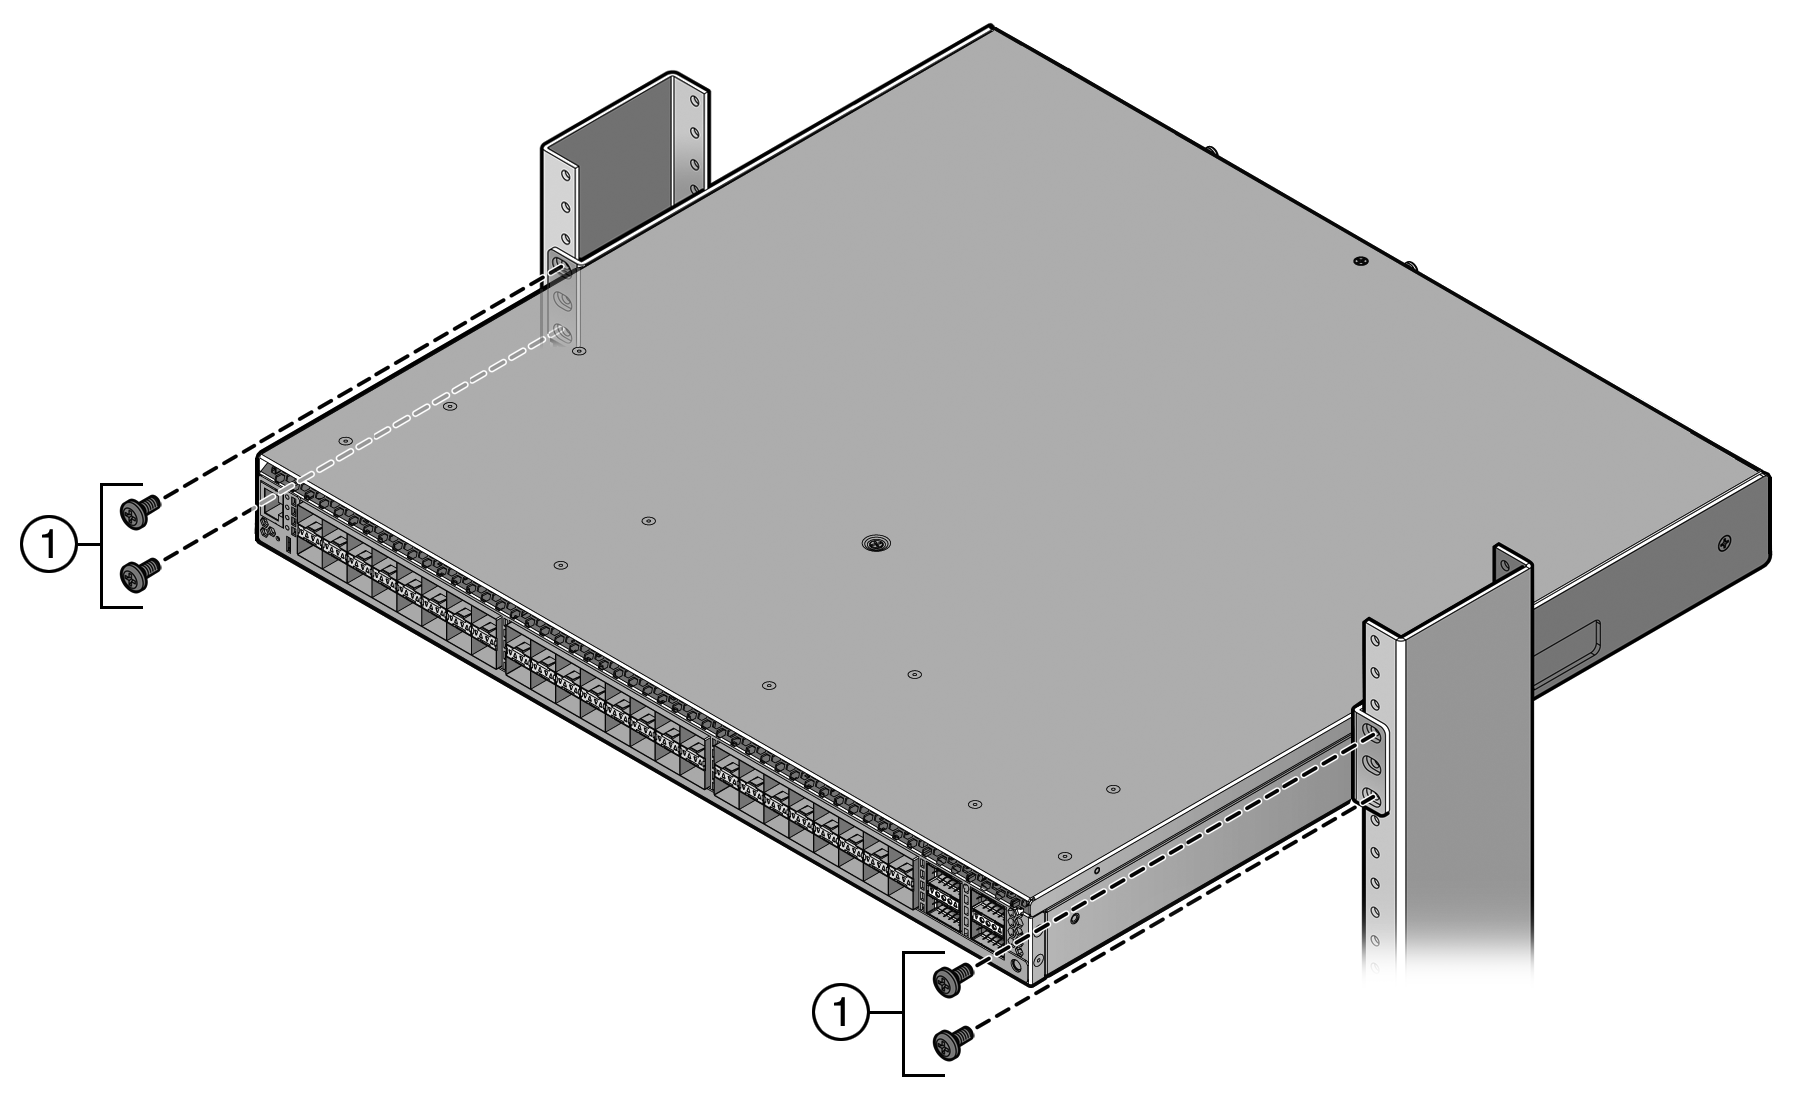
| 1 = 4 to 6 screws or fasteners appropriate to the rack |
 Print
this page
Print
this page Email this topic
 Feedback
 View PDF
 Download EPUB