Replacing the SSA Fan Module
The SSA switch is
cooled by two fan modules accessible from the power supply side of the unit. If the FAN
LED and the output of the CLI show system command indicate that a fan module has failed, you must replace
the failed fan module.

Note
SSA fan modules are hot-swappable. Do not uninstall a failed fan module until its replacement is available. All
SSA switch components and cover plates must be installed to ensure proper airflow.
The replacement fan kit,
SSA-FB-FAN, ordered separately, contains one replacement fan.
To replace a failed fan
module, follow these steps:
-
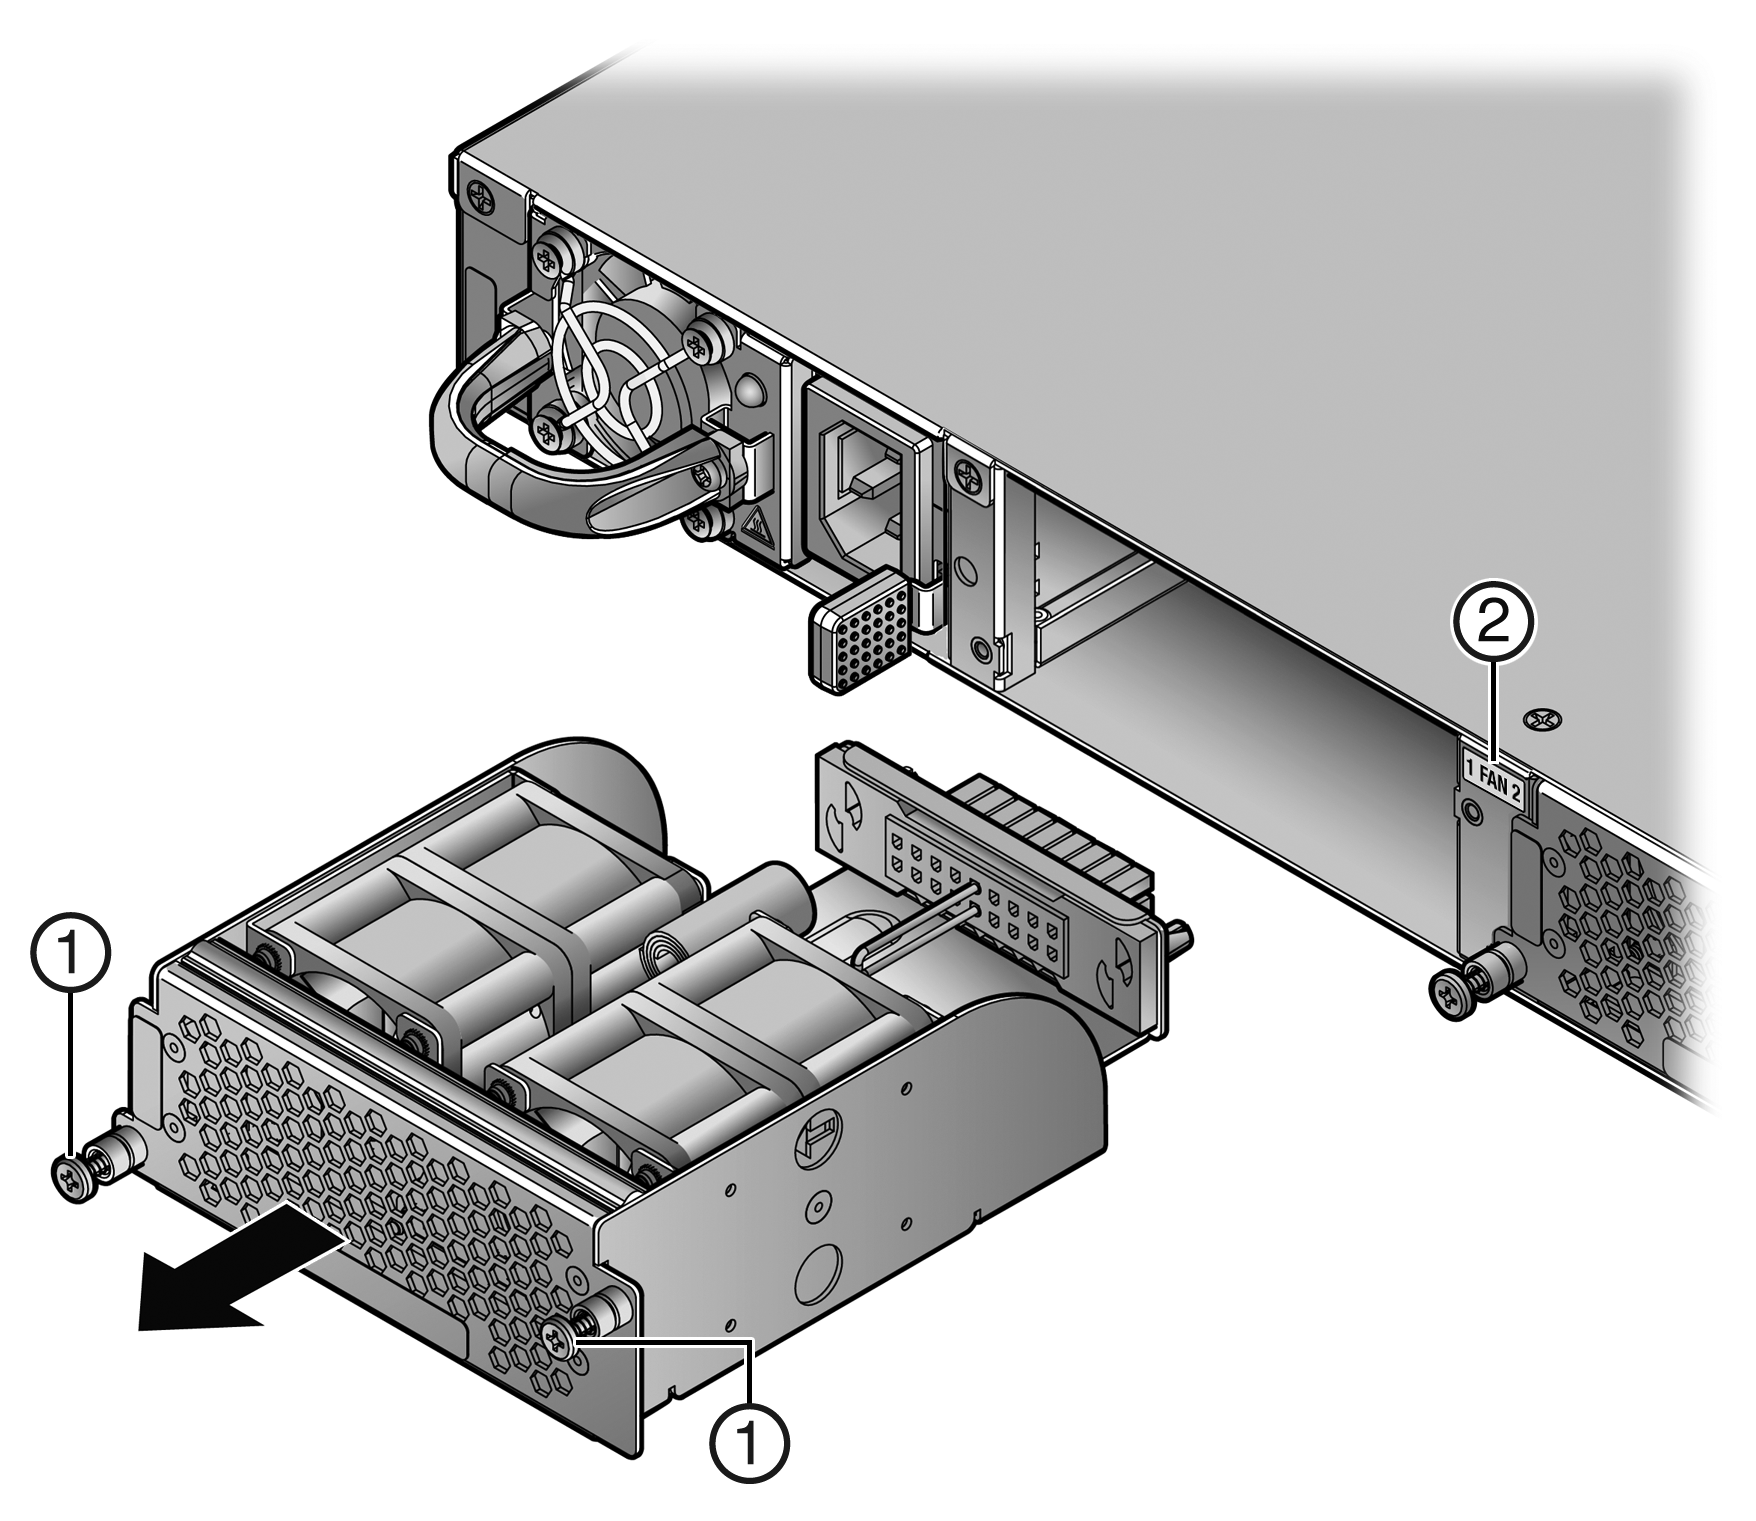
Determine the location of
the failed module using the label shown in Removing the Fan Module.
| 1 = Fan module screws |
2 = Fan module location label |
-
Unscrew the two captive screws of the failed fan module as shown in Removing the Fan Module.
-
Following the discussion in Power Supply Airflow and Switch Fan Module Airflow, ensure that the new fan module airflow direction agrees with the installed SSA switch configuration.
-
If a non-default airflow is
required, see Reversing the Fan Module Airflow for directions on how
to reverse the fan unit direction.
-
When you have ensured that
the fan module airflow is appropriate to your system configuration, slide the
currently installed fan module forward until it is unplugged from the device as shown
in Removing the Fan Module.
-
Align the new fan module
with the fan module opening.
-
Insert the module into the fan module opening, applying enough pressure that the fan module is flush with the device.
-
Secure the two fan module
captive screws.
 Print
this page
Print
this page Email this topic
 Feedback
 View PDF
 Download EPUB