In the console tree, right-click
the DHCP server, IPv4 on which you want to create the new DHCP scope, and then
select New
Scope.
Select Next.
In the Name and Description text
boxes, type the scope name and description.
This can be any name that you
want, but it should be descriptive enough so that you can identify the purpose
of the scope on your network.
Select Next.
The IP Address Range
window is displayed.
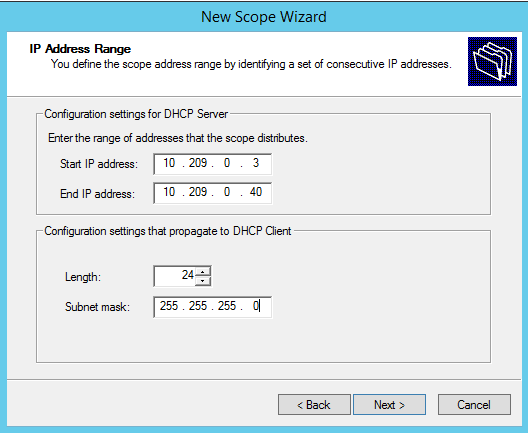
IP Address
Range
In the Start IP address and the
End IP address text boxes, type the start and end of the IP address range that
you want to be distributed to the network.
You must use the range provided
by your network administrator.
In the Length text box, type the
numeric value of the subnet mask bits, or in the Subnet mask text box, type the
subnet mask IP address.
A subnet mask defines how many
bits of an IP address to use for the network/subnet IDs and how many bits to use
for the host ID. You can specify the subnet mask by length or as an IP address.
You must use the Length (or the Subnet mask) provided by your network
administrator.
Select Next.
The Add Exclusions
window displays.
In the Start IP address and the
End IP address text boxes, type the start and end of the IP address range that
you want to exclude from the distribution.
You must use the exclusion
range provided by your network administrator.
Select Next.
The Lease
Duration window displays.
The DHCP server assigns a client an IP address for a given amount of time.
The amount of time for which the IP address can be leased is defined in the
Lease Duration window.
In the Days, Hours and Minutes
text box, type the lease duration.
You must use the Lease Duration
as specified by your network administrator.
Select Next.
The Configure DHCP
Options window displays.
Select Yes, I want to configure
these options now, and then select Next.
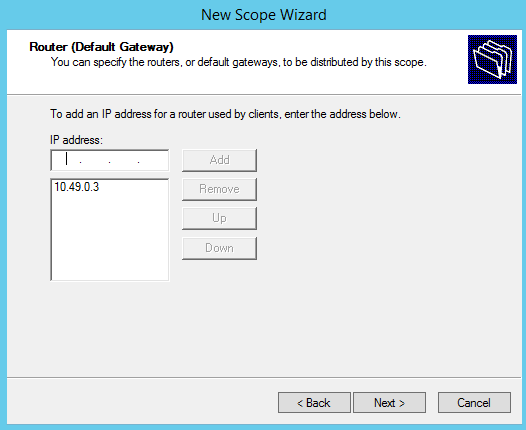
The Router (Default
Gateway) window displays.
In the IP address text box, type
the network‘s default gateway and select Add.
You must use the default
gateway provided by your network administrator.
Router Default
Gateway
Select Next.
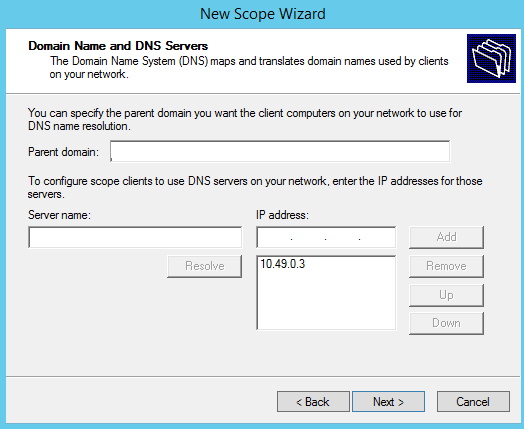
The Domain Name and DNS
Servers window displays.
Domain Name and DNS
Servers
In the Parent domain text box,
type your company‘s domain name.
You must use the Parent Domain
provided by your network administrator.
In the Server name text box,
type your server name.
You must use the server name
provided by your network administrator.
In the IP address text box, type
your server‘s IP address, and then select Add.
Select Next.
The WINS Servers
window displays.
Select Next.
The Activate Scope
window displays.
Select Yes, I want to activate this
scope now, and select Next.
The wizard displays the
following message:
You have successfully completed the New Scope wizard.