 Print
this page
Print
this page Email this topic
 Feedback
 View PDF
 Download EPUB
Installing OneC-V Virtual Appliance
The OneController software is available as a virtual appliance (OneC-V) that you can deploy on a virtualization server. The currently supported virtualization server software is VMware ESXi.
For the minimum specifications for the ESXi server, see OneC-V Overview.
To install OneC-V:
- Download the OneC-V OVA file from https://extranet.extremenetworks.com/downloads/Pages/OneController.aspx (on the Software tab).
-
Deploy the OneC-V OVA file:
-
From the vSphere client click .
The Deploy OVF
Template—Source dialog box appears (see the following
figure).
 Deploy OVF Template: Source Dialog Box
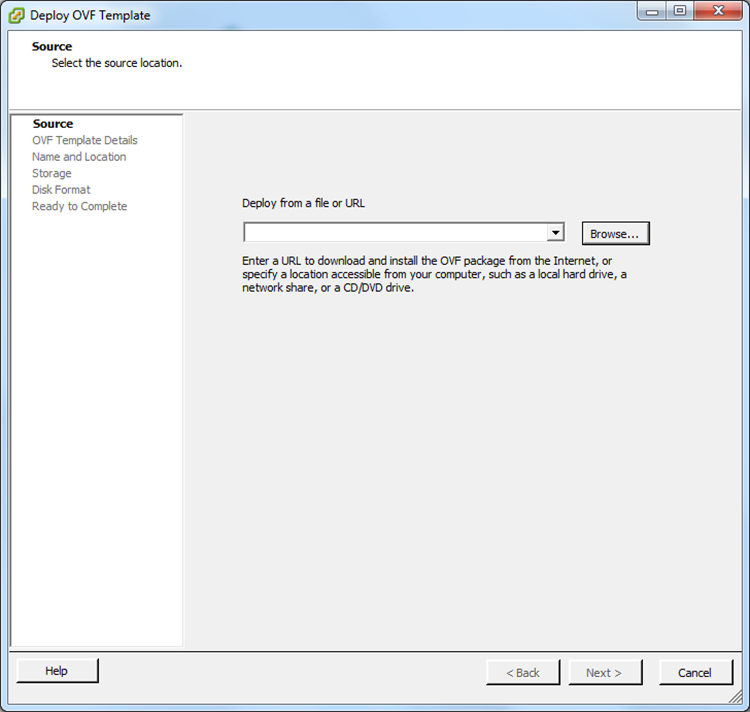
- Click Browse, go to the directory where the OneC-V OVA file resides, select the file, and then click Open.
-
Click Next.
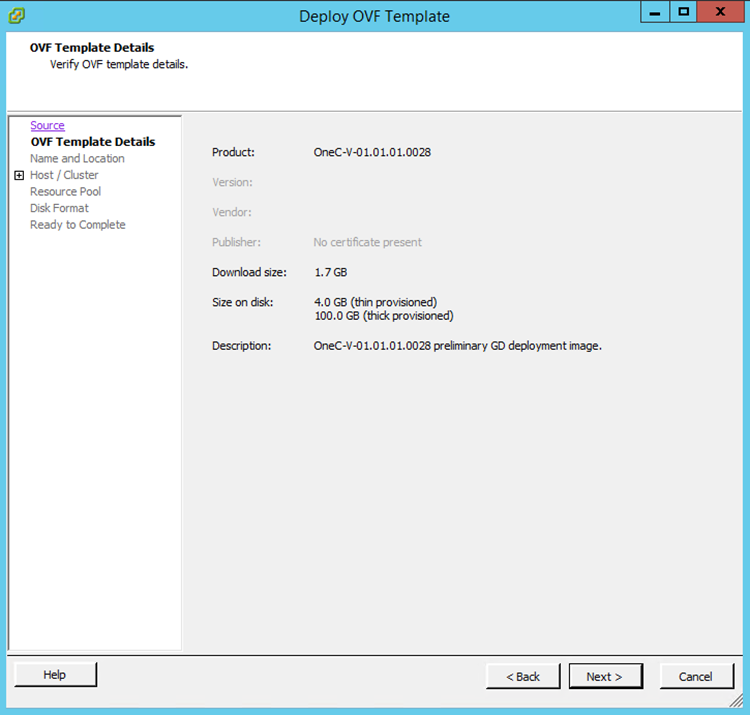
The Deploy OVF
Template: OVF Template Details dialog box appears (see
the following figure).Deploy OVF Template: OVF Template Details Dialog Box
-
Click Next. The
Deploy OVF Template: Name and Location dialog
box appears (see the following figure).
Deploy OVF Template: Name and Location Dialog Box
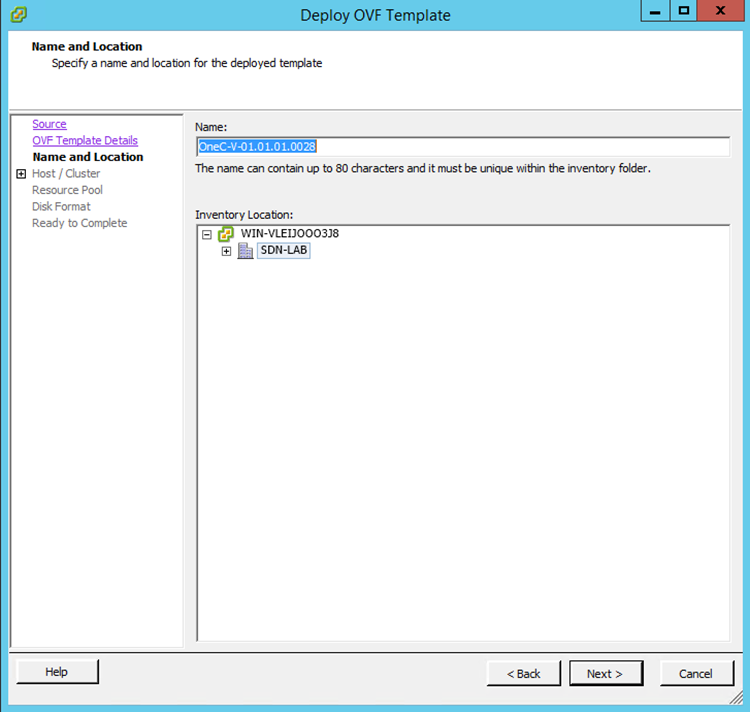
-
In the Name box, enter a
name for the OneC-V VM, and then click Next.
The Deploy OVF
Template: Host / Cluster dialog box appears (see the
following figure).Deploy OVF Template: Host / Cluster Dialog Box
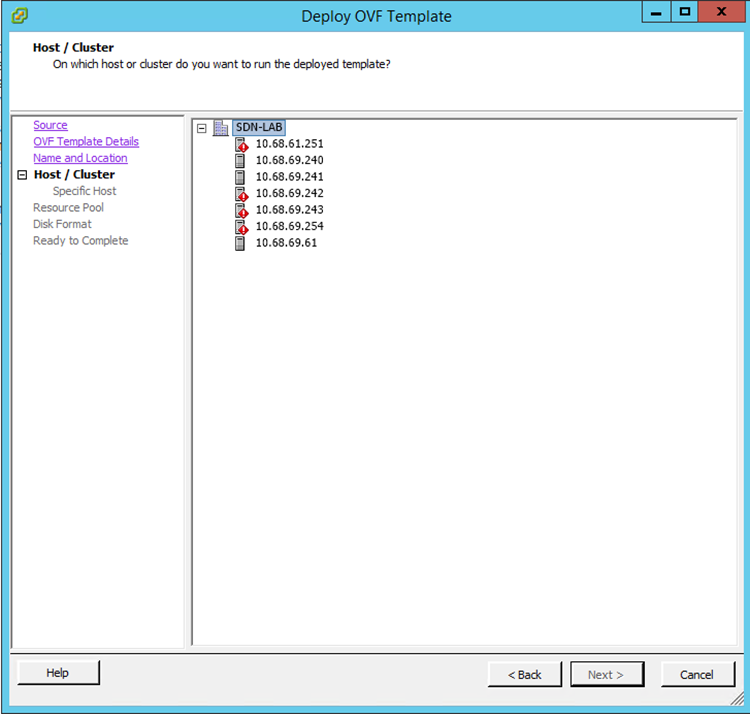
-
Select a host/cluster location, and then
click Next.
The Deploy OVF Template: Storage dialog box
appears (see the following figure).Deploy OVF Template: Storage Dialog Box
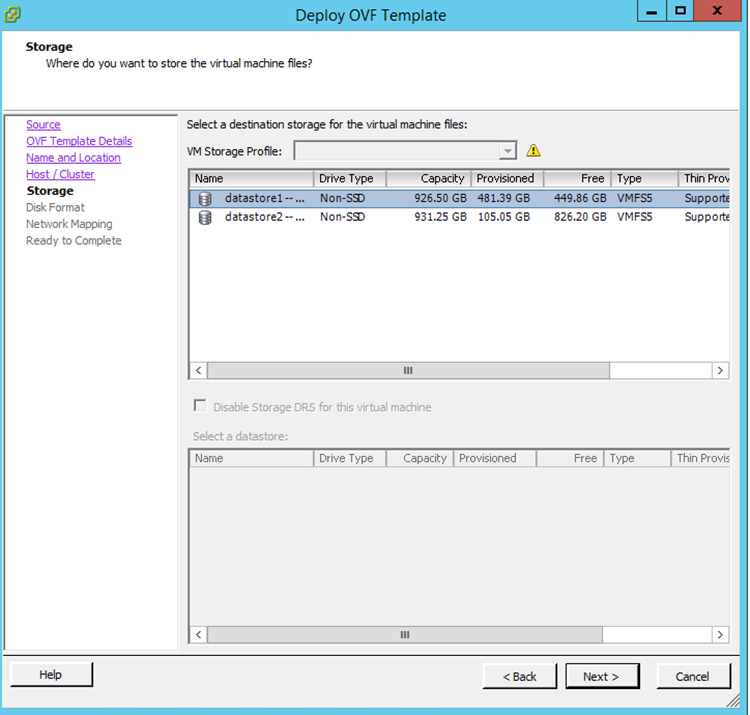
-
Select where to store the virtual machine files, and then click
Next.
The Deploy OVF Template: Disk Format dialog
box appears (see the following figure).Deploy OVF Template: Disk Format Dialog Box
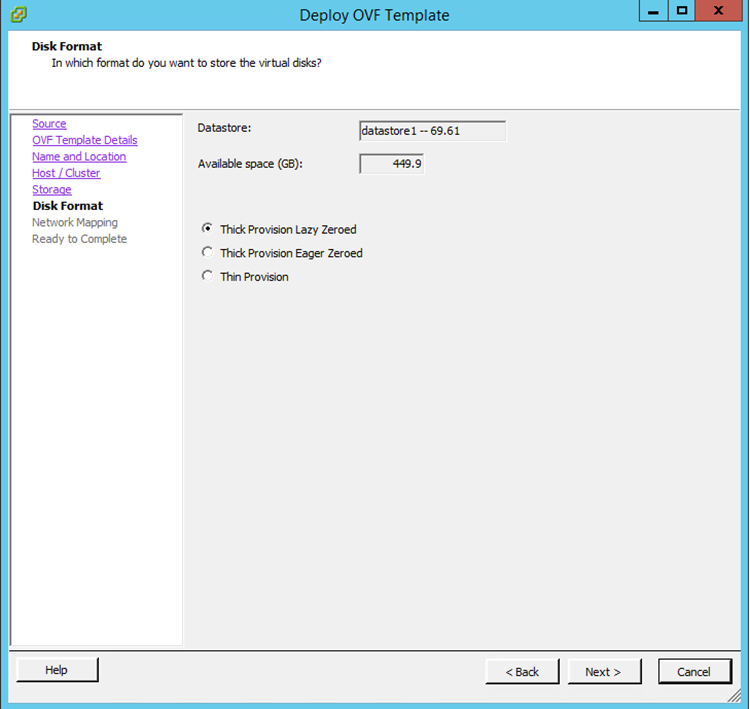
-
Accept the default settings by clicking
Next.
The Deploy OVF Template: Network
Mapping dialog box appears (see the following
figure).Deploy OVF Template: Network Mapping Dialog Box
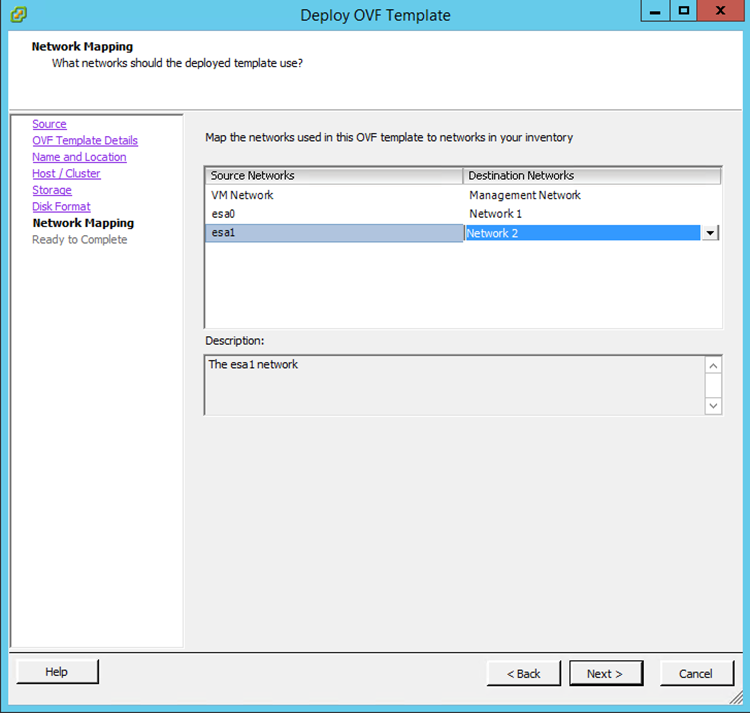
-
Using the drop-down controls under the
Destination Networks column, map the
interfaces in the OVA file to the inventory networks:
- VM Network = Management Network
- esa0 = Network 1
- esa1 = Network 2
-
Click Next.
The Deploy OVF Template: Ready to Complete
dialog box appears (see the following figure).Deploy OVF Template: Ready to Complete Dialog Box
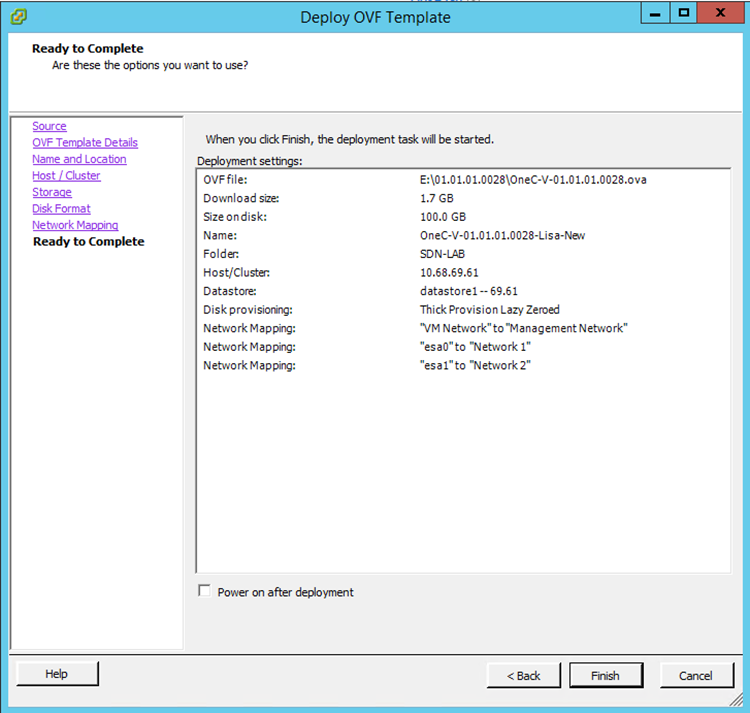
- Review your selections, and then click Finish to complete the configuration. The import may take several minutes to complete.
-
From the vSphere client click .
The Deploy OVF
Template—Source dialog box appears (see the following
figure).
-
Power on the OneC-V virtual machine by
right-clicking it in the left pane, and then clicking (see the following figure).
Powering on the OneController Virtual Machine

-
Configure the OneC-V system:

Note
This includes changing the Admin interface‘s management port IP address. Failing to change this IP address can cause IP address conflicts on the network.-
Click the OneC-V virtual machine in the
left pane, and then click the Console tab (see the
following figure).
Console Tab
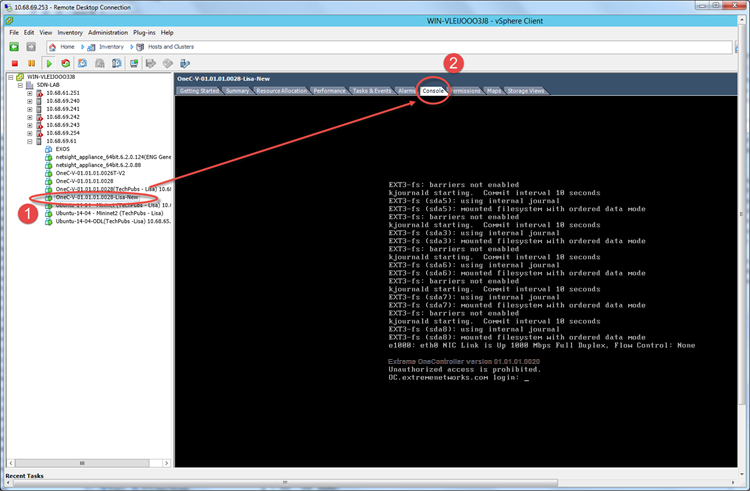
- Wait for the logon prompt to appear, and then type the credentials username = admin and password = abc123. The configuration script starts.
-
Click the OneC-V virtual machine in the
left pane, and then click the Console tab (see the
following figure).
-
Enter choices for the following settings (press
Enter to accept
the default setting):
Descritpion Values Continent Select the continent for time zone purposes: - Africa [A - J] = 0
- Africa[K - W] = 1
- America [A - A] = 2
- America [B - D] = 3
- America [E - I] = 4
- America [J - M] = 5
- America [N - R] = 6
- America [S - Y] = 7
- Antarctica = 8
- Arctic = 9
- Asia [A - G] = 10
- Asia [H - O] = 11
- Asia [P - V] = 12
- Asia [Y - Y] = 13
- Atlantic = 14
- Australia = 15
- Europe [A - L] = 16
- Europe [M - U] = 17
- Europe [V - Z] = 18
- Indian [V - Z] = 19
- Pacific [A - N] = 20
- Pacific [P - W] = 21
City Select the city for time zone purposes. Set Time Set the current time in the format hh:mm (h = hours, m = minutes). Set Date Set the current date in the format yyyy:mm:dd (y = year, m = month, d = day). Ntp Server NTP server's IP address. You can designate up to three NTP servers. Netmask NTP server's subnet mask. Gateway NTP server's gateway. Host Name NTP server's hostname. Domain Name NTP server's domain name. Static IP Address Management port's (Admin) IP address. Netmask Management port's (Admin) subnet mask. Gateway Management port's (Admin) gateway. Host Name Management port's (Admin) hostname. Domain Name Management port's (Admin) domain name. SNMP Mode 1 = Disable SNMP
2 = Enable SNMPv1/v2c
3 = Enable SNMPv3
Syslog Server Syslog server's IP address. You can designate up to three Syslog servers. Data Port 1 Static IP Address Data port's (EAS0) IP address. Netmask Data Port 2 Data port's (EAS0) subnet mask. Static IP Address Data port's (EAS1) IP address. Netmask Data port's (EAS1) subnet mask.