Web User Interface
The web user interface is used to manually add individual users or bulk users through vouchers.
The web user interface can be accessed only by a web user. A web user account must be created
by the administrator. Use the web user credentials (username/password) to access the web user
interface.
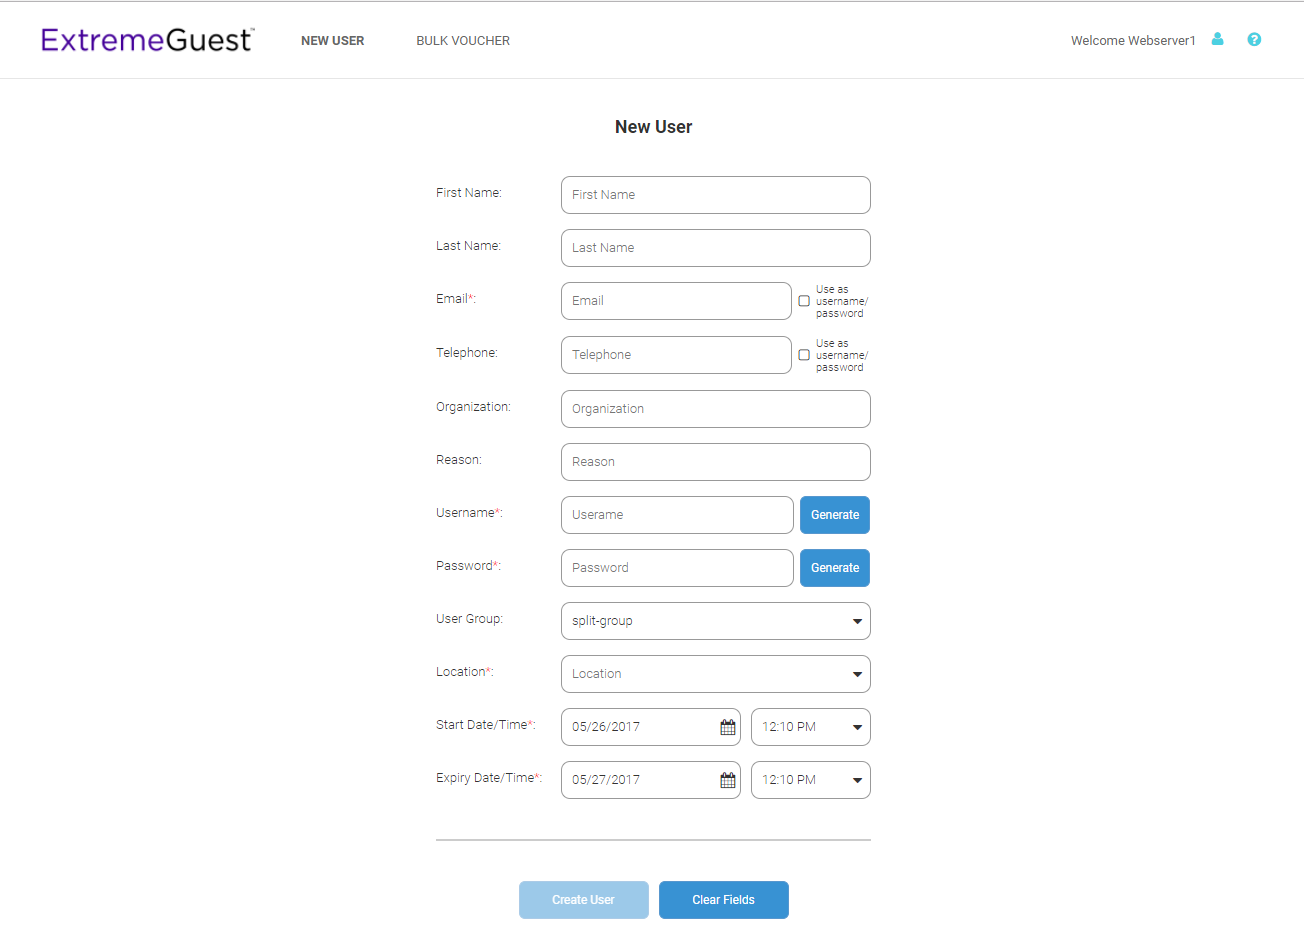
Web User Interface - New User
Screen
Configure the following user details to add a new user to the network:
| First Name |
Enter the first name of the user you
wish to add to the network. |
| Last Name |
Enter the surname of the user you wish
to add to the network. |
| Email |
Enter the e-mail address for the user
you wish to add to the network. This field is required. Select Use as username/password to
use the e-mail address as the username and password for the user. Selecting this will
remove the Username and Password fields from this screen. |
| Telephone |
Enter the telephone number for the user
you wish to add to the network. Select Use as username/password to
use the telephone number as the username and password for the user. Selecting this will
remove the Username and Password fields from this screen. |
| Organization |
Optionally, enter an organization name
for the user. |
| Reason |
Optionally, enter a reason that the
user is being created. |
| Username |
If Use as username/password is
not selected in the Email or Telephone fields, specify a unique username for the new user. |
| Password |
If Use as username/password is
not selected in the Email or Telephone fields, specify a unique password for the new user. |
| User Group |
Optionally, select a user group to
associate the new user with. New user groups are added by the admin user. |
| Location |
Use the pull-down menu to select a site
for the user to be added to. New locations are created by the admin user. This is a
required field. |
| Start Date / Time |
Specify the starting date and time for
the new user to be activated. This is a required field. |
| Expiry Date / Time |
Specify an ending date and time for the
user to be deactivated. This is a required field. |
Select
Create, once
all required fields are populated, to add the user to the network. To erase any information
entered in the fields, select
Clear.
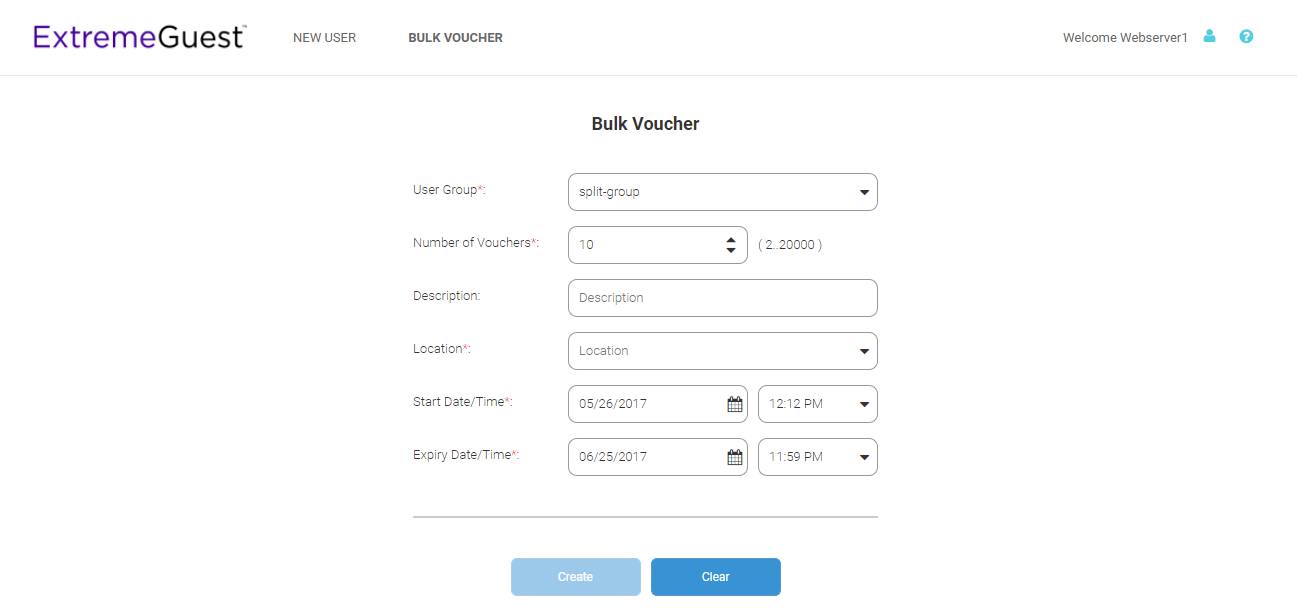
The Bulk Voucher screen is used to create between 2 and 20,000 users at
a time.
Configure the following fields to add a
Bulk Voucher.
Web User Interface - Bulk Voucher
Screen
| User Group |
User the pull-down menu to select a user group for all new users in the bulk voucher. New
user groups are created by the admin user. This is a required field. |
| Number of Vouchers |
Use the spinner controls to specify the number of vouchers to create. The number of
vouchers may be between 2 and 20,000. This is a required field. |
| Description |
Optionally, enter a description for the users being added to the voucher. |
| Location |
User the pull-down menu to select a location for the new users to be added to. New
locations are added by the admin user. This is a required field. |
| Start Date / Time |
Specify the starting date and time for the new users to be activated. This is a required
field. |
| Expiry Date / Time |
Specify an ending date and time for the users to be deactivated. This is a required
field. |
Select
Create, once all required fields are populated, to add the
user vouchers to the network. To erase any information entered in the fields, select
Clear.
 Print
this page
Print
this page Email this topic
 Feedback
 View PDF
 Download EPUB