ML-2452-PNA7-01R Antenna Wall Install
About this task
The following hardware is
required for wall installation:
- One wall mount
- One articulating arm
- One antenna mount
- Four ¼ in. SS nylon hex nuts
- One machine screw
- One SS split lock washer
- One ¼ in. flat washer
- One ¼ in. – 20 SS hex nut
- Four #8 plastic wall anchors
- Four #8–18 × ¾ in. SS machine screws
Procedure
-
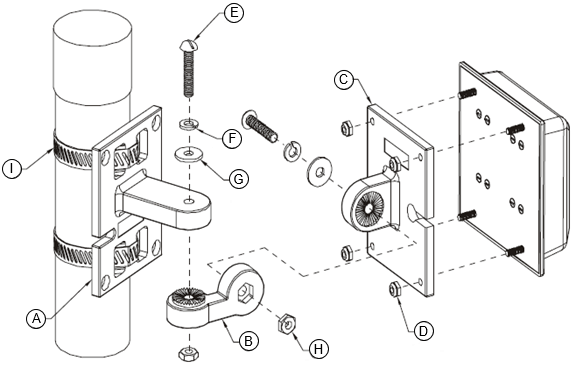
Attach the articulating arm
to the antenna mount using the machine screw, SS split lock washer, ¼ in.
flat washer, and ¼ in. – 20 SS hex nut, as shown in the following figure.
 Antenna mount attachment and antenna install to a vertical flat surface
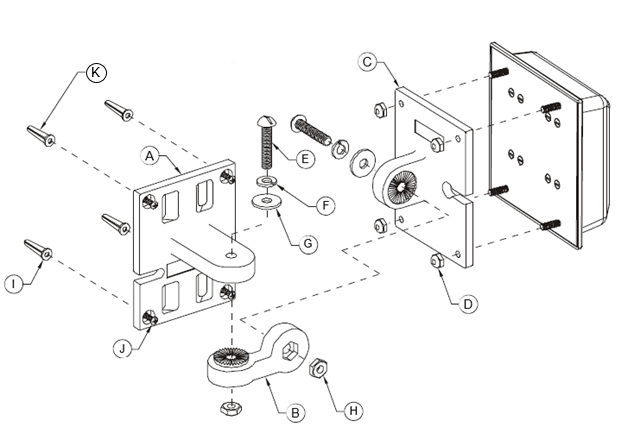
Callout Description A Wall mount B Articulating arm C Antenna mount D ¼ in. SS nylon hex nut E Machine screw F SS split lock washer G ¼ in. flat washer H ¼ in. – 20 SS hex nut I #8 plastic wall anchor J #8–18 × ¾ in. SS machine screws K 3/16 in. diameter attachment hole for anchor -
Attach the articulating arm
to the wall mount using a machine screw, SS split lock washer, ¼ in. flat
washer, and ¼ in. – 20 SS hex nut.
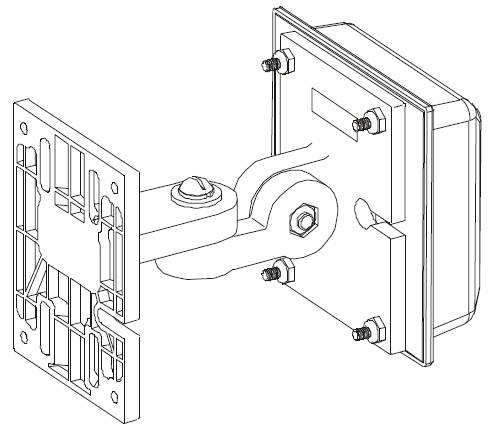
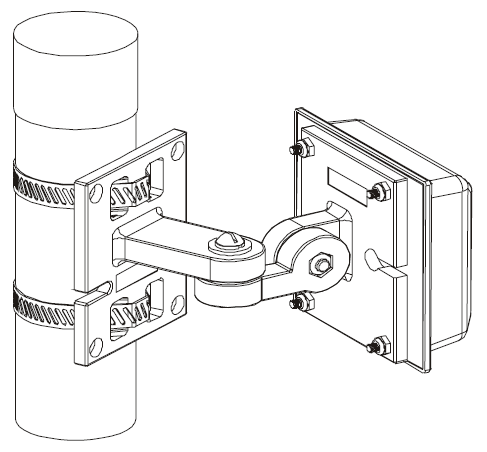
ML-2452-PNA7-01R antenna assembly