ExtremeWireless™ User Guide
>
Configuring a VNS
>
VNS Global Settings
>
Using NAC Integration
> Adding a New NAC Server Destination
Published April 2017
prev
|
next
Print this page
Email this topic
Feedback
View PDF
Download EPUB
About This Guide
Intended Audience
How to Use This Guide
Safety Information
Sicherheitshinweise
Consignes De S??curit??
Text Conventions
Providing Feedback to Us
Getting Help
Related Publications
Overview of the ExtremeWireless Solution
Introduction
The ExtremeWireless Appliance
Conventional Wireless LANs
Elements of the ExtremeWireless Solution
Extreme Networks Extreme Management Center Integration
ExtremeWireless and Your Network
Network Traffic Flow
Network Security
Authentication
Privacy
Virtual Network Services
NAC Integration with the Wireless WLAN
VNS Components
Topology
Role
Classes of Service
WLAN Services
Routing
Mobility and Roaming
Network Availability
Quality of Service (QoS)
ExtremeWireless Appliance Product Family
Configuring the ExtremeWireless Appliance
System Configuration Overview
Logging on to the ExtremeWireless Appliance
Wireless Assistant Home Screen
Working with the Basic Installation Wizard
Basic Installation Wizard - Management Screen
Basic Installation Wizard - Services Screen
Basic Installation Wizard - Success Screen
Configuring the ExtremeWireless Appliance for the First Time
Changing the Administrator Password
Applying Product License Keys
License Pooling
Installing the License Keys
Setting Up the Data Ports
Viewing and Changing the L2 Ports Information
Viewing and Changing the Physical Topologies
Setting Up Internal VLAN ID and Multicast Support
Setting Up Static Routes
Viewing the Forwarding Table
Setting Up OSPF Routing
Configuring Filtering at the Interface Level
Built-in Interface-based Exception Filters
Working with Administrator-defined Interface-based Exception Filters
Protecting the Controller???s Interfaces and Internal Captive Portal Page
Before Installing a Certificate
Installing a Certificate for a Controller Interface
Configuring the Login Authentication Mode
Configuring the Local Login Authentication Mode and Adding New Users
Configuring the RADIUS Login Authentication Mode
Configuring the Local, RADIUS Login Authentication Mode
Configuring the RADIUS, Local Login Authentication Mode
Configuring SNMP
Configuring SNMPv1/v2c-specific Parameters
Configuring SNMPv3-specific Parameters
Editing an SNMPv3 User
Deleting an SNMPv3 User
SNMP Trap Types
Configuring Network Time
Configuring the Network Time Using the System???s Time
Configuring the Network Time Using an NTP Server
Configuring Secure Connections
Configuring DNS Servers for Resolving Host Names of NTP and RADIUS Servers
Using a Third-party Location-based Solution
Configuring Location-Based Services
Additional Ongoing Operations of the System
Configuring the ExtremeWireless APs
Wireless AP Overview
AP Model Nomenclature
Wireless Protocol Standards (802.11)
Antennas
AP Types (Features)
Radios
Threat Detection and Prevention Features
802.11n- and 802.11ac-Compliant Access Point Features
MIMO
Channel Bonding
Shortened Guard Interval
MAC Enhancements
Wireless AP International Licensing
Licensing Considerations
First-time Configuration Guidelines
Wireless AP Default IP Address
Assigning a Static IP Address to a Wireless AP
Configuring Wireless APs for the First Time
General Configuration Methods
Modifying the Properties of Wireless APs Based on a Default AP Configuration
Modifying the Default Setting of Wireless APs Using the Copy to Defaults Feature
AP Multi-Edit Properties
Discovery and Registration
Wireless AP Discovery
Wireless AP Registration
Security Mode
Registration After Discovery
Viewing a List of All APs
AP Search Facility
Understanding AP Status
AP Actions
Applying WLAN Service
Radio Actions
New Button -- Adding and Registering a Wireless AP
Creating a Clone AP
Deleting an AP
Wireless AP Default Configuration
Configuring the Default Wireless AP Settings
Configuring Common Configuration Default AP Settings
Configuring AP3912 Default AP Settings
Configuring AP3935 Default AP Settings
Configuring AP3965 Default AP Settings
Configuring AP38xx Default AP Settings
Configuring AP3801 Default AP Settings
Configuring AP37xx, W78xC Default AP Settings
AP Default Settings
Configuring Wireless AP Properties
Modifying the Status of a Wireless AP
AP Rehoming
AP Dashboard
AP Properties Tab Configuration
AP Properties Tab - Basic Settings
AP Properties Tab - Advanced Settings
Professional Install Settings
Assigning Wireless AP Radios to a VNS
Assigning WLAN Services to AP3912 Ports
Configuring Wireless AP Radio Properties
Dynamic Radio Management (DRM)
Modifying 11n and 11ac Wireless AP Radio Properties
Channel Bonding
Channel Selection ??? Primary and Extension
Guard Interval
Aggregate MSDU and MPDU
Antenna Selection
Configuration Parameters for Radio Properties
Radio Advanced Properties
Achieving High Throughput with 11n and 11ac Wireless APs
Setting Up the Wireless AP Using Static Configuration
Configuring VLAN Tags for Wireless APs
Setting Up 802.1x Authentication for a Wireless AP
Configuring 802.1x EAP-TLS Authentication
Proxy Mode
Pass Through Mode
Viewing 802.1x Credentials
Deleting 802.1x Credentials
Setting Up 802.1x Authentication for Wireless APs Using Managing Certificates
Configuring 802.1x EAP-TLS Authentication in Pass Through Mode Using Multi-edit
Managing Certificates
Configuring Co-Located APs in Load Balance Groups
Creating a Load Balance Group
Configuration Parameters for AP Load Groups
How Availability Mode Affects Load Balancing
Load Balance Group Statistics
Configuring an AP Cluster
Configuring an AP as a Guardian
Configuring a Captive Portal on an AP
Configuring Firewall Friendly External Captive Portal on an AP
Controlling Network Access on the AP
Performing AP Software Maintenance
Maintaining the List of Current AP Software Images
Scheduling a Maintenance Cycle for Specific APs
Deleting a Wireless AP Software Image
Downloading a new Wireless AP Software Image
Defining Parameters for a Controlled Software Upgrade
Understanding the ExtremeWireless LED Status
39xx Series Wireless APs
AP3912 LED Indicators
AP3935, AP3965 LED Indicators
38xx Series Wireless APs
WS-AP3801i LED Indicators
WS-AP3805i/e LED Indicators
WS-AP3865 LED Indicators
WS-AP3825 LED Indicators
37xx Series Wireless APs
WS-AP3705i LED Indicators
WS-AP3710 LED Indicators
WS-AP3715 LED Indicators
AP3765/AP3767/W786C LED Status
Configuring Wireless AP LED Behavior
Configuring Operational Mode for One AP
Configuring Operational Mode with Multi-Edit
Configuring AP Operational Mode Default Behavior
Configuring Topologies
Topology Overview
Configuring the Admin Port
Configuring a Basic Data Port Topology
Configuring a Basic Topology
Creating a Topology Group
Edit or Delete a Topology Group
Enabling Management Traffic
Layer 3 Configuration
IP Address Configuration
DHCP Configuration
Defining a Next Hop Route and OSPF Advertisement
Exception Filtering
Multicast Filtering
Configuring Roles
Roles Overview
Configuring Default VLAN and Class of Service for a Role
Policy Rules
Matching Policy Rules Criteria
Rule-Based Redirection
Configuring Rule-Based Redirection
Rule Based Redirection to a Captive Portal
Policy Rules for a Non-authenticated Role
Non-authenticated Role Examples
Authenticated Rules Examples
Policy Rules for a Default Role
Default Role Examples
Policy Rules Between Two Wireless Devices
Defining Policy Rules for Wireless APs
Configuring Policy Rules
Understanding the Policy Rules Tab
Custom AP Rules
Creating a Custom AP Filter
Understanding the Filter Rule Definition Dialog
DPI L7 Configuration Restrictions
Configuration Rules with L7 Filters
L7 Configuration
Application Groups
Allowing for Restricted Sets of Applications and Resources
Host Name DNS Support
DNS Resolution
Configuring a Host Name Rule
Custom Apps List
Including Custom Apps
Partially Specified Policy
Configuring WLAN Services
WLAN Services Overview
Third-party AP WLAN Service Type
Configuring a Basic WLAN Service
Advanced WLAN Service Configuration
Configuring Privacy
About Wi-Fi Protected Access (WPA V1 and WPA V2)
Wireless 802.11n APs and WPA Authentication
WPA Key Management Options
Configuring WLAN Service Privacy
Configuring Accounting and Authentication
Defining Accounting Methods for a WLAN Service
Configuring Authentication for a WLAN Service
MAC-Based Authentication for a WLAN Service
Assigning RADIUS Servers for Authentication
Defining the RADIUS Server Priority for RADIUS Redundancy
Configuring Assigned RADIUS Servers
Defining Common RADIUS Settings
Vendor Specific Attributes
Defining RADIUS Settings for Individual RADIUS Servers
Testing RADIUS Server Connections
Viewing the RADIUS Server Configuration Summary
Removing an Assigned RADIUS Server from a WLAN Service
Defining a WLAN Service with No Authentication
Configuring Captive Portal for Internal or External Authentication
Configuring Basic Captive Portal Settings
Configuring External and Mode 802.1 Captive Portal
Configuring Firewall Friendly External Captive Portal
Configuring Internal Captive Portal and Guest Splash
Configuring Guest Portal
Configuring Error Messages
Using the Captive Portal Editor
Defining Priority Level and Service Class
Defining the Service Class
Configuring the Priority Override
Configuring QoS Modes
Defining the DSCP and Service Classifications
Configuring Hotspots
To Configure a New Hotspot
SP Identification Tab
Network Characteristics Tab
Online Signup Tab
Configuring the OSU Service Provider
Configuring a VNS
Configuring a VNS
Controller Defaults
VNS Global Settings
Defining RADIUS Servers and MAC Address Format
Defining RADIUS Servers for VNS Global Settings
Configuring the Global MAC Address Format for Use with the RADIUS Servers
Configuring Advanced RADIUS Servers Settings
Changing the Display Time of the Notice Web Page
Configuring RADIUS Attribute for Hybrid Role Mode
Defining RFC 3580 Mapping Mode for VNS Global Settings
Configuring Dynamic Authorization Server Support
Defining Wireless QoS Admission Control Thresholds
Configuring QoS Admission Control Thresholds
Configuring QoS Flexible Client Access
Working with Bandwidth Control Profiles
Configuring the Global Default Policy
Configuring the Topology and Rate Profiles
Configuring the Filters
Configuring Egress Filtering Mode
Configuring the In/Out Rules for WLAN Services Settings
Using the Sync Summary
Using NAC Integration
Adding a New NAC Server Destination
Using Client Login
Selecting a Client Autologin Option
Using Topology Group Algorithm
Using Netflow/MirrorN
ExtremeAnalytics Support with Enhanced IPFIX Records
Managing Redirection URLs
Adding a Redirection URL
Modifying a Redirection URL
Deleting a Redirection URL
Methods for Configuring a VNS
Manually Creating a VNS
Creating a VNS Manually
Creating a VNS Using the Wizard
Creating a NAC VNS Using the VNS Wizard
Creating a Voice VNS Using the VNS Wizard
Creating a Voice VNS Using the VNS Wizard - Basic Settings Screen
Creating a Voice VNS Using the VNS Wizard - Authentication Settings Screen
Creating a Voice VNS Using the VNS Wizard - DHCP Screen
Creating a Voice VNS Using the VNS Wizard - Privacy Screen
Creating a Voice VNS Using the VNS Wizard - Radio Assignment Screen
Creating a Voice VNS Using the VNS Wizard - Summary Screen
Creating a Data VNS Using the VNS Wizard
Creating a Data VNS Using the VNS Wizard - Basic Settings Screen
Creating a Data VNS Using the VNS Wizard - Authentication Screen
Creating a Data VNS Using the VNS Wizard - DHCP Screen
Creating a Data VNS Using the VNS Wizard - Filtering Screen
Creating a Data VNS Using the VNS Wizard - Privacy Screen
Creating a Data VNS Using the VNS Wizard - Radio Assignment Screen
Creating a Data VNS Using the VNS Wizard - Summary Screen
Creating a Captive Portal VNS Using the VNS Wizard
Creating an Internal Captive Portal VNS
Creating an Internal Captive Portal VNS - Basic Settings Screen
Creating an Internal Captive Portal VNS - Authentication Screen
Creating an Internal Captive Portal VNS - DHCP Screen
Creating an Internal Captive Portal VNS - Filtering Screen
Creating an Internal Captive Portal VNS - Privacy Screen
Creating an Internal Captive Portal VNS - Radio Assignment Screen
Creating an Internal Captive Portal VNS - Summary Screen
Creating an External Captive Portal VNS
Creating an External Captive Portal VNS - Basic Settings Screen
Creating an External Captive Portal VNS - Authentication Screen
Creating an External Captive Portal VNS - DHCP Screen
Creating an External Captive Portal VNS - Filtering Screen
Creating an External Captive Portal VNS - Privacy Screen
Creating an External Captive Portal VNS - Radio Assignment Screen
Creating an External Captive Portal VNS - Summary Screen
Creating a Firewall Friendly External Captive Portal VNS
Creating a Firewall Friendly External Captive Portal VNS - Basic Settings Screen
Creating a Firewall Friendly External Captive Portal VNS - Authentication Screen
Creating a Firewall Friendly External Captive Portal VNS - DHCP Screen
Creating a Firewall Friendly External Captive Portal VNS - Filtering Screen
Creating a Firewall Friendly External Captive Portal VNS - Privacy Screen
Creating a Firewall Friendly External Captive Portal VNS - Radio Assignment Screen
Creating a Firewall Friendly External Captive Portal VNS - Summary Screen
Creating a GuestPortal VNS
Creating a GuestPortal VNS from an Existing VNS
Creating a New GuestPortal VNS Using the VNS Wizard
Enabling and Disabling a VNS
Renaming a VNS
Deleting a VNS
Configuring Classes of Service
Classes of Service Overview
Configuring Classes of Service
CoS Rule Classification
Priority and ToS/DSCP Marking
Configuring ToS/DSCP Marking
Rate Limiting
Configuring Sites
VNS Sites Overview
Configuring Sites
Recommended Deployment Guidelines
Defining Roles, CoS, and RADIUS Servers for Local RADIUS Authentication
Radius Configuration
Selecting AP Assignments
Selecting WLAN Assignments
Working with a Mesh Network
About Mesh
Simple Mesh Configuration
Wireless Repeater Configuration
Wireless Bridge Configuration
Examples of Deployment
Mesh WLAN Services
Mesh Setup with a Single Mesh WLAN Service
Mesh Setup with Multiple Mesh WLAN Services
Key Features of Mesh
Self-Healing Network
Tree-like Topology
Radio Channels
Multi-Root Mesh Topology
Link Security
Deploying the Mesh System
Planning the Mesh Topology
Provisioning the Mesh Wireless AP
Mesh Deployment Overview
Connecting the Mesh APs to the Network for Discovery and Registration
Configuring the Mesh Wireless APs Through the Controller
Connecting the Mesh Wireless APs to the Enterprise Network for Provisioning
Moving the Mesh Wireless APs to the Target Location
Changing the Pre-shared Key in a Mesh WLAN Service
Working with a Wireless Distribution System
About WDS
Simple WDS Configuration
Wireless Repeater Configuration
Wireless Bridge Configuration
Examples of Deployment
WDS WLAN Services
WDS Setup with a Single WDS WLAN Service
WDS Setup with Multiple WDS WLAN Services
Key Features of WDS
Tree-like Topology
Radio Channels
Multi-Root WDS Topology
Automatic Discovery of Parent and Backup Parent Wireless APs
Link Security
Deploying the WDS System
Planning the WDS Topology
Provisioning the WDS APs
WDS Deployment Overview
Connecting the WDS Wireless APs to the Enterprise Network for Discovery and Registration
Configuring the WDS Wireless APs Through the Wireless Controller
Assigning the Satellite Wireless APs??? Radios to the Network WLAN Services
Connecting the WDS Wireless APs to the Enterprise Network for Provisioning
Moving the WDS Wireless APs to the Target Location
Changing the Pre-shared Key in a WDS WLAN Service
Availability and Session Availability
Availability
Events and Actions in Availability
Availability Prerequisites
Configuring Availability Using the Availability Wizard
Configuring Availability Manually
Alternate Method to Setting Up a Wireless AP
Setting the Primary or Secondary Wireless Controllers for Availability
Verifying Availability
Session Availability
Events and Actions in Session Availability
Enabling Session Availability
Configuring Fast Failover and Enabling Session Availability
Verifying Session Availability
Verify Synchronization
Viewing SLP Activity
Configuring Mobility
Mobility Overview
Mobility Domain Topologies
Configuring a Mobility Domain
Designating a Mobility Manager
Designating a Mobility Agent
Working with Third-party APs
Defining Authentication by Captive Portal for the Third-party AP WLAN Service
Defining the Third-party APs List
Defining Policy Rules for the Third-party APs
Working with ExtremeWireless Radar
Radar Overview
Radar Components
Analysis Engine Overview
Radar Functionality on the Controller
Radar Functionality on the Wireless AP
Radar License Requirements
AP Limitations
Radar Scan Profiles
In-Service Scan Profiles
Guardian Scan Profiles
Enabling the Analysis Engine
Viewing Existing Scan Profiles
Adding a New Scan Profile
Configuring an In-Service Scan Profile
In-Service Scan Profile Detection Settings
In-Service Scan Profile Prevention Settings
Selecting Countermeasures
Viewing the List of Assigned APs
Assigning an AP to an In-Service Scan Profile
Configuring a Guardian Scan Profile
Guardian Scan Profile Detection Settings
Guardian Scan Profile Prevention Settings
Selecting Countermeasures
Viewing the List of Assigned APs
Assigning an AP to a Guardian Scan Profile
Maintaining the Radar List of APs
AP Categories
Viewing the List of Scanning APs
Viewing the List of Friendly APs
Adding Friendly APs
Modifying Friendly APs
Viewing the List of Uncategorized APs
Viewing the List of Authorized APs
Adding Authorized APs
Viewing the List of Prohibited APs
Adding Prohibited APs
Reclassifying APs
Reclassifying an AP as a Threat
Working with Radar Reports
Security Threats
Active Threats
Active Countermeasures
Blacklisted Clients
Radar APs Denied by License
Collection Engine Status
WLAN Security Report
Threat Summary
Threat History
Working with Location Engine
Location Engine Overview
Location Solution Architecture
Dynamic Filtering
Bulk Reporting
Location Engine on the Controller
Deploying APs for Location Aware Services
Configuring the Location Engine
Enabling the Location Engine
Location Batch and Client Reporting
Creating a New Destination URL
Creating a New On-Demand User
Downloading a Floor File
Uploading an Existing Floor File
Deleting a Floor Plan
Working with Reports and Statistics
Application Visibility and Device ID
Application Visibility
Application Control for Tunneled Traffic
Device Identification
Enabling Application Visibility with Device Identification
Viewing AP Reports and Statistics
Viewing Statistics for APs
Viewing Active Wireless APs
Viewing Wired Ethernet Statistics:
Viewing Wireless Statistics:
Viewing Admission Control Statistics by Wireless AP:
Viewing Mesh VNS Wireless AP Statistics:
Viewing Load Balance Group Statistics
About Radio Preference/Load Control Statistics
About Client Balancing Statistics Reports
Viewing Wireless AP Availability
AP Inventory Reports
Channel Inspector Report
Viewing the Channel Inspector Report
Running a Background Scan
Channel Inspector Report Fields
AP Performance by Radio Report
AP Performance by SSID and Radio Report
AP Accessibility Report
Viewing All Clients
Displaying Client Details
Client Search Facility
Viewing Client MAC and OUI
Viewing Role Filter Statistics
Viewing Topology Reports
Viewing Mobility Reports
Client Location in Mobility Zone
Primary/Backup Manager Mobility Tunnel Matrix
Remotable VNS
Viewing Controller Status Information
Viewing Routing Protocol Reports
Viewing RADIUS Reports
Call Detail Records (CDRs)
CDR File Naming Convention
CDR File Types
CDR File Format
Viewing CDRs
Backing Up and Copying CDR Files to a Remote Server
Performing System Administration
Performing Wireless AP Client Management
Adding Clients to a Blacklist
Defining Wireless Assistant Administrators and Login Groups
Modifying Admin Password
Removing Administrator
Logs, Traces, Audits and DHCP Messages
ExtremeWireless Appliance Messages
Working with Logs
Log Severity Levels
Viewing the Wireless Controller Logs
Viewing Wireless Controller Station Logs
Viewing Wireless AP Logs
Viewing Login Logs
Working with GuestPortal Login Logs
Working with a Tech Support File
Viewing Wireless AP Traces
Viewing Audit Messages
Viewing the DHCP Messages
Viewing the NTP Messages
Viewing Software Upgrade Messages
Viewing Configuration Restore/Import Messages
Working with GuestPortal Administration
About GuestPortals
Adding New Guest Accounts
Enabling or Disabling Guest Accounts
Editing Guest Accounts
Removing Guest Accounts
Importing and Exporting a Guest File
Viewing and Printing a GuestPortal Account Ticket
Working with the Guest Portal Ticket Page
Working with a Custom GuestPortal Ticket Page
Activating a GuestPortal Ticket Page
Uploading a Custom GuestPortal Ticket Page
Deleting a Custom GuestPortal Ticket Page
Configuring Guest Password Patterns
To Configure a Guest Password Pattern
Configuring Web Session Timeouts
Regulatory Information
ExtremeWireless APs 37XX , 38XX, and 39XX
Default GuestPortal Ticket Page
Example Ticket Page
Placeholders Used in the Default GuestPortal Ticket Page
Default GuestPortal Ticket Page Source Code
Glossary
A
B
C
D
E
F
G
H
I
J
L
M
N
O
P
Q
R
S
T
U
V
W
X
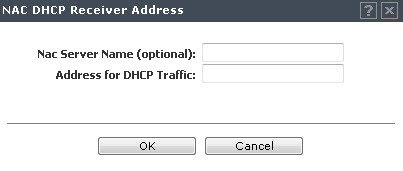
Adding a New NAC Server Destination
From the top menu, click
VNS
.
In the left pane, click
Global
>
NAC Integration
.
Click
New
. The
NAC DHCP Receiver Address
dialog appears
.
For
Nac Server Name
, enter a name for the NAC Server. This is an optional step, but it helps to identify a specific server.
For
Address for DHCP Traffic
, enter the IPv4 address for
DHCP (Dynamic Host Configuration Protocol)
Traffic.
Click
OK
.
 Print
this page
Print
this page Email this topic
 Feedback
 View PDF
 Download EPUB