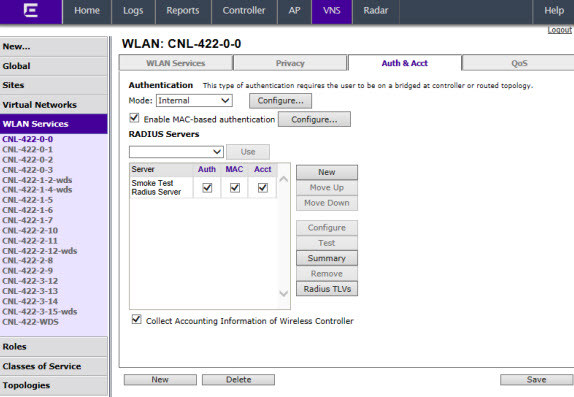
Accounting tracks the activity of wireless device users. There are two types of accounting available:
Controller accounting creates Call Data Records (CDRs). If RADIUS accounting is enabled, a RADIUS accounting server needs to be specified.
To define accounting methods:
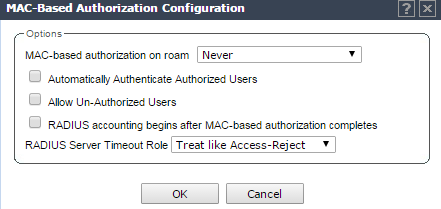
MAC-Based Authorization Configuration - Fields and Buttons
| Field/Button | Description |
|---|---|
| MAC-based authorization on roam | Select method for
MAC-based authorization: Never: disables the feature On inter-AP roam: enables MAC-based authorization on roam. On inter-Area roam: enables MAC-based authorization sent to the RADIUS server on area roams. |
| Automatically Authenticate Authorized Users | Select to automatically authenticate authorized users. When set, a station that passes MAC-based authentication is treated as fully authorized. For example, its authentication state is set to fully authenticated. This can trigger a change to the role applied to the station. If Captive Portal authentication is also configured on the WLAN Service, a station that passes MAC-based authentication will not have to pass Captive Portal authentication as well. |
| Allow Un-Authorized Users | Select to allow
un-authorized users which permits stations that do not pass
MAC-based authentication to stay on the network in an
un-authorized state. The station can be confined to a
“Walled Garden” by its assigned role. If Captive Portal
authentication is also configured on the WLAN Service, a
station that fails MAC-based authentication can still become
authorized by passing Captive Portal authentication. Note: Only select this
checkbox if you want your clients to be authorized every
time they roam to another AP. If this option is not
enabled, and MAC-based authentication is in use, the
client is authenticated only at the start of a
session.
|
| RADIUS accounting begins after MAC-based authorization completes | Select to delay RADIUS accounting until after MAC-based authorization is complete. |
| RADIUS Server Timeout Role | Select a Radius Server Timeout Role from the drop-down list. |
The server name is added to the Server table of assigned RADIUS servers. The selected server is no longer available in the RADIUS servers drop-down list.
The RADIUS servers are defined on the Global Settings screen. For more information, see Defining RADIUS Servers and MAC Address Format.
The configured values for the selected server are displayed in the table at the top.
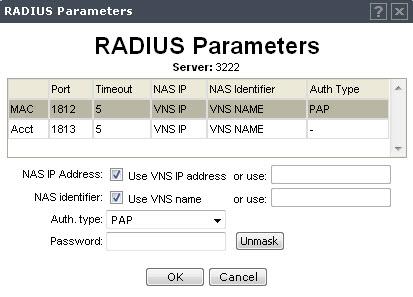
To proofread your shared secret key, click Unmask. The password is displayed.
 Print
this page
Print
this page Email this topic
 Feedback
 View PDF
 Download EPUB