Adding New Guest Accounts
To add a new guest
account:
- Do one of the following:
- If you have GuestPortal Manager rights, log onto the controller.
- If you have
full administrator rights:
- From the top menu, click VNS. The Virtual Network
Configuration screen displays.
- In the left pane, expand the WLAN Services
pane, click the dedicated WLAN Service that provides the temporary
guest network services. The WLAN Services
configuration window for that service displays.
- Click the Auth & Acct tab.
- Make sure the Mode is set to Guest Splash and
then click Configure. The Configuration page displays.
- In the Guest Splash
section, click Manage
Guest Users.
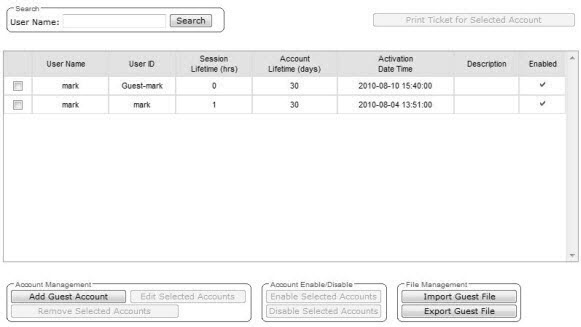
- The Guest Splash
Administration screen displays.

Note
You have 3 minutes to add new guest user accounts.
If that time expires, close the
Guest Splash
Administration screen and click
Manage Guest Users
again. You can also increase the
Start date time to be
within 3 minutes of the current network time.
-
In the Account Management section,
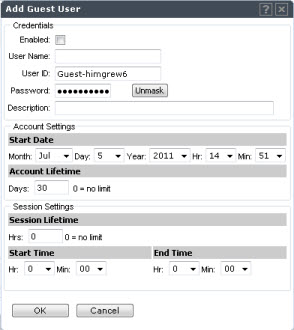
click Add Guest Account. The
Add Guest
User screen displays.
- To enable the new guest account, select the Enabled checkbox. For more information, see Enabling or Disabling Guest Accounts.
- In the Credentials section, do the following:
- In the Account Settings section, do the following:
- Start date — Specify the start date and time for
the new guest account.
- Account lifetime — Specify the account lifetime,
in days, for the new guest account. The default 0
value specifies no limit to the account lifetime. Only a user with
administrative privileges can change the value of the Account
lifetime.
- In the Session Settings section, do the following:
- Session lifetime — Specify a session lifetime,
in hours, for the new guest account. The default 0
value specifies no limit to the session lifetime. The session lifetime is
the allowed cumulative total in hours spent on the network during the
account lifetime.
- Start Time — Specify a start time for the
session for the new guest account.
- End Time — Specify an end time for the session
for the new guest account.
- To save your changes, click OK.
 Print
this page
Print
this page Email this topic
 Feedback
 View PDF
 Download EPUB