Creating a New GuestPortal VNS Using the VNS Wizard - Filtering
Screen
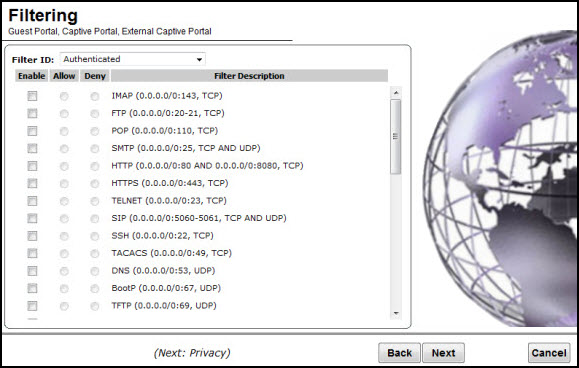
The Filtering screen displays:
-
Configure the VNS
filtering settings:
-
In the
Filter ID drop-down
list, click one of the following:
- Authenticated — Controls
network access after the user has been authenticated.
- Non-authenticated —
Controls network access and to direct users to a Captive Portal Web page for
login.
-
In the Filter table, select the
Enable checkbox for the
desired filters, then select the Allow or Deny option buttons for each filter as needed.
-
At the bottom of the
Filter list, select Allow or Deny for All Other Traffic.
-
Click Next. The Privacy screen displays.
 Print
this page
Print
this page Email this topic
 Feedback
 View PDF
 Download EPUB