
Caution
Observe all ESD precautions when handling sensitive electronic equipment.Caution
Before rack-mounting the device, ensure that the rack can support it without compromising stability. Otherwise, personal injury and/or equipment damage may result.To install the RPS-500p in a rack, follow these steps.
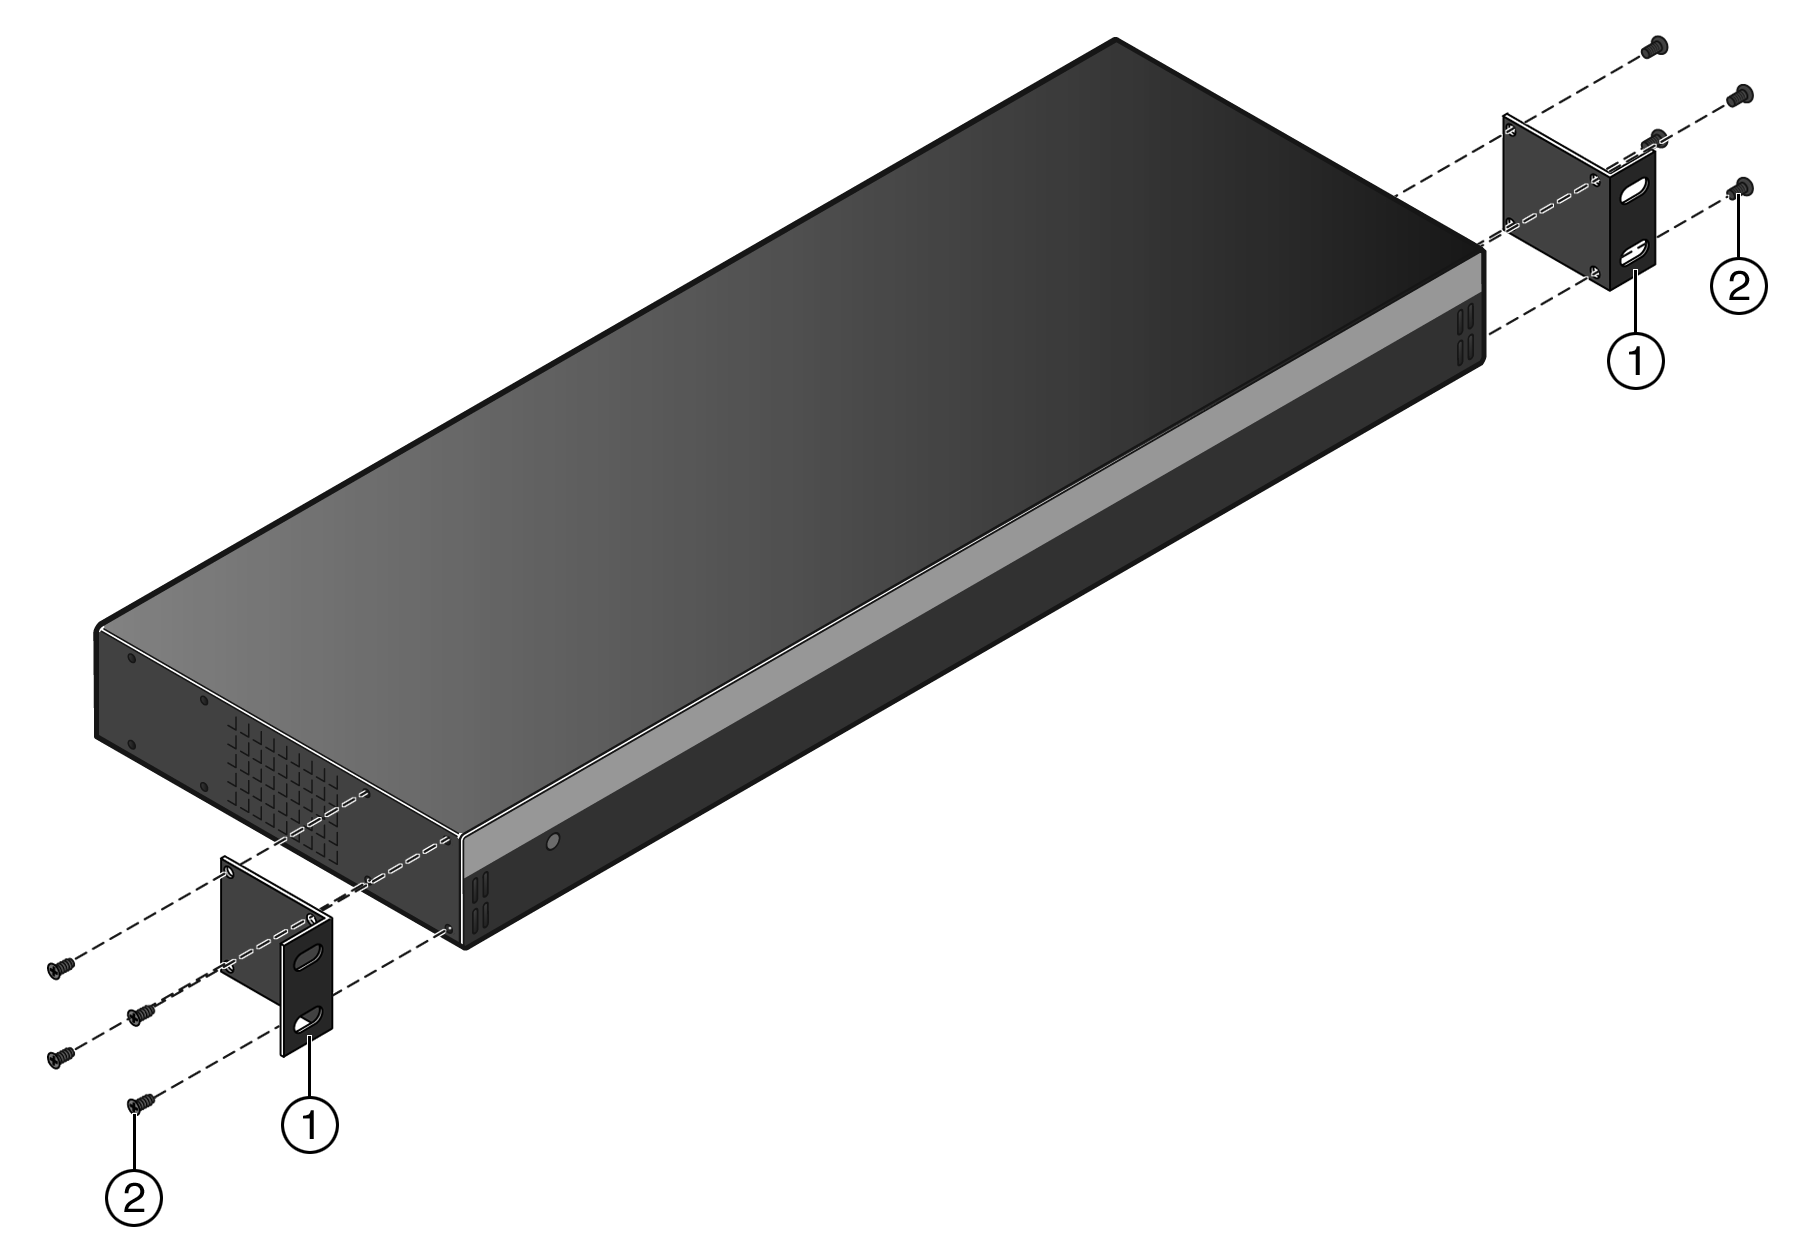
| 1 = Rack-mounting brackets (2) | 2 = M3x6mm flathead screws (8) |
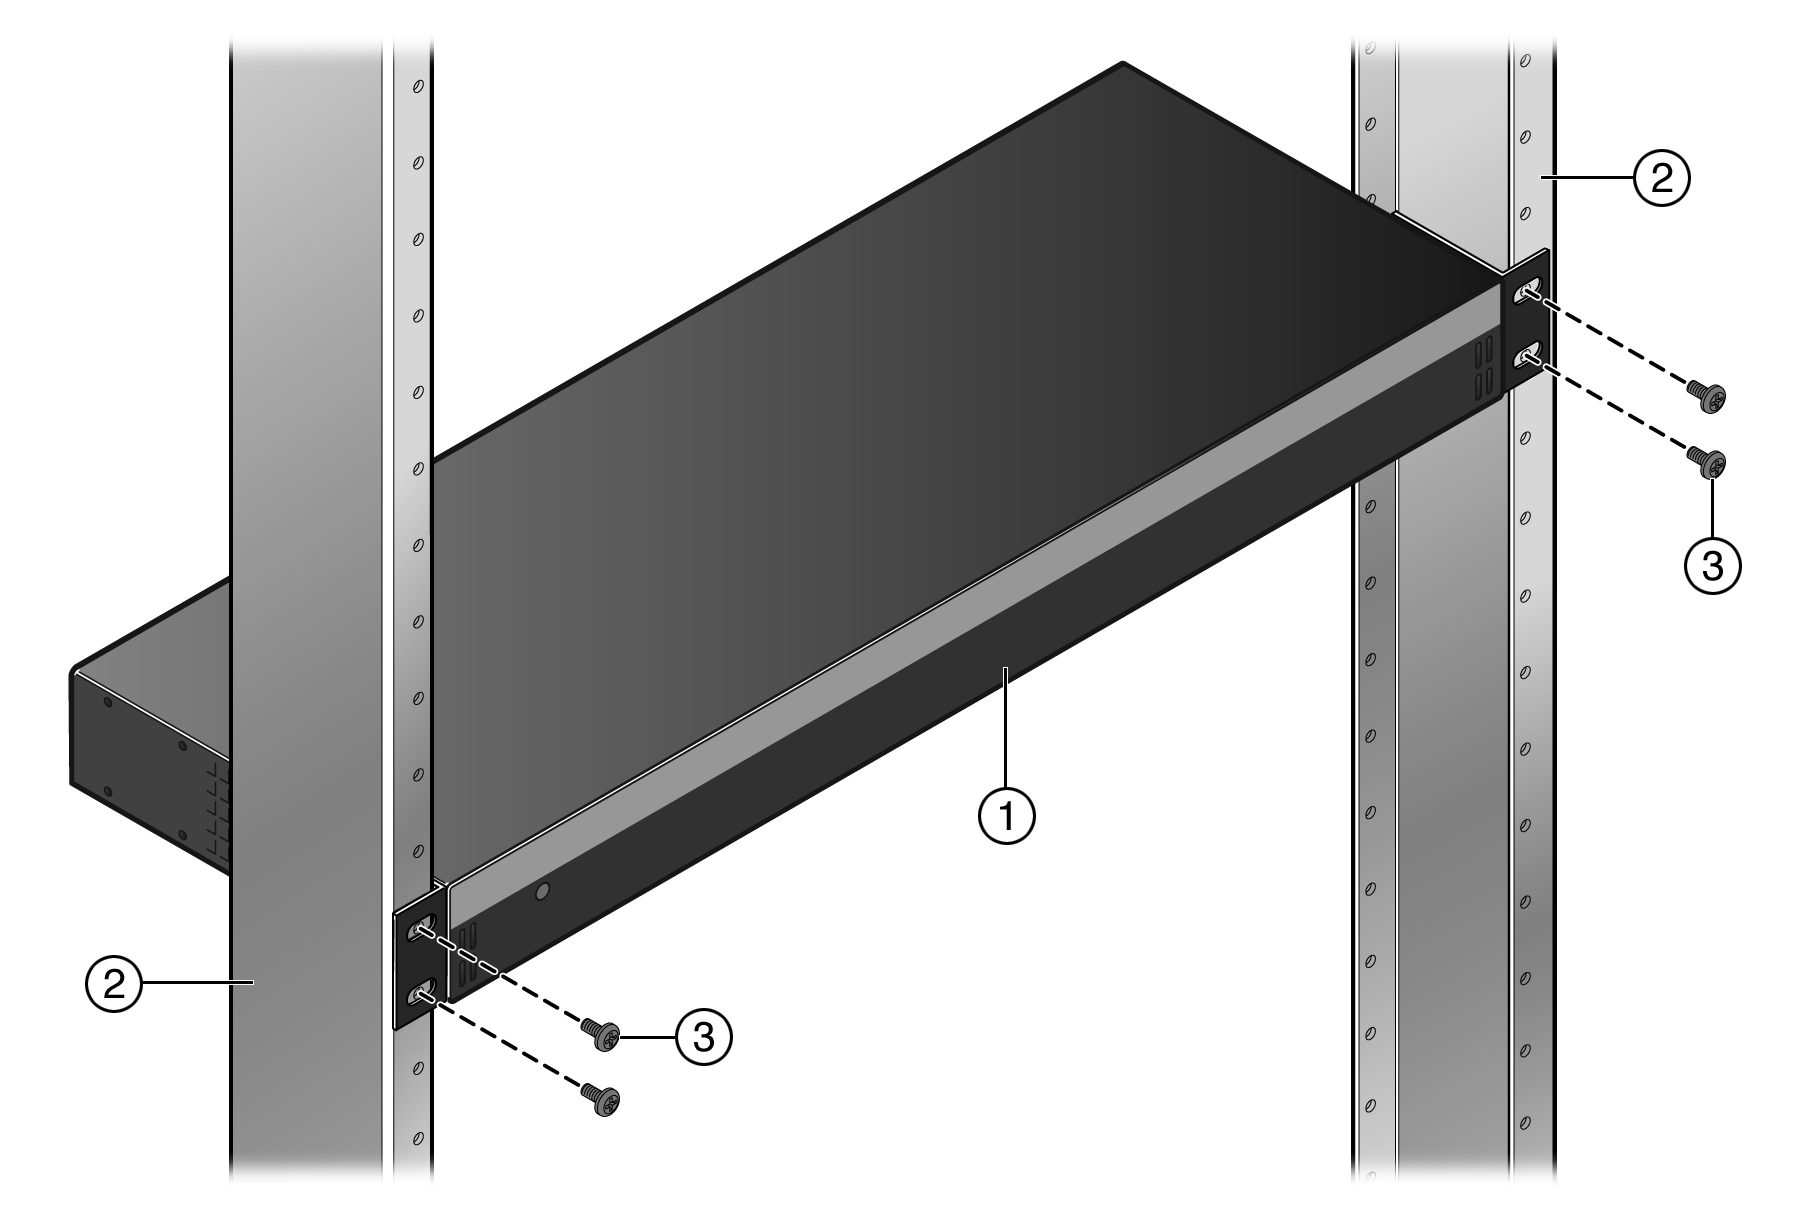
| 1 = RPS-500p | 3 = Mounting screws (4) |
| 2 = Rails of 19-inch rack |