Captive Portal Policy Web Page Configuration

Procedure

  1. Select the Web Page tab to create locally or externally hosted HTML pages.

    The Login page displays by default

    Click to expand in new window
    Captive Portal Policy - Web Page - Internal Option Screen
    GUID-298713F6-7DC8-4290-B5A1-F5CF524D620D-low.png

    The Login screen prompts the user for a username and password to access the captive portal and proceed to either the Terms and Conditions page (if used) or the Welcome page.

    The Terms and Conditions page provides conditions that must be agreed to before captive portal access is permitted.

    The Welcome page asserts a user has logged in successfully and can access the captive portal.

    The Welcome Back page greets returning users.

    The Fail page asserts authentication attempt has failed, the user is not allowed to access the internet (using this captive portal) and must provide the correct login information again to access the internet.

    The No Service page asserts the captive portal service is temporarily unavailable for technical reasons. Once the services become available, the captive portal user is automatically connected back to the services available through the captive portal.

  2. Select the location where the captive portal Login, Terms and Conditions, Welcome, Fail, No Service and Registration Web pages are hosted.

    Available sources include Internal, External and Advanced. If Internal is selected, provide the information for each of the screens. If Advanced is selected, follow the on-screen instructions to upload custom Web pages. If Externally hosted is selected, provide the URLs for each of the necessary pages in the fields below.

    Organization Name

    Set any organizational specific name or identifier which clients see during login. This setting is available only for the Login page.

    Title Text

    Set the title text displayed on the pages when wireless clients access captive portal pages. The text should be in the form of a page title describing the respective function of each page and should be unique to each function.

    Header Text

    Provide header text unique to the function of each page.

    Login Message

    Specify a message containing unique instructions or information for the users who access the Login, Terms and Condition, Welcome, Fail, No Service or Registration pages. In the case of the Terms and Agreement page, the message can be the conditions requiring agreement before captive portal access is permitted.

    Footer Text

    Provide a footer message displayed on the bottom of each page. The footer text should be any concluding message unique to each page before accessing the next page in the succession of captive portal Web pages.

    Main Logo URL

    The Main Logo URL is the URL for the main logo image displayed on each of the pages. Use the Browse button to navigate to the location of the target file. Optionally select the Use as banner option to designate the selected main logo as the page‘s banner as well. The banner option is disabled by default.

    Small Logo URL

    The Small Logo URL is the URL for a small logo image displayed on the screens. Use the Browse button to navigate to the location of the target file.

    Signature

    Provide the copyright and legal signature associated with the usage of the captive portal and the usage of the organization name provided. This setting is available only for the Login page.

  3. Refer to the right side of each screen to define how the Org Name/Signature Background Color, Org/Name Signature Text Color, Body Background Color and Body Text Color display for current screen.

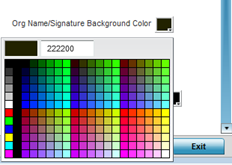
    Select the box to the right of each of these four items to launch a color palette where screen colors can be selected uniquely. Select Preview Page to review your color selections before committing the updates to captive portal screens. Each of the Login, Terms and Conditions, Welcome, Fail, No Service and Registration screens can have their background and signature colors set uniquely.

    Click to expand in new window
    Captive Portal Policy - Web Page - Color Palette Menu
    GUID-B9831CA0-C997-4F86-98A3-7F363465B55D-low.png
  4. When setting the properties of the Registration screen, refer to the bottom portion of the screen to define email, country, gender, mobile, zip, street and name filters used as additional authentication criteria.

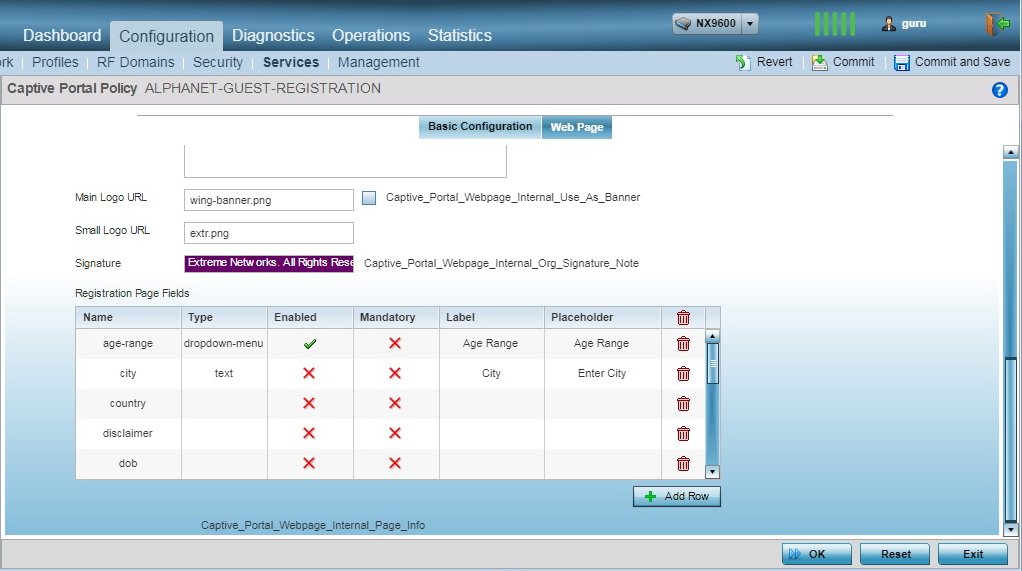
    Guest users are redirected to the registration portal on association to the captive portal SSID. Users are displayed an internal (or) externally hosted registration page where the guest user must complete the registration process if not previously registered.

    These fields are customizable to meet the needs of retailers providing guest access. The captive portal sends a message to the user (on the phone number or Email address provided at registration) containing an access code. The user inputs the access code and the captive portal verifies the code before returning the Welcome page and providing access. This allows a retailer to verify the phone number or Email address is correct and can be traced back to a specific individual.
    Click to expand in new window
    Captive Portal Policy - Web Page - Internal - Registration - Registration Page Fields Table
    GUID-FE9E673C-81C5-46A8-A407-4EF7FD4CEDE1-low.png
  5. Click OK to save the changes made within any of the Internal Page screens.

    Click Reset to revert to the last saved configuration.

  6. Select Advanced to use a custom-developed directory of web pages.

    Web pages in the directory can be copied to and from the controller or service platform, to support the captive portal.

    Use the File Transfers sub-menu in the Operations page to transfer files to the appropriate devices serving up the web pages.

    Click to expand in new window
    Captive Portal Policy - Web Page Screen - Advanced Option
    GUID-CF88B7AA-8AE2-42EE-8640-23610CBF9178-low.png
  7. Select the Externally Hosted radio button if hosting the captive portal on an external server resource.

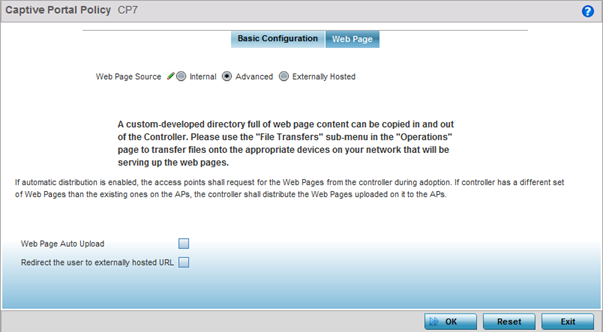
    Select to automatically launch the advanced pages for requesting clients upon association. This setting is disabled by default.
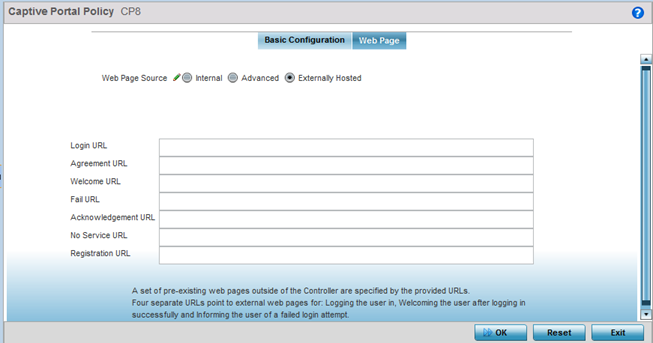
    Select Redirect the user to externally hosted URL to use an externally hosted server resource and its login permissions for logging into the advanced page. This setting is disabled by default.
    Click to expand in new window
    Captive Portal Policy - Web Page - Externally Hosted Option
    GUID-75DF258B-EC1D-48B5-91A8-57AE899CFFD8-low.png

    Login URL

    Define the complete URL for the location of the Login screen. The Login screen prompts the user for a username and password to access either the Terms and Conditions or Welcome page.

    Agreement URL

    Define the complete URL for the location of the Terms and Conditions page. The Terms and Conditions page provides conditions that must be agreed to before wireless client access is provided.

    Welcome URL

    Define the complete URL for the location of the Welcome page. The Welcome page asserts the user has logged in successfully and can access network resources via the captive portal.

    Fail URL

    Define the complete URL for the location of the Fail page. The Fail page asserts authentication attempt has failed, and the client cannot access the captive portal. The client needs to provide correct login information to regain access.

    Acknowledgement URL

    Define the complete URL to the location of the Acknowledgement page. The Acknowledgement URL is needed by returning users whose MAC addresses has been validated previously, but must accept the conditions of the captive portal again.

    No Service URL

    Define the complete URL to the location of the No URL page. The No Service URL is needed by users encountering difficulties connecting to the external resource used to host the captive portal pages.

    Registration URL

    Define the complete URL to the location of the Registration page. The Registration URL is supported by NX9500, NX9600 and NX75XX service platform models as an adopting controller verifying (registering) user information before client access is provided to captive portal managed Internet resources.

  8. Click OK when completed to update the captive portal's advanced configuration.

    Click Reset to revert the screen back to its last saved configuration.