Use the CP Pages Image File screen to set the way managed access points receive captive portal images files required to provision captive portal access to requesting clients. Captive portal image files are the login, welcome and conditions pages specifically
To set the captive portal for upload and define the transfer configuration:
Select the Operations menu item.
Select Devices and select the Captive Portal Pages tab.
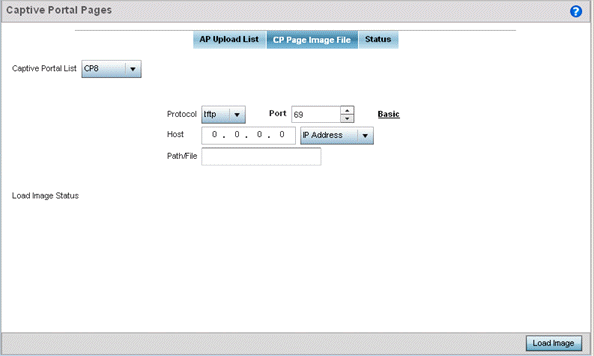
Select the CP Pages Image File tab.
|
Captive Portal List |
Use the drop-down menu to select an existing policy. This policy contains the image (or set of login and conditions pages) requesting clients will navigate and complete before granted access to the network using the unique permissions of the captive portal. |
|
Protocol |
Define the protocol (transfer medium) used to forward the image files to the access points provisioning captive portal files to requesting clients. Available options include ftp, http, tftp and sftp. A protocol parameter is required only when Server is selected as the Source and the Advanced option is used. |
|
Host |
If needed, specify a Hostname or numeric IP address of the server transferring the file. If a hostname is provided, an IP Address is not needed. This field is only available when Server is selected in the From field. |
|
Port |
Specify the port for transferring files. Enter the port number directly or use the spinner control.. |
|
User Name |
Provide a user name to access the FTP or SFTP server. This parameter is required only when the selected protocol is ftp or sftp. |
|
Password |
Provide the password for the user name used to log in to the FTP/SFTP server. Only required when the protocol is ftp or sftp. |
|
Path/File |
Define the path to the file on the server. Enter the complete relative path to the file. |
Select Load Image to upload the image file. Optionally, refer to the Load Image Status field to review the status of the current upload.
 Print
this page
Print
this page Email this topic
 Feedback
 View PDF
 Download EPUB