To add or edit a NAT configuration that can be applied to a profile:
Select the Configuration tab from the Web UI
Select Profiles from the Configuration tab.
Select Manage Profiles from the Configuration > Profiles menu.
Select Security.
Select NAT.
Select Add to create a new NAT policy that can be applied to a profile. Select Edit to modify the attributes of a existing policy or select Delete to remove obsolete NAT policies from the list of those available to a profile.
If adding a new NAT policy or editing the configuration of an existing policy, define the following parameters:
|
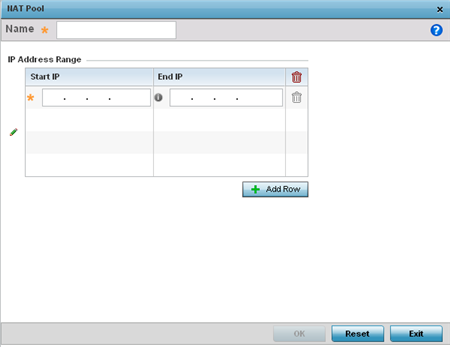
Name |
If adding a new NAT policy, provide a name to help distinguish it from others with similar configurations. The length cannot exceed 64 characters. |
|
IP Address Range |
Define a range of IP addresses hidden from the public Internet. NAT modifies network address information in the defined IP range while in transit across a traffic routing device. NAT only provides IP address translation and does not provide a firewall. A branch deployment with NAT by itself will not block traffic from being potentially routed through a NAT device. Consequently, NAT should be deployed with a stateful firewall. |
Select the + Add Row button as needed to append additional rows to the IP Address Range table.
Select OK to save the changes made to the profile's NAT Pool configuration. Select Reset to revert to the last saved configuration.
 Print
this page
Print
this page Email this topic
 Feedback
 View PDF
 Download EPUB