Routing is the process of selecting IP paths to strategically route and segregate network traffic. Set Destination IP and Gateway addresses enabling the assignment of static IP addresses for requesting clients without creating numerous host pools with manual bindings. This eliminates the need for a long configuration file, and reduces the resource space required to maintain address pools.
To create a profile's static routes:
Select Configuration > Profiles > Network.
Expand the Network menu to display its submenu options.
Select Routing.
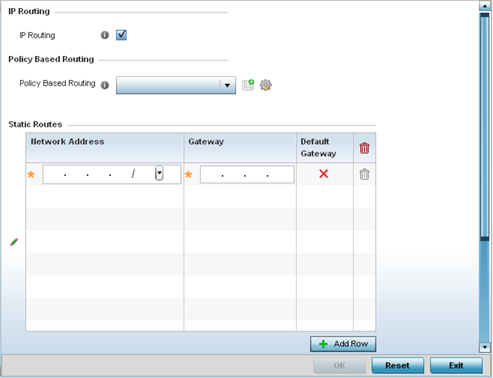
Select IP Routing to enable static routes using IP addresses. This option is enabled by default.
Use the drop-down menu to select a Policy Based Routing policy. If a suitable policy is not available, click the add button to create a new policy.
Select Add Row + as needed to include single rows with in the static IPv4 route table.
Add IP addresses and network masks in the Network column.
Provide the Gateway used to route traffic.
Refer to the Default Route Priority field and set the following parameters:
|
Static Default Route Priority |
Use the spinner control to set the priority value (1 - 8,000) for the default static route. This is the weight (priority) assigned to this static route versus others that have been defined to avoid potential congestion. The default setting is 100. |
|
DHCP Client Default Route Priority |
Use the spinner control to set the priority value (1 - 8,000) for the default client route learnt from the DHCP client. The default setting is 1000. |
|
Enable Routing Failure |
When selected, all default gateways are monitored for activity. The system will failover to a live gateway if the current gateway is unavailable. This feature is enabled by default. |
Select the OK button located at the bottom right of the screen to save the changes. Select Reset to revert to the last saved configuration.
 Print
this page
Print
this page Email this topic
 Feedback
 View PDF
 Download EPUB